Whenever an update is made available for payroll, the QuickBooks Desktop application prompts users to install it, which can only be done with updated payroll account info. In one such scenario, QuickBooks throws an error message that reads, ‘Update Your Payroll Account Info By (DATE).’ However, as soon as you try to update payroll account info, you get error 40003. QuickBooks Error 40003 can also occur while trying to download the most recent QB payroll updates. Let’s figure out why error code 40003 appears in QuickBooks and what needs to be done to resolve it.
Are you troubled by QuickBooks Error 40003 and unable to get rid of it despite several attempts? Consult our pro-advisors right now to get to the root of the issue. Ring 1.855.738.2784 to speak to the crew.
Why Do You Get QuickBooks Payroll Update Error 40003?
Here are some common factors that provoke QuickBooks Error Code 40003. It is possible that there might be several other reasons that are not included here –
- Damaged QuickBooks files or components are the primary reasons behind this error.
- If the firewall settings on the device are not configured properly, the error 40003 may arise.
- Stuck paychecks can be a prominent reason for getting error 40003 in QuickBooks.
- Sometimes, an outdated QuickBooks Desktop application can also trigger error 40003 in QuickBooks Desktop.
How to Fix QuickBooks Desktop Error 40003?
Below, we have listed some of the most effective methods for permanently resolving QuickBooks payroll error 40003. Try one or all the solutions carefully –
Method 1: Disable Antivirus Temporarily
Begin by turning off your antivirus briefly to resolve the error 40003 as follows:
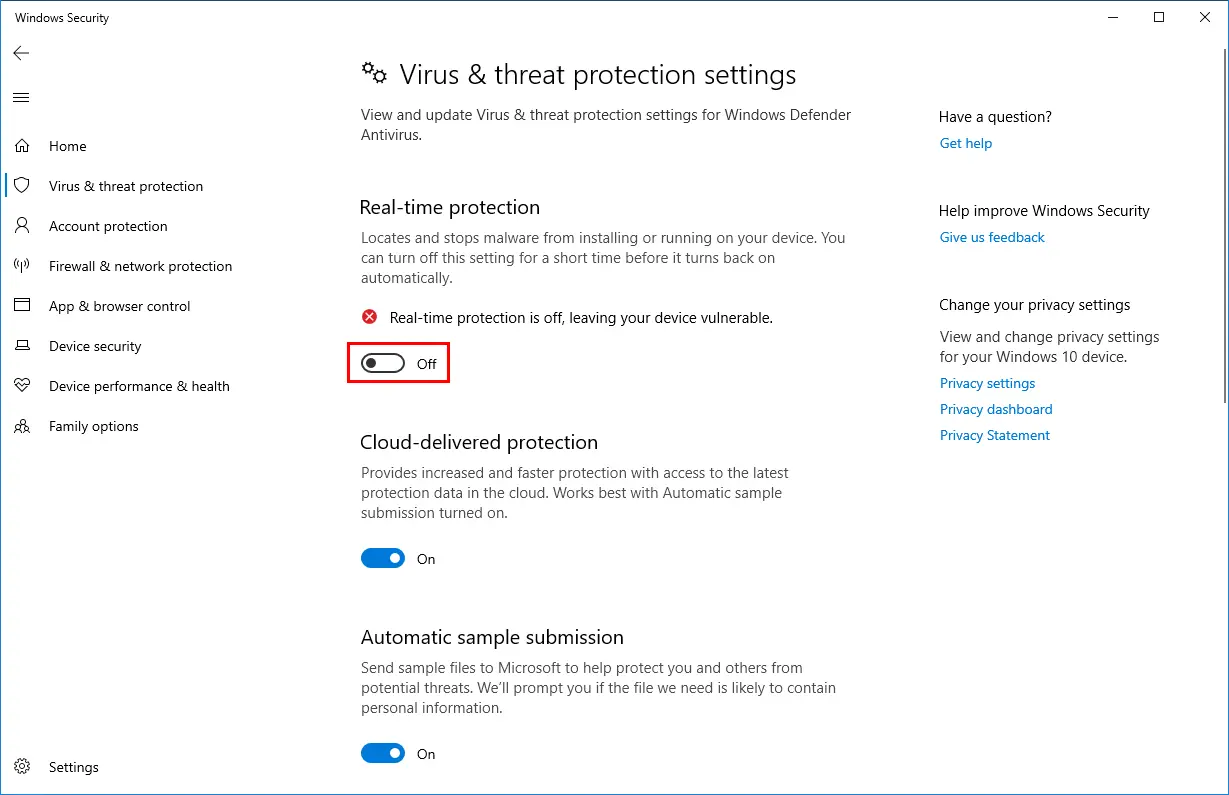
- Access the antivirus icon on the desktop. Alternatively, find it in the Control Panel’s programs list.
- Right-click this program and select ‘Disable’ or ‘Turn Off.’
- Set the duration for which you wish to turn off your antivirus.
- Click OK and enter the admin password if asked.
- Re-enable antivirus protection after your task is done.
Method 2: Ensure your Account Info is Correct
Your account information should be correct and up-to-date in QuickBooks. So, perform the following:
- Reboot your PC and reopen QB.
- Ensure your account information is correct and updated. If not, follow the steps to do so:
- Click Employees.
- Select My Payroll Service.
- Tap Update Account Payroll Info.
- Now, download the newest payroll tax tables as follows:
- Click Employees.
- Select Get Payroll Updates.
- Choose Download Entire Update.
- Then, click Update.
Method 3 – Perform a Manual Update and Backup for QuickBooks Desktop
Sometimes, when you update your application through the automated mode, all the updates are not downloaded completely if the internet loses connection in the middle, leading to the QuickBooks error message 40003. You can execute an update yourself to ensure that this is successful –
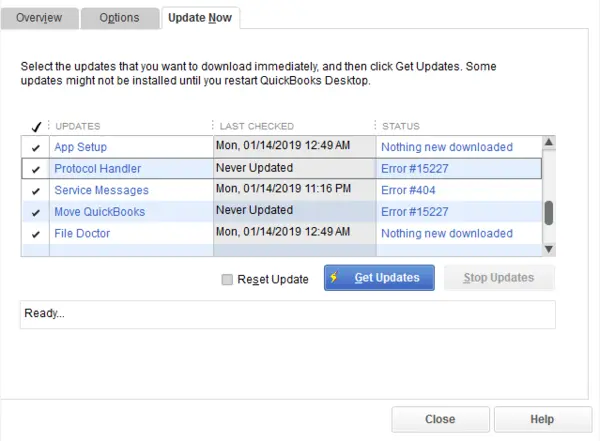
- In QuickBooks Desktop, tap the Help button and choose Update QuickBooks Desktop.
- Click on Update Now, tick the box beside the Reset Update option, and select Get Updates.
- Wait for the program to download the available updates; do not close the window.
- Relaunch QuickBooks Desktop; after this is complete, go to the Help menu again and press Update QuickBooks Desktop.
- Click on Overview and hit the Update Now
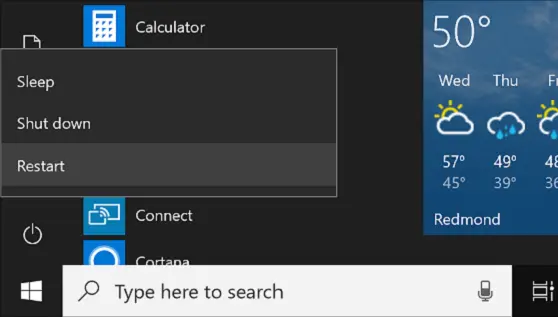
- Allow the installation of the updates and restart your computer device.
- Choose the File menu.
- Select Back Up Company.
- Then, tap Create Local Backup.
- Select Back up now and save them.
Method 4- Try Sending Payroll Data
Sending payroll or usage data after trying the updates and backup can help resolve the QuickBooks error 40003 as follows:
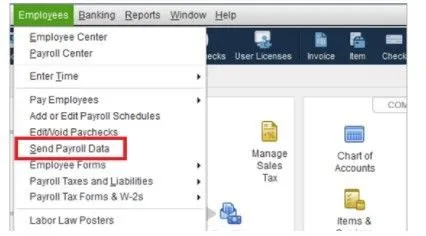
- Navigate to Employees, choose My Payroll Service, and then select Send Usage Data. If this option is not visible, proceed to the next step.
- Go to Employees, then tap Send Payroll Data.
- Choose Send All in the Send/Receive Payroll Data window. Enter your payroll service PIN if prompted.
- If the send is successful, attempt to get payroll updates again. If the error persists, proceed to the next troubleshooting steps.
- If the send is unsuccessful, contact customer support for assistance.
Method 5- Detect Stuck Paychecks
Stuck paychecks may cause QB error 40003. Resolve the problem as follows:
- Go to Edit, then select Find.
- Choose the Advanced
- In the Choose Filter area, select Detail Level from the Filter
- Tap Summary Only.
- Return to the Filter list, scroll down, and select Online Status.
- Choose Online to Send.
- Click on Find to see paychecks that haven’t been sent to Intuit.
- Note the “Number of matches” on the Find window and proceed to the next actions.
Method 6- Try the Verify and Rebuild Data Utility Tool
A damaged QuickBooks component or file may result in error 40003. To fix the bug in the same, you need to execute a repair on the damage by running the Verify Data and Rebuild Data tool. This is how –
- Click on the Windows icon and type QuickBooks Desktop in the search panel.
- Right-click QuickBooks and select Run as Administrator.
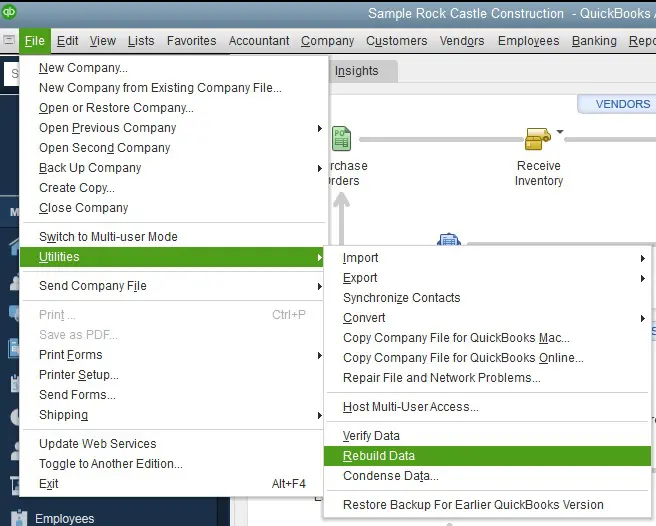
- Now, while on the QuickBooks screen, click on the File
- Choose Utilities from the drop-down menu and then select Verify Data.
- Allow the tool to run and diagnose the issues with your data file. This may take up to a few minutes.
- The tool will display some messages after your file has been checked –
- “QuickBooks detected no problem with your data” means there is no issue.
- A particular error message will ask you to follow the steps mentioned in the text.
- “Your data has lost integrity” means you must repair your file.
- Tap on the File tab again and go to Utilities.
- Choose the Rebuild Data option and proceed to create a backup of your QuickBooks company data file.
- Follow the instruction prompts to complete the process.
- After this, you must rerun the Verify Data tool to confirm that the issue has been resolved.
- Reboot your computer and download the payroll updates once again.
Method 7- Toggle the Paychecks Found in Method 5
If stuck paychecks are found in Method 5, resolve them as follows:
- Open the oldest stuck paycheck.
- Select the Paycheck Detail
- In the Review Paycheck window, under Earnings, add the same earnings item as the last one in the list.
- Example: If the last item is Hourly Rate, add another earnings item named Hourly Rate.
- A Net Pay Locked message will appear. Choose No.
- Ensure no changes to the tax amounts and net pay. Select OK.
- If you receive a Past Transaction message, choose Yes.
- Select Save & Close to close the paycheck.
- Choose Yes to the Recording Transaction warning message.
- Open the paycheck again. Select the Paycheck Details
- Delete the added earnings items in the Earnings section.
- Confirm there are no changes to the tax amounts and net pay. Select OK.
- Repeat these steps for each stuck paycheck found above.
- Once finished, repeat the steps and download the tax table update again.
Method 8- Make Changes in the Windows Firewall Settings
The firewall tends to block the activities of the programs installed on the system in order to protect the system’s data. If QuickBooks is in the block list of the firewall, you must create an exception for it by applying the steps below –
- Tap on the Windows icon and open the Start
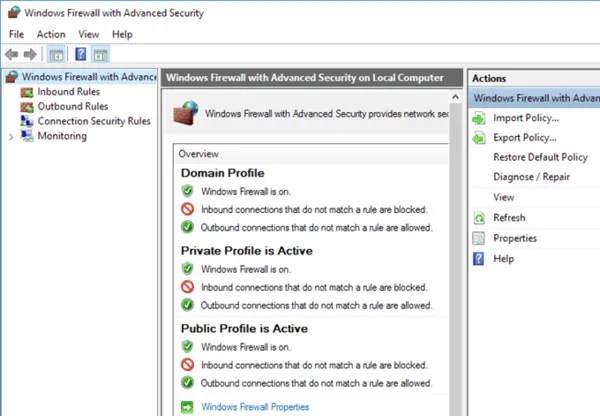
- Type Windows Firewall and select the option to open a new window.
- Click on Advanced Settings, go to Inbound Rules, right-click on it, and select the New Rule
- Choose Program and tap on Next. Now, choose This Program Path and click on Next.
- Locate and select one executable file for QuickBooks from the given list of files. You will have to repeat the procedure for all the listed QuickBooks files.
- Press Next and tap on Allow the Connection Hit Next again.
- Select all the profiles in the following section and choose Next.
- Finally, create and name this rule “QBFirewallException(name.exe).”
- Follow similar steps to create Outbound Rules for all the .exe files in QB.
- Open QuickBooks Desktop, click the File menu and select Switch to Multi-user Mode.
Method 9- Reinstate your Payroll Service Key
Refresh your payroll subscription through the following steps and fix the QuickBooks error 40003:
- Navigate to the QuickBooks Home Page
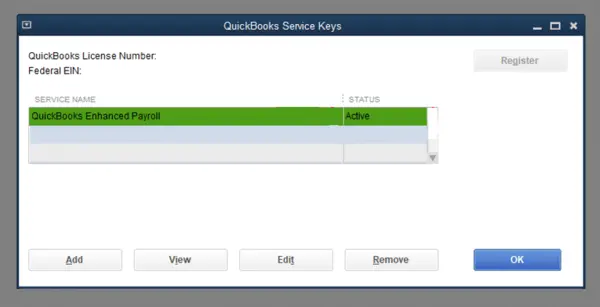
- Press CTRL+K on your keyboard.
- If you see your payroll service keys with an Inactive status, note the payroll service key numbers.
- Click Edit, then remove and re-enter the service numbers in the designated box.
- Select Next until you reach the finish.
- Once completed, click OK.
Conclusion
This blog was a decent attempt to explain explicit facts and solutions about QuickBooks Error 40003. There might be situations where the error might become recurrent after performing all the possible troubleshooting. In those cases, we recommend you contact our tech experts and find a permanent solution to the problem. Call 1.855.738.2784 immediately.
FAQs
Does QuickBooks error 40003 come alone?
The QuickBooks error 40003 may accompany other errors like QuickBooks error code PS038, difficulties reactivating payroll, or updating payroll account information. You may also see error 40005 while troubleshooting the problem.
Why do I find an error when updating the payroll service?
The reasons behind errors in updating your payroll service include the following:
1. Network timeouts not letting QB Desktop from accessing the server
2. Invalid security certificate
3. Sending payroll data in multi-user mode.
4. Restricted firewall and internet security settings
5. Inaccurate system date and time
6. General internet connection problems
How do I reactivate my payroll service?
In your QuickBooks Desktop company file, follow these steps:
1. Hit Employees and select My Payroll Service.
2. Click on Account/Billing Info.
3. Sign in using your Intuit Account login. This will open your QuickBooks Account page.
4. Under Status, tap Resubscribe.
5. Follow the on-screen steps to reactivate your payroll service.
Alternatively, you can perform these actions in your web browser:
1. Sign in to your account using your Intuit credentials as usual.
2. Under Status, hit Resubscribe.
3. Follow the on-screen steps to reactivate your payroll service.
How do I get a PIN in QB?
To set up a PIN in QuickBooks, follow these steps:
1. Set up Direct Deposit: Configure your direct deposit settings in QuickBooks.
2. Connect and Verify Bank: Link your bank account and ensure that it is active and your account information is accurate.
3. Create a PIN: QuickBooks will prompt you to generate a Personal Identification Number (PIN). Each time you use the direct deposit feature to send your payroll, this PIN is required.
Ensure you follow QuickBooks’s specific prompts and instructions for each step to set up and use the direct deposit feature successfully.

Edward Martin
Edward Martin is a Technical Content Writer for our leading Accounting firm. He has over 10 years of experience in QuickBooks and Xero. He has also worked with Sage, FreshBooks, and many other software platforms. Edward’s passion for clarity, accuracy, and innovation is evident in his writing. He is well versed in how to simplify complex technical concepts and turn them into easy-to-understand content for our readers.

