Last Updated on April 16, 2026
The QuickBooks error 1327 is an issue that users often face while installing the QB Desktop application through a physical disk or a downloaded installation file. This can appear with an error message stating “Error 1327: Invalid drive X (X represents your CD drive letter)” or “Error 1327: The Windows Installer cannot write to the specified drive.”. This can hamper your workflow and important business processes. It usually occurs due to problems with the Microsoft .NET Framework or incorrectly configured system settings. You can resolve it by clean installing the QB Desktop app. In this blog, we’ll cover the in-depth troubleshooting methods to fix the QuickBooks error 1327 invalid drive. Let us first see the causes of the 1327 error.
Are you having issues installing your QuickBooks Desktop Application? Contact our Accounting Helpline’s experts at 1.855.738.2784 today to fix your problem in no time!
Potential Causes of the Error 1327 QuickBooks Desktop
Given below are the potential factors that can trigger the QuickBooks Desktop error code 1327:
- The drive letter is either unavailable or doesn’t exist.
- Your system settings aren’t configured correctly.
- Problems with your Windows registry.
- A damaged Microsoft .NET Framework.
- Problems with your user profiles in Windows can also cause this.
- Removal of the device you’re installing QuickBooks from (like a USB drive) can cause this error.
Now that we know about its causes, let’s proceed to the troubleshooting methods to fix it.
A Stepwise Take on Troubleshooting the QuickBooks Error Code 1327
Given below are the troubleshooting methods you can use to fix the 1327 error in QuickBooks Desktop:
Remove the Drive Letter and Associate it With a Temporary Location Using the Command Prompt
If you are facing the QuickBooks error 1327, you can remove the drive letter and associate it with a temporary location from the command prompt with the following steps:
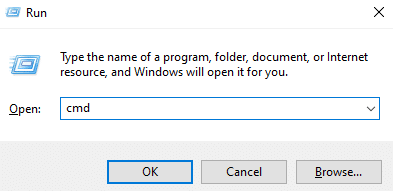
- Open the Run menu by pressing Windows + R.
- Type cmd in the Run menu.

- Press Ctrl + Shift + Enter to open the command prompt as administrator.
- In the command prompt, type in subst/P and hit Enter:
- P represents the drive letter you were trying to install QB on.
- Exit the command prompt.
- Try to install QBDT again. If you still face the same error, move to the next step.
- Open the Run menu again.
- Type cmd and hit Ctrl + Shift + Enter.
- Now, type subst [Drive Letter]: C:\temp in the command prompt and press Enter:
![subst [Drive Letter]](data:image/svg+xml;base64,PHN2ZyB4bWxucz0iaHR0cDovL3d3dy53My5vcmcvMjAwMC9zdmciIHdpZHRoPSI0NTAiIGhlaWdodD0iMTYyIiB2aWV3Qm94PSIwIDAgNDUwIDE2MiI+PHJlY3Qgd2lkdGg9IjEwMCUiIGhlaWdodD0iMTAwJSIgc3R5bGU9ImZpbGw6I2NmZDRkYjtmaWxsLW9wYWNpdHk6IDAuMTsiLz48L3N2Zz4=)
- Replace [Drive Letter] with your actual drive letter.
- Close the command prompt.
- Install the QBDT app.
![subst [Drive Letter]](https://blog.accountinghelpline.com/wp-content/uploads/2022/10/subst-Drive-Letter.png)
This would fix the QuickBooks error 1327.
Use the QuickBooks Install Diagnostic Tool
You can use the QuickBooks Install Diagnostic Tool from the QB Tool Hub to fix error 1327 in QBDT with the following steps:
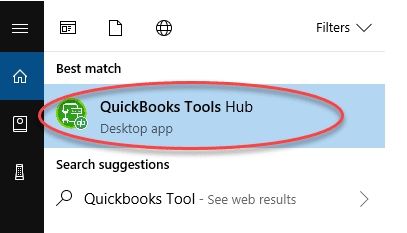
- Download and install the QuickBooks Tool Hub.

- Open the Tool Hub app.
- Navigate to the Installation Issues tab.
- Click on the QuickBooks Install Diagnostic Tool.

- Let the tool run.
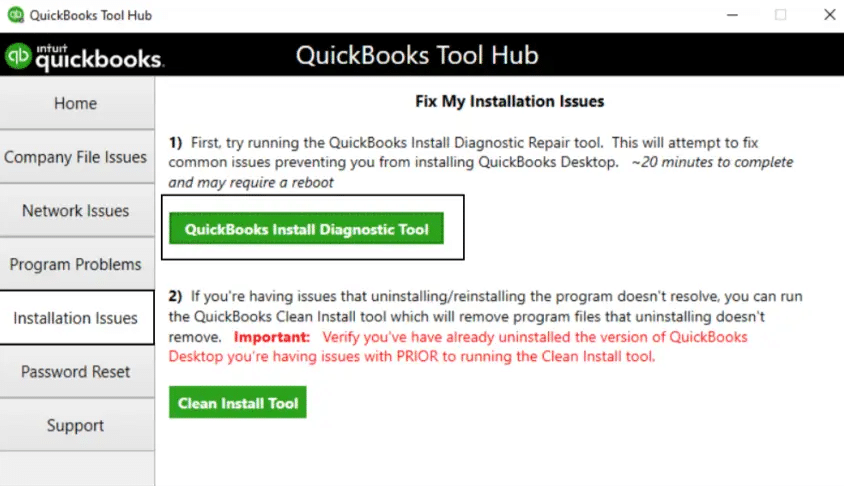
This would get rid of the QuickBooks installation error 1327.
Edit the Windows Folder Permissions
You can edit the Windows folder permissions to fix the QuickBooks error 1327 with the following steps:
- Press Windows + R to open the Run menu.
- Now, type in the file path containing the QuickBooks Program Files:
- For 32-bit versions:
- QB Desktop Enterprise 20.0: C:\Program Files\Intuit\Enterprise Solutions 20.0
- QB Desktop Enterprise 19.0: C:\Program Files\Intuit\Enterprise Solutions 19.0
- QB Desktop Enterprise 18.0: C:\Program Files\Intuit\Enterprise Solutions 18.0
- QB Desktop Pro and Premier 2020: C:\Program Files\Intuit\QuickBooks 2020
- QB Desktop Pro and Premier 2019: C:\Program Files\Intuit\QuickBooks 2019
- QB Desktop Pro and Premier 2018: C:\Program Files\Intuit\QuickBooks 2018
- For 64-bit versions:
- QB Desktop Enterprise 20.0: C:\Program Files (x86)\Intuit\Enterprise Solutions 20.0
- QB Desktop Enterprise 19.0: C:\Program Files (x86)\Intuit\Enterprise Solutions 10.0
- QB Desktop Enterprise 18.0: C:\Program Files (x86)\Intuit\Enterprise Solutions 18.0
- QB Desktop Pro and Premier 2020: C:\Program Files (x86)\Intuit\QuickBooks 2020
- QB Desktop Pro and Premier 2019: C:\Program Files (x86)\Intuit\QuickBooks 2019
- QB Desktop Pro and Premier 2018: C:\Program Files (x86)\Intuit\QuickBooks 2018
- For 32-bit versions:
- Now, select View > Customize this folder.
- The properties window would open.
- Navigate to the Security tab.
- Click on Administrators.
- Press the Allow checkbox located next to Full Control.
- Now, in the Security tab, choose the SYSTEM user.
- Click on Allow, which is next to Full Control.
- Hit OK.
Now, you will be able to install the QBDT app with no issues.
Use the Compatibility Troubleshooter
You can run the QB installer in compatibility mode to fix QuickBooks error 1327 with the following steps:
- Right-click on the QuickBooks installer.
- Click on Properties.
- Go to the Compatibility tab.
- Press Run compatibility troubleshooter.

- Now, select Try recommended settings.

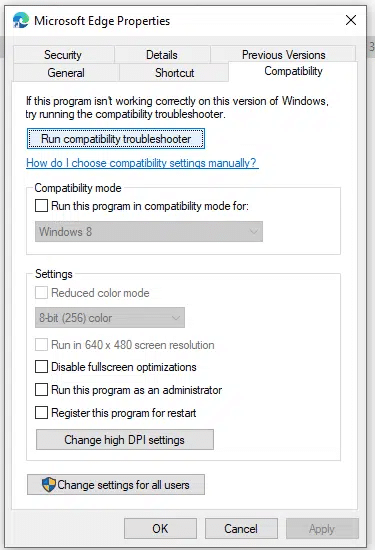
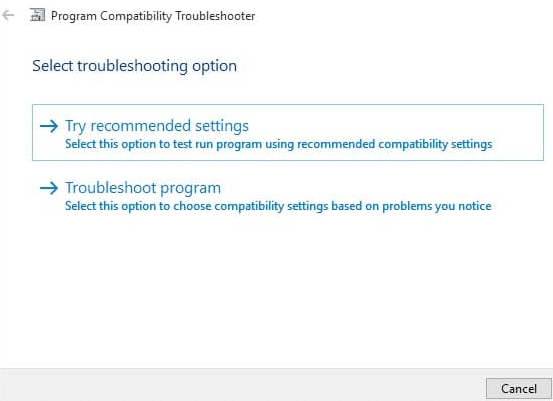
Follow the on-screen instructions to troubleshoot the program. Finally, restart the computer and try installing the software again.
Performing these steps would troubleshoot the QuickBooks installation error 1327.
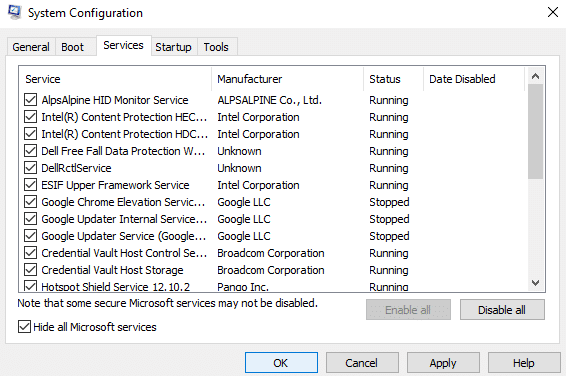
Install QuickBooks in Selective Startup Mode
You can install QB in selective startup mode to fix the error 1327 in QBDT with the following steps:
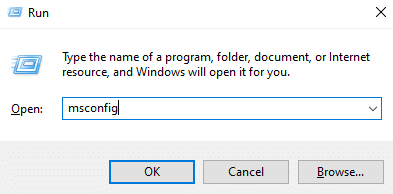
- Open the Run menu:
- Hit Windows + R on your keyboard.
- Type msconfig.

- Select OK.
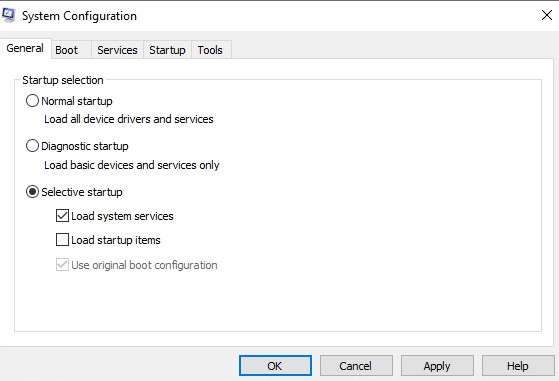
- Navigate to the General tab.
- Press Selective Startup.
- Select Load System Services.

- Go to the Services tab.
- Click on Hide all Microsoft Services.
- Select Disable All.
- Then, unmark Hide all Microsoft Services.

- Choose Windows Installer from the list of services.
- Hit OK.
- Press Restart on the System Configuration window.
- Install the QuickBooks Desktop app.
- Open the Run menu again and type in msconfig.
- Press Enter.
- Navigate to the General tab.
- Choose the Normal startup option.
- Select OK.
- Now, restart your PC.
The QuickBooks error 1327 would now be fixed.
Fix the Microsoft .NET Framework
You can manually fix the Microsoft .NET Framework to fix the QuickBooks error code 1327 with the following steps:
- Close all the open programs.
- Open the Start menu.
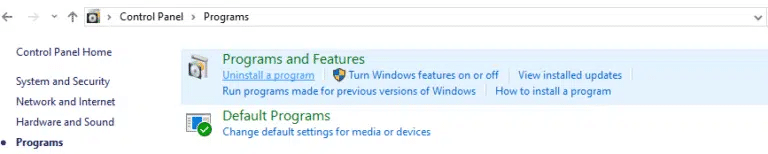
- Search for and open the Control Panel.
- Click on Programs and Features, followed by Uninstall a Program:

- No need to worry, you won’t be uninstalling anything.
- Choose the Turn Windows features on or off option.
- Find .NET Framework from the list.

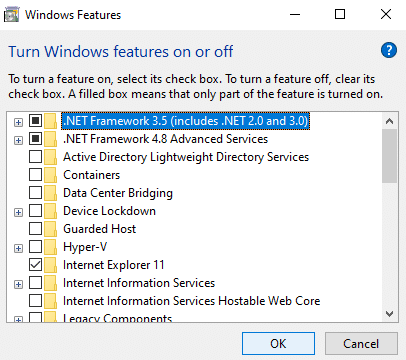
Now, you would have to follow the steps according to your .NET Framework version:
.NET Framework 4.5 or Later
If the .NET Framework isn’t turned on:
- Mark the checkbox to turn on .NET Framework.
- Hit OK.
- Restart your system.
If the .NET Framework is turned on:
- Mark the checkbox to turn off .NET Framework.
- Don’t turn it on.
- Press OK.
- Restart your PC.
- Follow the steps above to turn it back on again.
.NET Framework 3.5 SP1
If the .NET Framework isn’t turned on:
- Turn on the .NET Framework by marking the checkbox.
- Select OK.
- Restart your computer.
If the .NET Framework is turned on:
- Turn off the .NET Framework by marking its box.
- Do not turn it on yet.
- Press OK.
- Restart your PC.
- Follow the steps mentioned above to turn on the .NET Framework.
This would resolve the QuickBooks error 1327.
Register the MSXML DLL Files
You can register the MSXML DLL files to fix the QB Desktop installation issue with the given steps:
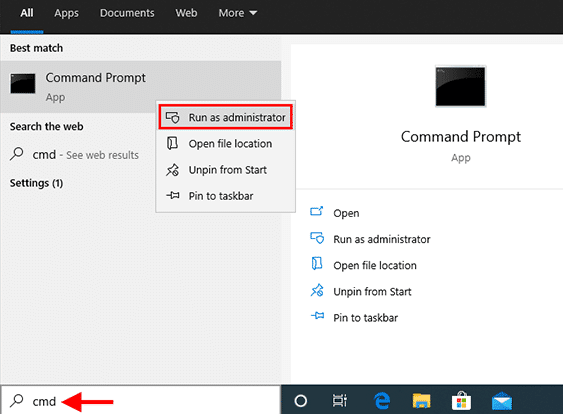
- For 64-bit operating systems:
- Open the Start menu.
- Type in cmd.
- Right-click on the Command Prompt.
- Press Run as Administrator.

- Now, type in cd\windows\syswow64 and press Enter.
- Then, type regsvr32 MSXML6.dll.
- Press Enter.
- For 32-bit operating systems:
- Open the Run menu by hitting Windows + R
- Type in cmd and hit Enter
- Now, type regsvr32 MSXML6.dll

- Press Enter
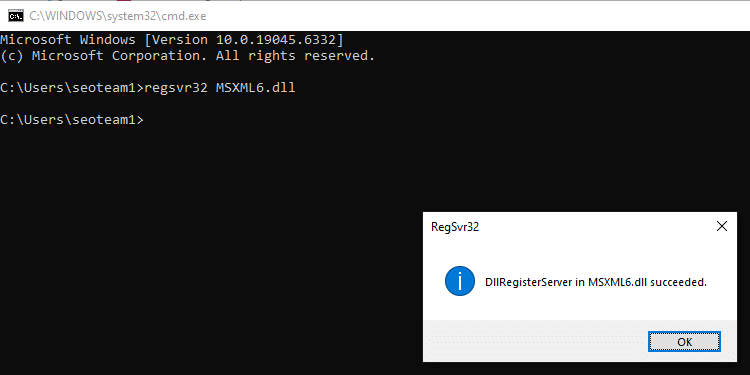
After performing these steps, you would be able to install QB Desktop without any issues.
QuickBooks Error 1327 – A Quick View Table
Given in the table below is a concise summary of this blog on the topic of the QuickBooks error code 1327:
| Description | The QuickBooks error code 1327 is an installation error that can prevent you from installing the QBDT software and its updates. This can hamper your workflow and important business processes. |
| Its causes | A corrupted QB installation file, a non-existent drive letter, problems with the Windows registry, problems with the Windows OS, the Firewall blocking QBDT, and damaged Microsoft .NET Framework. |
| Ways to fix it | Removing the drive letter, using the QuickBooks Install Diagnostic Tool, editing the Windows folder permissions, using the compatibility troubleshooter, installing QB Desktop in selective startup, fixing .NET Framework, and registering the MSXML DLL files. |
Conclusion
In this blog, we discussed the QuickBooks error 1327 and the various reasons why it appears on your workstation’s screen. Additionally, we provided you with in-depth, step-by-step troubleshooting methods that you can use to fix this problem on your own.
If you are still at bay with the error, contact our Accounting Helpline’s experts at 1.855.738.2784 today, who can help resolve this error in no time!
FAQs
How to install QuickBooks without a CD drive?
You can install QuickBooks without a CD drive by downloading the QB installation file from Intuit’s official website, running it, and following the guide you see on your screen.
Why am I seeing the QuickBooks error 1327 on my screen?
You can see the QuickBooks error code 1327 due to these reasons:
– The QuickBooks installation file is either corrupted or damaged
– The drive letter is either unavailable or nonexistent
– Issues with the Windows registry
– Problems with the Windows operating system
– Firewall blocking the QB Desktop app
– Damaged Microsoft .NET Framework
How can I fix the QuickBooks error code 1327?
You can fix the QB error code 1327 with these troubleshooting methods:
– Removing the Drive letter and associating it with a temporary location
– Using the QB Install Diagnostic Tool
– Editing the Windows Folder Permissions
– Using the compatibility troubleshooter
– Installing QB Desktop in selective startup mode
– Fixing the .NET Framework
– Registering the MSXML DLL files
Related Posts-
QuickBooks Connection Has Been Lost: Restoration Tips and Tricks
Resolution Guide to Resolve the QuickBooks Data Missing After Update Issue
QuickBooks Error 1317: How to Fix the Installation Issue
How to Install QuickBooks Database Server Manager Like a Pro
QuickBooks Error 1904: Reasons and Troubleshooting Steps
Expert-Approved Resolution Guide to QuickBooks Unrecoverable Error Codes

Edward Martin is a Technical Content Writer for our leading Accounting firm. He has over 10 years of experience in QuickBooks and Xero. He has also worked with Sage, FreshBooks, and many other software platforms. Edward’s passion for clarity, accuracy, and innovation is evident in his writing. He is well versed in how to simplify complex technical concepts and turn them into easy-to-understand content for our readers.