
Last Updated on April 16, 2026
If you want to use the multi-user functionality of Quickbooks, you will have to provide some administrator rights to the user account on Windows. With this article, by this blog, you will learn how to assign QuickBooks Desktop Database User the required administrative rights on Windows 10, 8, 8.1, 7, Server 2011, Server 2012, and 2008 R2. add a User with Administrator Rights on Windows allows you to use the multi-user mode of QuickBooks. It may solve some of the common errors that occur due to the local user account without having administrator rights.
From this blog post, you will be able to learn how to create a Windows user account that has administrator rights and how to extend these rights to a user of QuickBooks Desktop and Online.
You’ll learn how to create a Windows admin user account in this article and how to provide Windows admin access to QuickBooks Desktop database users and QuickBooks Online users. However, if you don’t want to create the admin user yourself or simply need help with that, please contact our Accounting Helpline’s support team. Call our specialists right now at 1.855.738.2784 to receive help in creating an admin user account.
Why Do You Require Windows Admin Privileges?
An administrator may perform changes and modifications on a PC belonging to a network that could affect other users. Different necessary actions require that your PC has admin permission, which includes the following –
- Installing or implementing a software program.
- The processes of hardware installation and the regulation of the system’s utilization of hardware resources.
- Changing the security parameters of the computer.
- Performing different types of system and software updates on the PC.
- Having access to all the files stored on the computer.
- Modifications that are made to other user accounts on the Windows OS.
Also, you have to enable a Windows admin account for QuickBooks to perform certain essential operations, such as making changes in settings or features, updating it, using crucial QuickBooks services, and more.
Learn to Create or Add a User with Administrator Rights on Windows
You can create or add a User with Administrator Rights on Windows, depending on your Windows OS version, by following the steps below –
Windows 10 & 11
For you who are on Windows 10 or 11, here’s how to create a new account with admin privileges –
- Click Start and select Settings.
- Click Accounts and then choose Family and Other Users.
- In the other users tab, click on Add someone else.
- Sign in to the Microsoft account and click on Add user without a Microsoft account.
- Enter the name and create a new password.
- Click finish and select the new account
- Click on account type and select administrator.
- Exit the control panel after clicking OK.
- Restart your PC and sign in to the new account with administrator rights.
Windows 7 & Windows 8
The steps below are followed in making a new user in Windows 7 & 8 OS with admin rights –
- To open the Run window, press Win Key + R.
- Write Control Panel and hit Enter.
- On user accounts, click on Manage Other Accounts and add a new account.
- Enter the name and choose administrator.
- Click Create and restart the PC.
Windows 8.1
The following are the steps on how you can create a new admin user account if you are using Windows 8.1 version –
- Press the Win key+R, type Control Panel, and hit Enter.
- On user accounts, click on Manage Other Accounts and add a new account.
- Click Add an Account and Sign in without a Microsoft account (not recommended).
- Enter additional account information in the local account, such as the password, username, and password hint.
- Click the new account and select Edit to assign Administrator rights to this account.
- Click on account type and select administrator.
- Exit the control panel after clicking OK.
- Restart your PC and sign in to the new account with administrator rights.
NOTE: You can also access the Control Panel by typing Control Panel in the Search Programs and Files search box, which appears after you hit the Windows key on your keyboard.
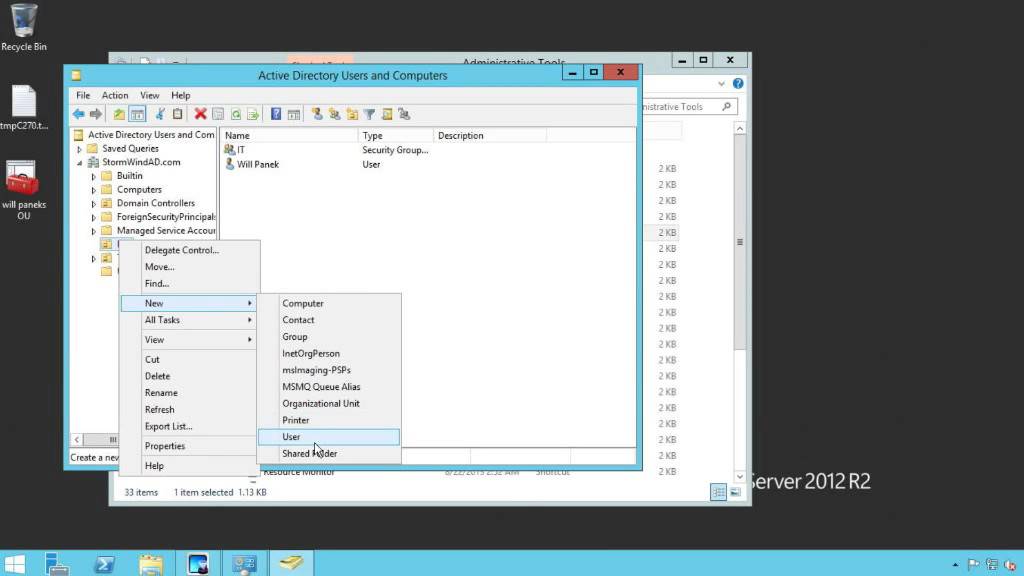
Windows Server 2012
In the Windows Server 2012 version, you can create a new admin user account through the pointers highlighted below –
- Press the Win key and R together.
- Type ServerManager in the search box of the Run window and press Enter on the keyboard.
- Click Tools, select Computer Management, then choose Local Users and Groups.
- After clicking on groups, double-click on Administrator Group
- Click Add in the Administrator Properties Window.
- Type the name and click OK.
Windows Server 2008 R2 and 2011
The following are steps to input a new user account with all the rights to be an administrator in the Windows Server 2008 R2 and 2011 versions –
- Click Start and choose All Programs.
- Select Windows Small Business Server and click Windows SBS Console.
- Under Users and Groups, select Add a new user account.
- Write your information to create a new account and follow all the instructions given on the screen.
- Choose administrator rights for the account.
- Click Finish.
Steps to Perform If You Are Unable to Create a New User or Change the Admin Status in Windows
If the above section did not allow you to create a new admin account or change the user account status, try the following to address the problems –
Step 1 – Enabling the Built-In Administrator Account
To enable the built-in Windows administrator account, you have to do the following:
- To get to the command prompt, first press Windows + x and then click on the Command Prompt (admin).
- To turn on the default admin account, just type “net user administrator /active: yes,” and to turn it off, you need to type “net user administrator /active: “no” at the end of the troubleshooting process whenever you are done.
Step 2 – Log in to the Built-In Admin Account
Go to the built-in administrator after booting up the computer, then sign in as the administrator and add a new user account with Administrator privileges (as detailed above). You can try the steps we’ve outlined once more and use the Microsoft Accounts Troubleshooter tool, which is designed to find problems and fix them itself.
Steps to Assign Administrator Rights to QuickBooks Desktop Database System User
Once you successfully create your account with administrator rights, you will have to give the same rights to the QuickBooks Desktop DB System user to fulfill the requirements for setting up multi-user mode in QuickBooks.

Steps to Perform on Windows 8, 8.1, 10, or Server 2012
To provide admin rights to QBDataServiceUser in Windows 8, 8.1, 10, or Server 2012 versions, follow the steps below –
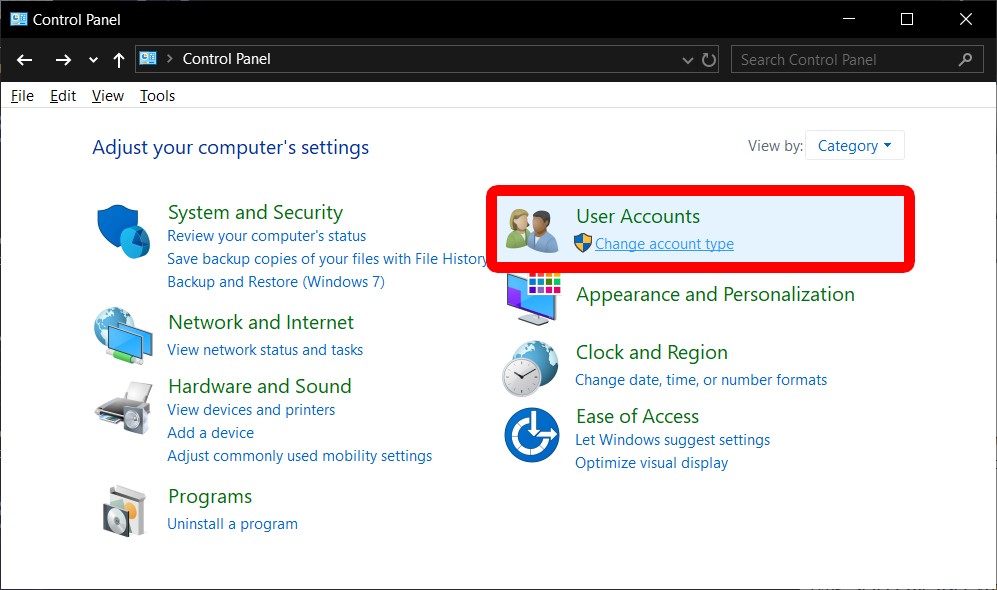
- Press the Win key + R, type Control Panel, and hit Enter.
- Select User Accounts and click Manage another account.
- Double-click QBDataServiceUser (the version of your QuickBooks) and select Change the account type.
- Select Administrator and click Change Account Type.
Steps to Perform on Windows 7
If you are a Windows 7 OS user, you can assign admin rights to the QBDataServiceUser by going through the following steps –
- Press the Win key+R, type Control Panel, and hit Enter.
- On user accounts, click on Manage Other Accounts and add a new account.
- Select User Accounts and Family Safety, click User Accounts, and then select Manage another account.
- Double-click QB Data Service (your QuickBooks version) and click Change Account type.
- Click Administrator and select Change Account Type.
NOTE: After creating or adding a new account with administrator rights on the Windows Server, you must restart the server to sign in with the newly created account.
How to Assign Admin Rights to a User in QuickBooks Online
If you want to assign Administrator rights to QuickBooks Users, you can follow these steps:
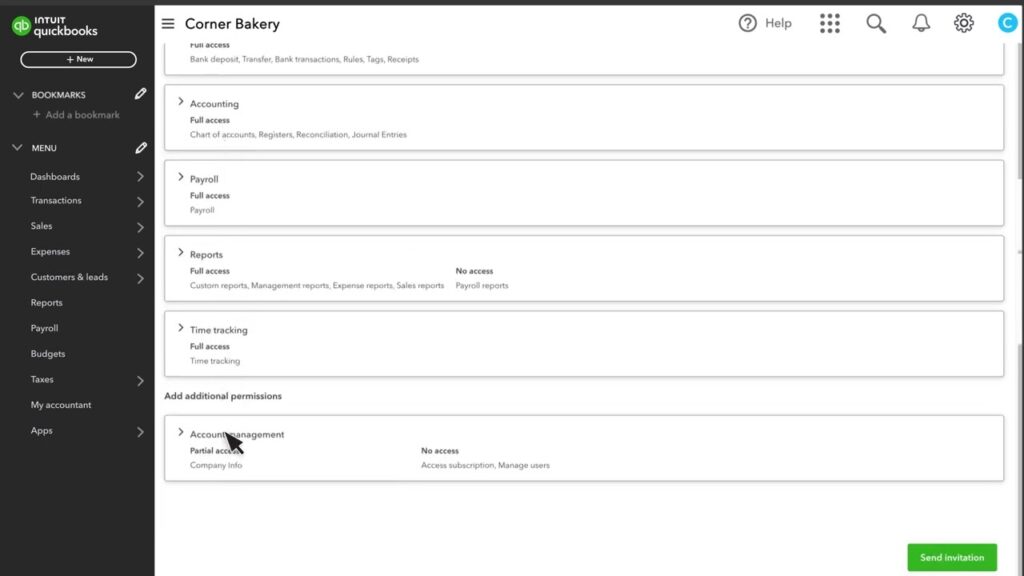
- Select the Gear icon from the top and click Manage Users.
- In Action, click Edit.
- Select Admin from the User Type drop-down list.
- Click Save.
If you want to assign administrator rights to an already created local user account, you can do this by selecting the local account under the Accounts window, choosing Change account type, selecting Administrator for this account, and hitting OK.
Conclusion
This detailed guide will help you create or add a User with Administrator Rights on Windows. If the steps don’t help, you can try using the built-in admin account as mentioned above. Nevertheless, if you still encounter problems regarding the creation of the admin user, you may require assistance from expert parties. If you have any questions while working through the problem and setting up the admin account, you may call our Accounting Helpline’s Support team at 1.855.738.2784.
FAQs
How can I start an application as an admin user in Windows?
Click to start an application with an admin account in Windows in the following manner:
– While holding the Shift key on your keyboard, right-click on the Executable File or the Shortcut for the application and select ‘Run as different user.’
– Now, type the admin username and password and click OK on the Windows Security dialog.
What is the concept of having a built-in administrator account in Windows?
The Windows OS contains the default account, the built-in administrator one, which is automatically generated at the moment of the os installation. The admin, therefore, has the most control over all the profiles that can be created within a computer system.
How can one be sure that the user account in context relates to the administrator?
To ascertain whether the current user account being used has administrative rights, the following steps should be followed:
– Select the Windows Start button and then go to Control Panel, from where we select User Accounts and Family Safety.
– This is followed by clicking on User accounts and then selecting Manage User Accounts; this opens the User Accounts window.
– Move to the Properties tab, then select the Group Membership tab, and see that Administrator has been selected. If yes, then you already have privileged admin; otherwise, you will choose option ‘Administrator’ to operate as the admin user.
How can I log in if my administrator account has been disabled?
The following steps will help you enable the admin account in Windows 10:
– From the Local Computer Configuration window, select Windows Settings and move to the Security Settings menu.
– Click Local Policies, then double-click on the Security Options, and select Accounts.
– Lastly, under Admin Account Status, select Properties and set it to Enabled.
How to make a user an admin in Windows 10?
To make a user an admin in Windows 10 or 11, open Settings and then open the Account section. Now, proceed to the Family & Other Users section and choose the user you want to make an admin. Select the Change account type option, and from the list of items you see, choose Administrator. The user account will be an administrator now and will have full rights to make changes to your computer.

Edward Martin is a Technical Content Writer for our leading Accounting firm. He has over 10 years of experience in QuickBooks and Xero. He has also worked with Sage, FreshBooks, and many other software platforms. Edward’s passion for clarity, accuracy, and innovation is evident in his writing. He is well versed in how to simplify complex technical concepts and turn them into easy-to-understand content for our readers.