Last Updated on April 17, 2026
The Intuit Printer Library Error makes it challenging for users to print an invoice because of font or orientation issues. If you can’t proceed with your work due to this error, this comprehensive blog explains everything you need to know about the error.
QuickBooks software has been used and eventually loved by millions of business users worldwide. Not only are its features crisp and user-friendly but, it helps save a lot of time, which tops the list for businesses as that time is invested in core areas. QuickBooks allows the printing of invoices, forms, and other documents within the software. This saves a lot of time, but when Intuit Printer Library Error appears, it ruins the user experience. There are various categories for the error, and in this blog, we have described them for you. Eventually, we have given you the general reasons and solutions to get rid of it and get back on track.
Is the Intuit Printer Library Error interrupting your productivity? Are you unable to continue because the invoices aren’t getting printed? Let Accounting Helpline experts take over the issue and implement their specialization to cure the error. Ring them at 1.855.738.2784 for complete assistance
What is Intuit Printer Library Error?
In the Intuit printer library could not print to printer error, users may be unable to print the invoices because they do not have the required font or orientation installed on the computer to undertake the process. Users face this challenge usually when they try to save their invoice, form, or purchase order as a PDF and print or send it to their customers.
Users complain that they can preview and even print the invoice due to the error. However, they may be unable to send it to the customer directly or save the file as PDF in the system. Apart from the font settings, users may face QuickBooks not printing errors because of misconfigured printing settings. Regardless of the reason, it can cause significant chaos in the company. Therefore, users need to understand and resolve the trouble as quickly as possible.
Recommended To Read : How To Fix QuickBooks Desktop Installation Errors
QuickBooks Error: The Form you are about to print does not fit on the page
An overview into the “QuickBooks report can’t fit on printer page” problem
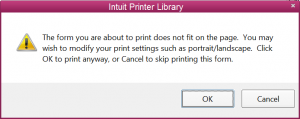
Intuit Printer Library Message: The form you are about to print does not fit on the page. You may wish to modify your print settings, such as portrait/landscape. Click OK to print anyway, or Cancel to skip printing this form.
QuickBooks report can’t fit on printer page issue has been reported by users once they upgraded their QuickBooks Enterprise. The computers connected on a network report facing the above error while saving estimate reports as a PDF or e-mailing the reports. The QuickBooks Error “The Form you are about to print does not fit on the page.” could root from the following reasons.
- The paper size or orientation in the printer’s settings does not coincide with that of QuickBooks Printer Setup.
- The settings of QuickBooks Printer Setup for the PDF print could also generate Intuit Printer Library Error.
- The template might be sized incorrectly.
Guide to Fix “The form you are about to print does not fit on the page” error
When you encounter the Intuit printer library the form you are about to print error, you should attempt the following resolution methods:
Method 1: Ensure that orientation in your printer’s settings matches with QuickBooks Printer Setup
- Open QuickBooks and click on File.
- Select Printer Setup from the File menu.
- Click on the form to be printed from the list.
- From the Printer Setup window, click Options.
- In the window showing Paper and Paper attributes, ensure that printer is set to print on letter size paper and portrait orientation.
- Hit on OK.
- Finally, from the same Printer Setup window, there is an option of Printer Type. Select the option that equals to your printer from the drop-down arrow. Click OK and check the error status.
Method 2: Correct the Paper Size of the template for the forms
- Take a note of the template that you are using for the current transaction.
- Navigate to Lists and select Templates from the menu.
- Basic Customization Window is displayed when you double-click on the template.
- Select the Additional Customization button and click the Print tab.
- The layout is modified from the Layout Designer button.
To check the paper size, see that “Use specified printer settings below for this (form name)” is checked else modify the template layout.
If the “Use (form name) Printer settings from Printer Setup” is marked, click on “Use specified printer settings below for this (form name)”
- Check the printer settings thereafter.
An insight into “QuickBooks could not print to printer” issue
Another Intuit Printer Library Error states you can’t print from QuickBooks. Here are the description, causes, and troubleshooting methods for the error:
Description of Could not print to printer Error
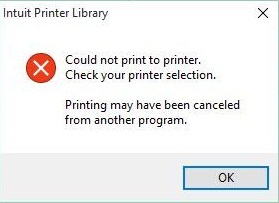
The error has been registered when the user upgrades to the latest versions of QuickBooks and attempts to send the invoices. The error prompts the following message to appear:
Could not print to the printer. Check your printer selection. Printing may have been canceled from another program.
The following could be the reasons for experiencing Intuit Printer Library Error.
- The installation of the PDF driver is corrupted.
- The R4 and R5 update by Intuit introduced an incorrect PDF Driver from Amyuni.
- The Qbprint.qbp file is damaged.
Steps to resolve QuickBooks could not print to printer error
Here’s what you can do when you face the QuickBooks could not print to printer problem:
Step 1: Resolve the QuickBooks could not print to printer error with QuickBooks PDF and Print Repair Tool
The QuickBooks Print and PDF Repair Tool from the Tool Hub helps resolve numerous PDF and Printing issues in QB. You can use it easily and fix your problem seamlessly.
- Download the QuickBooks Tools Hub file and open the QuickBooksToolsHub.exe file to install it.
- Once it is downloaded, open the tools hub from the desktop icon.
- In the QuickBooks Tools Hub, select Program Problems.
- Select the QuickBooks PDF & Print Repair Tool. It will take about a minute to run.
- Once the tool completes, try the .PDF file-related task that originally generated the error.
- If the error still occurs, please try rebooting your computer and then try again.
Step 2: Reset the temp folder permissions
Insufficient permissions to the Temp folder may attract QuickBooks printing issues. Resolve them through this method:
- Press the Windows key + R to open the RUN command.
- Type %TEMP% and press Enter.
- Right-click an empty area of the temp folder and choose Properties.
- Select the Security tab.
- Ensure all usernames and groups showing on the Security tab have Full Control.
- Once the permissions have been set to Full Control, try saving as PDF again within QuickBooks.
Read Also – How To Resolve QuickBooks Error 15222
Step 3: Renaming the qbprint.qbp file
A damaged QBPrint.qbp file is a primary reason for the Intuit Printer Library Error. Rectify them as follows:
- Locate the QBPrint.qbp file.
Note: For certain cases, there might be a need to display the hidden files or folders to locate the file
Windows 10, 8.1, 8, 7 and Vista: C:\ ProgramData\ Intuit\ QuickBooks 20XXNote: 20XX represents the version of your QuickBooks
Server 2008 and Server 2012: C:\ Program Data\ Intuit\ QuickBooks year and C:\ Users\ **remote user**\ AppData\ Roaming\ Intuit\ YEAR VERSION\ TSPrinterSettings
- Right-click the QBprint.qbp file for your QuickBooks version and select Rename.
- Add the word old to the file name (i.e., QBPrint.qbp.old)
- Open QuickBooks Desktop.
- From the File menu, select Printer Setup.
- Select any transaction in the Form Name list and select OK. This will create a new QBprint.qbp file.
- Try to open and print any transaction and check the status of Intuit Printer Library Error.
General QuickBooks Printing Problems: An Overview
Users may encounter some general QuickBooks printing problems besides specific error messages. These are mentioned below:
- Could not print to the printer. Check your printer determination. Printing may have been dropped from another program.
- There is a problem connecting to your currently selected printer, Microsoft XPS Document writer, on the XPS port.
- PDF Converter shows offline.
- You cannot print directly to the QuickBooks PDF Converter.
- The accompanying could be the purpose behind encountering Intuit Printer Library Error.
- The establishment of the PDF driver is tainted.
- Error: QuickBooks can’t complete the current action due to a missing component: Missing pdf file component.
- The device is not ready.
- Error 1722 or 1801 when installing PDF Converter.
- Unable to save as .pdf file.
- Intuit’s R4 and R5 updates presented an inaccurate PDF Driver from Amyuni.
- QuickBooks could not save your form or reports as a .pdf.
- QuickBooks is not responding.
- Print Driver Host for 32-bit Applications has Stopped Working.
- Unrecoverable error.
- QuickBooks PDF Converter Activation Error -20, -30, or -41.
- The Qbprint.qbp file is harmed.
- Problems printing transactions or reports.
- QuickBooks freezes when you try to reconcile accounts.
- Reconcile window disappears or doesn’t show.
Reasons Why Printing Issues Arise
Users may face printing issues in QuickBooks desktop due to the following reasons:
- Your printer may be unsupportive.
- The required font is not installed in the system.
- A particular driver required for printing may be missing.
- The fonts in the invoice may not match.
- Additional load in the computer RAM may bring forth the error.
- Incorrect layout measurement may cause the Intuit Printer Library Error. The printer setup may not match the paper size and orientation.
These reasons may trigger issues in QuickBooks printers, causing significant delays and productivity problems. The glitches may also leave specific signs mentioned in the subsequent section.
You may Read Also – I’m Getting QuickBooks Error PS107
Signs of QuickBooks Printing Problems
The following symptoms clarify you’re stuck with printing issues in QB:
- You can’t print your invoices.
- The user is unable to save files as PDFs.
- Directly emailing the files to customers is not possible.
- Windows OS might freeze and crash.
- QB application lags in performance.
- The mouse and keyboard inputs don’t work.
These factors disrupt QuickBooks’ functioning and productivity. Therefore, users need to address and troubleshoot the issues immediately.
Troubleshooting Methods for Intuit Printer Library Error
Before you proceed to fix printing issues in QuickBooks desktop, consider the following aspects:
- Update your QB app to the latest version.
- Ensure your computer is linked to the internet.
- Have the latest printer driver installed on your device.
- Make sure no error messages or warning lights are on your printer.
After considering these signs, it’s time to troubleshoot the Intuit Printer Library error:
Method 1: Try Printing from Another Program
You should ensure you can print from another program by using notepad to print. Or else, use any application that is not QuickBooks and verify if printing runs here:
- Go to the Start menu and browse for Notepad.
- Type some text in the notepad.
- Head to the File menu and opt for the Print option.
- Choose a suitable printer and tap Print.
If it doesn’t print, proceed with the following solution (Method 2). However, if it does, you should skip the next method and jump to the subsequent one (Method 3).
Method 2: Test whether the Printer Setup is accurate
Check whether your printer is set up correctly through the following steps:
Step 1: Ensure the printer setup is accurate
- Begin by disabling your printer, restarting your computer, and switching it back on.
- Ensure the printing paper loads correctly.
- Head to the Start menu.
- Tap Control Panel from the Accessories.
- Here, double-click Printers and Faxes.
- If you see the Printer status as offline, right-click the printer and tap the option Use Printer Online.
- Double-tap the printer and if any print jobs are in the queue, tap Printer, and click Cancel all documents.
- Exit the window.
- Now, right-tap the Printer option. Tap Properties, followed by Print Test Page.
Suppose the printer is a network printer, and the test page doesn’t print. In such cases, network issues may cause the QuickBooks printer setup not opening error.
Step 2: Ensure the printer is the right one
- Tap the File menu and select Printer Setup in QuickBooks.
- Choose the form you wish to print.
- Ensure the printer name is the same as the printer you wish to use.
- If these settings are not correct, you need to configure them in the computer’s Printer Setup first.
- Get more help in these settings by clicking help.
Step 3: Print to another printer
- Head to the File menu in QuickBooks and choose the Printer Setup option.
- Choose any form you wish to print.
- Opt for a different printer.
- Receive more help in these settings by tapping Help.
Method 3: Test your company file
You may need to test your company file and see where the problem lies. You can test your company file through the following steps:
- Print another form than the one you’re trying to print. Further, attempt a standard form or report to print if you’re printing customized forms or memorized reports.
- Attempt to print a single form if you were trying to print a batch of forms in QuickBooks. If this goes successful, you should print in small batches.
- Access one of the sample company files in QuickBooks. Try to print the same form or report type. If this works, you should try verifying and rebuilding the data damage in the company file. Try to print again once you are done.
If the printer still doesn’t work, you can try to use the Print and PDF repair tool from the QuickBooks Tool Hub. However, if you’ve used it and still can’t figure out how to add printer to QuickBooks, you should try reinstalling the app in Windows.
Method 4: Delete and Install QuickBooks Again
When you can’t get rid of the Intuit Printer Library error with any method mentioned above, you should delete QB from the system and reinstall it correctly. Take steps to delete QuickBooks, but before that, consider the following prerequisites:
- You should download the QB installer version securely prior to reinstallation.
- Not the license number somewhere safe and quickly accessible. The license number will be available on the original package or the purchase confirmation email (online).
Now, let’s take a look at the steps needed to take to delete QB from the system:
Step 1: Remove QuickBooks from the system
When the errors strike your system, delete the QB application and reinstall it as follows:
- Log into the system as a Windows administrator or a user with admin rights.
- Access the Start menu and select the Control Panel icon.
- Open it and navigate to the Programs and Features tab.
- Here, you’ll find an Uninstall a program option. Click it.
- You’ll get to a window with the list of programs currently installed on the PC.
- Look for QuickBooks Desktop through manual scrolling or by searching and sorting.
- Execute the uninstallation steps by managing the prompts.
- End the uninstall process successfully, and you’re good to go.
Step 2: Reinstall QuickBooks
After removing QuickBooks Desktop from your system, you should clear the space, temporary files, and other unnecessary things the application leaves. Undertake disk cleanup and clean manager for assistance. After removing everything and making space for the latest QuickBooks version installation in the system, you can visit the official website or insert the installation CD into the disk space in the system. Then, install the application, accept the terms and agreement, and set up the app for seamless use.
Reinstallation Alternative
Some manual edits become necessary when you can’t seem to eliminate Intuit Printer Library error even after reinstalling the QB application. In such cases, you must undertake the following steps:
- Erase QuickBooks from the system and execute the steps to display hidden files.
- Search for Windows Explorer in the Start menu and open it from here.
- Find the folder having your QB company files and access it. Usually, it is the QuickBooks folder located in any of the following locations:
- C:\ProgramData\Intuit\QuickBooks (year)
- C:\Program Files\Intuit\QuickBooks (year)
- 64-bit version C:\Program Files (x86)\Intuit\QuickBooks (year)
- C:\Users\(current user)\AppData\Local\Intuit\QuickBooks (year)
- Right-click each of these folders and hit the Rename option.
- Rename the file by adding old to the end of the file name and clicking OK to save the changes. It will prevent QB from accessing these files and instead go for the new ones.
- In the end, you must reinstall QB Desktop and see if the error remains.
If the error messages trouble you while renaming the files, undertake the following steps:
- Right-click the Windows Task Bar and click the Task Manager option.
- Navigate to the Processes tab and select the Name column header to arrange the items.
- In the end, right-tap each of the following processes and tap the End Processes option for the files below:
- QBDBMgr.exe
- QBDBMgrN.exe
- QBW32.exe
- QBCFMonitorService.exe
- Click Yes if a warning message appears on the screen as follows, “WARNING: Terminating a process can cause undesired results…”
Method 5: Test if you can Print to XPS Document Writer
When you face problems saving your PDF and sending emails, you should test your printer. The XPS Document Writer is a Microsoft Windows Product useful to QuickBooks to save files as a PDF. You should test if you can print to your XPS Document Writer through the following steps:
- Launch your Notepad from the Start menu.
- Type Test in the notepad.
- Head to the File menu in the notepad and click Print.
- Name the file and save it to your desktop.
- Navigate to your desktop and access the XPS Document you printed from the notepad.
You’ll require professional help if you can’t print to your XPS printer outside of QuickBooks. Take Microsoft assistance as it’s their product. You can take the following steps with your IT professional:
- Ensure the XPS services are turned on.
- Undertake a test of XPS Document Writer outside QuickBooks.
- Install the Microsoft XPS Document Writer again.
- Edit your software security settings. For instance, if you are using McAfee firewall or Norton antivirus, you should check the settings of the security software. Ensure the XPS files aren’t blocked.
- Ensure the Windows user has sufficient admin rights and permission to print to the XPS Document Writer.
- Not having these permissions will cause QB problems while saving files as PDFs. Modify these permissions by signing in as an admin.
A complete insight into Intuit Printer Library Error with this blog is useful to get the printing form feature running smoothly. If you are still unable to print because of printer library error, contact the Accounting Helpline support team at 1.855.738.2784. The team has expert professionals who will help you resolve the error in no time and get back on track with QuickBooks as soon as possible.
FAQ’s
How to verify the template form?
Open QuickBooks and click on Customers and then select Create Invoice.
Browse to the Formatting select Customize Data Layout.
Select Basic Customization.
Now go to the Change the Font For section:
Click on Change Font.
Go to Font and then click on a font type.
Which all items must have the same font?
Company Name, Company Address, Labels Data, Subtotals Labels, and Total Labels must have the same font. This helps to avoid the occurrence of Printer library error while printing from QuickBooks.
How can I verify the Printer Connectivity if Unable to print because of printer library error?
1. Open QuickBooks and go to the File menu.
2. From the File menu, choose Printer Setup.
3. Select any Transaction to print.
4. Verify the Printer Name displayed with the name on the printer. Make sure the name is the same.
What are the different kinds of printing issues in QuickBooks?
The various kinds of printing issues users may face when encountering Intuit Printer Library Error are as follows:
1. Problems printing transactions or reports
2. Unable to save as a .pdf file
3. Couldn’t print to the printer. Check your printer determination. Printing may have been dropped from another program.
4. QuickBooks 1099 form printing problems
5. The accompanying could be the purpose behind encountering Intuit Printer Library Error.
6. The establishment of the PDF driver is tainted.
7. Intuit Printer Library Error
8. Intuit’s R4 and R5 updates presented an incorrect PDF Driver from Amyuni.
9. You cannot print directly to the QuickBooks PDF Converter
10. The Qbprint.qbp file is damaged.
11. QuickBooks Enterprise Unable to Print
12. Unable to Print Invoice and Checks in QuickBooks
13. QuickBooks Printing problems in MAC
Which Windows OS does the QuickBooks Intuit Printer Library Error apply to?
Windows XP, Vista, 7, and 8 faces the Intuit Printer Library Error.
Where can I find the QBPrint.qbp file?
You can locate the QBPrint.qbp file as follows:
1. For Windows 10 and newer: C:\ProgramData\Intuit\QuickBooks 20xx
(20xx represents the version of your QuickBooks.)
2. For Server 2012 and newer: C:\Program Data\Intuit\QuickBooks YEAR and C:\Users\**remote user**\AppData\Roaming\Intuit\ YEAR VERSION\TSPrinterSettings

Edward Martin is a Technical Content Writer for our leading Accounting firm. He has over 10 years of experience in QuickBooks and Xero. He has also worked with Sage, FreshBooks, and many other software platforms. Edward’s passion for clarity, accuracy, and innovation is evident in his writing. He is well versed in how to simplify complex technical concepts and turn them into easy-to-understand content for our readers.