
Last Updated on April 17, 2026
The invalid product number QuickBooks POS error might appear when you try to open or register QB Desktop Point of Sale. It can also occur when you try to install the QB POS application, causing the procedure to terminate. The accompanying message for this error is “error code 176109: Invalid Product Number or Invalid Product Code”. Since the program doesn’t work until you input the correct product number or code, you can’t work on your accounting and bookkeeping data, resulting in a hampered workflow. So, let’s dive into the reasons behind you seeing the QuickBooks invalid product number message in this blog and the recommended troubleshooting methods to fix it.
Are you facing challenges dealing with the invalid product number QuickBooks POS error yourself? Call our Accounting Helpline experts at our toll-free number, 1.855.738.2784, and let them assist you in fixing your issue in no time!
Causes for the Invalid Product Number QuickBooks POS Message
Given below are the potential causes behind the QuickBooks incorrect product number POS:
- The Point of Sale Entitlement folder includes files that have been corrupted or damaged.
- The product code you used while installing the QuickBooks Desktop Point of Sale app is invalid or incorrect.
- You are not using Windows as an administrator.
- The date and time settings of your system not being correct can lead to the QuickBooks 2022 product number being incorrect error.
- Downloading the incorrect QuickBooks POS version can also result in this error.
- The files needed for authenticating the app are either damaged or missing.
- The validation code might be incorrect, or the service might be temporarily unavailable.
- Background interference from third-party apps or unexpected occurrences can also cause this issue.
- Adding hyphens while entering the product number might lead to QuickBooks POS error 176109.
Now, let us take a look at the steps to resolve the invalid product number error in QuickBooks POS.
Troubleshooting Methods to Resolve the Invalid Product Number QuickBooks POS Error
Now that we know about the causes that can lead to the QuickBooks POS’s invalid product number issue, let us now proceed to list the troubleshooting methods for the QuickBooks Point of Sale invalid product number:
Method 1: Delete the Corrupt Entitlement Client Folder Contents
You can resolve this issue by deleting the corrupted files in the POS Entitlement folder. You can do so by deleting them manually or automatically with the following steps:
Automatic Process
- First, download the Clear Entitlement File tool.
- Unzip the file and extract the contents to your desktop.
- Double-click on the file to run it.
- Open QuickBooks Desktop Point of Sale again and finish the registration.
Note: You have the option to remove the Clear entitlement v8.bat file and the Clear_entitlement_v8.zip files.
Manual Process
First, view hidden files with the steps given below:
- Open the Start menu.
- Search for and open the File Explorer.
- Access the View tab and proceed to mark the Hidden Items check box.
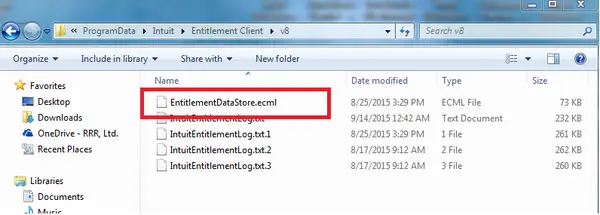
Now, follow the steps given below to delete the POS Entitlement folder files manually:
- Open the Windows File Explorer again.
- Now, navigate to C:\ProgramData\Intuit\EntitlementClient\v8.
- Press Ctrl + A on your keyboard to select all the files present in the folder
- Then, select Delete.
- Confirm the procedure by clicking on Yes.
- Restart QuickBooks Desktop Point of Sale
- Lastly, complete the registration process.
If the problem persists, move ahead to the next given solution.
Method 2: Rename the WSActivity File
To fix the QuickBooks error 176109, you can rename the WSActivity file with the following steps:
- Open the Windows File Explorer.
- Then, navigate to C:\ProgramData\Intuit\QuickBooks Point of SaleXX\Ini.
- XX represents the version of your QuickBooks POS.
- Right-click on WSActivity.
- Now, choose the Rename option.
- Type in the new name, something like “OLDWSActivity”, and save it.
- Close the window.
- Then, gloss over Method 1 to delete the contents of the entitlement client folder once more.
- Open QuickBooks Desktop Point of Sale.
Method 3: Clean Install the QB Desktop Point of Sale App
If you’re unable to resolve the invalid product number QuickBooks POS error, you can try to clean and install QuickBooks Desktop Point of Sale to see if it resolves the issue with the following steps:
Things to Keep in Mind
- Back up your QuickBooks POS data file.
- You should have one of the following available with you:
- The QuickBooks Desktop Point of Sale installation file.
- The QuickBooks POS installation CD.
- You should have the product and license numbers in hand.
- Ensure to log in as a Windows Administrator before proceeding further.
Uninstall the QuickBooks Desktop Point of Sale App
- Open the Run menu by pressing Windows + R on your keyboard.
- Type in Control Panel in the menu.
- Hit Enter on your keyboard.
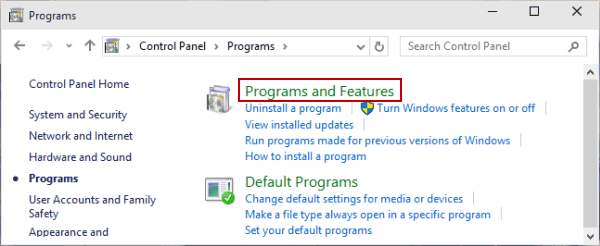
- Click on Programs and Features.

- Or select Uninstall a Program.
- From the list of programs, choose the QuickBooks Desktop Point of Sale program.
- Then, click on Uninstall/Change.
- Follow the guide on your screen to uninstall the application.
Rename All of the POS Installation Folders
- You should add OLD at the end of every POS folder name.
- This precautionary measure prevents QuickBooks Desktop Point of Sale from recognizing the folder, prompting the creation of a new one.
- Given below are the folders you should rename and OLD to.
Folder paths:
- C:\ProgramData\Intuit\QuickBooks Desktop Point of Sale 18.0
- C:\Program Files (x86)\Intuit\QuickBooks POS XX
- C:\Users\Public\Public Documents\Intuit\QuickBooks POS XX
- C:\Program Files (x86)\Common Files\Intuit\Entitlement Client\v8
Remove the QBPOSDBSrvUser Windows user:
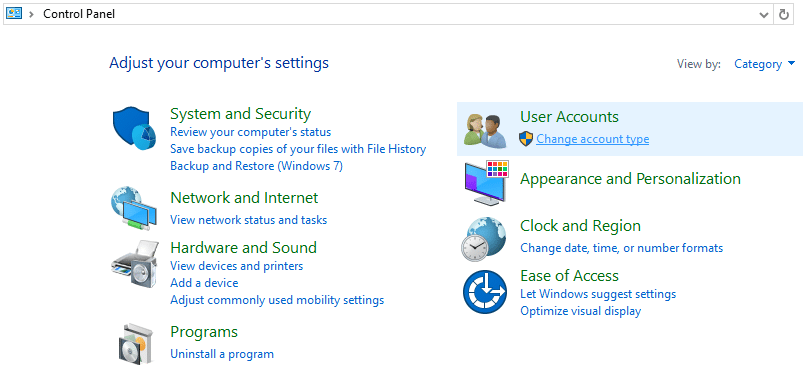
- Click on the Start menu and access the Control Panel.
- Click on User Accounts.

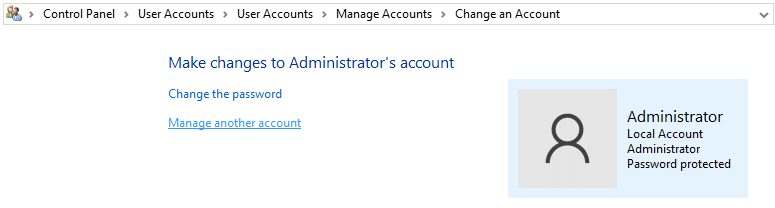
- Now, proceed to select Manage another account.

- In the User Account Control window, select Continue.
- Click on QBPOSDBSrvUser and choose to delete the account.
- Confirm the deletion of the folder.
- Restart your system.
Reinstall the QuickBooks Desktop Point of Sale Software
- Check and comply with the Point of Sale system requirements.
- Launch the QuickBooks Desktop POS installation file from your desktop.
- If prompted to overwrite existing extracted files, choose Yes to All.
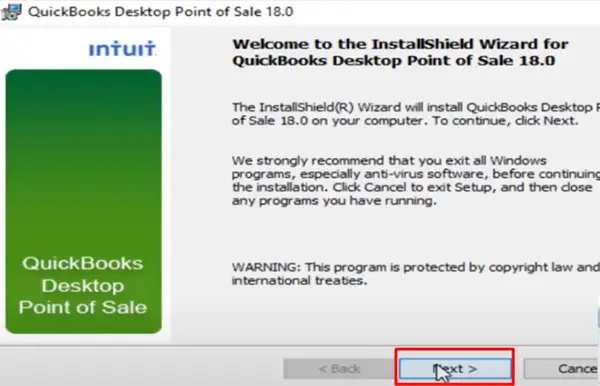
- Then, click Next on the QBPOS installation wizard.
- Review the License Agreement. If you agree, click on “I accept the terms in the license agreement” for QuickBooks POS
- Then, select Next.
- Input the license and product numbers for QBPOS
- Select Next.
- Now, choose the installation type according to your needs:
- Only this computer: Suitable for a single user.
- Two or more computers: Applicable when dealing with multiple users.
- If selecting the installation for two or more computers, specify the workstation type:
- Server workstation: This computer creates and stores company data.
- Client workstation: Typically serves as the cash register, assisting customers in daily sales and having program access.
- Click Install to initiate the QBPOS installation.
Note: QuickBooks Point of Sale must be installed in the following file path: C:\Program Files (x86)\Intuit\QuickBooks Desktop Point of Sale (version). - Upon completion of the installation, activate QuickBooks Point of Sale. You might need to restart your computer and reopen QuickBooks to commence.
If this doesn’t fix your issue, check out the next solution.
Method 4: Verify the Date and Time Settings of Your System
If the date and time settings of your system are incorrect, you can encounter the invalid product number QuickBooks POS error. Verify the date and time settings of your PC with the steps given below:
- Close QuickBooks Desktop.
- Right-click on the time display on the Windows taskbar and hit Adjust Date and Time.
- Check if the date and time settings of your pc are correct. If they aren’t, follow the steps further.
- Click on the Date & Time tab and set the date and time for your time zone:
- Select the correct time zone of your PC.
- Select Apply and choose the OK option.
- Reopen QuickBooks Desktop POS and navigate to Help.
- Choose Activate QuickBooks, then tap the Begin Activation option.
- Enter the validation code and select Next.
This would resolve the issue if it were being caused by incorrect system date and time settings.
Method 5: Check the License and Product Number
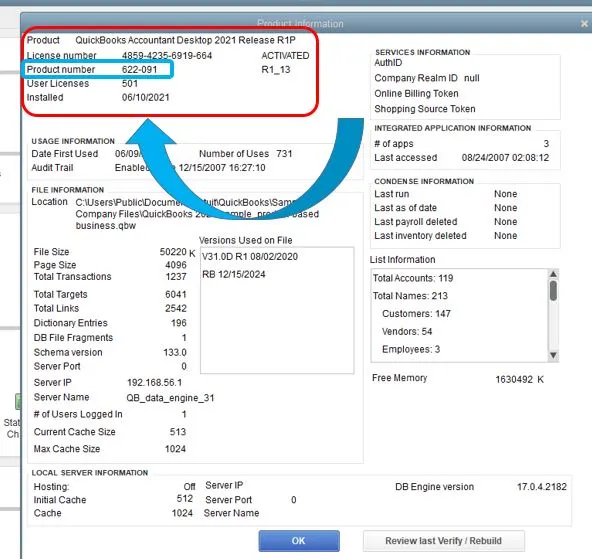
Check and verify that your QuickBooks POS product and license numbers are correct. Refer to the purchase confirmation email if you acquired the software from Intuit’s website. For purchases from a retail store, locate the brightly colored sticker on the original CD envelope. Make sure you enter the code without any hyphens.
Method 6: Create a New Administrator User in Windows
If you’re not running the installation of your program as a Windows admin user, you might see the “QuickBooks Point of Sale invalid product number” message. In such cases, creating a new Windows user and providing them with admin privileges will help. Here’s how you can do it in different Windows editions:
Windows 11/ 10
- Open the Start menu.
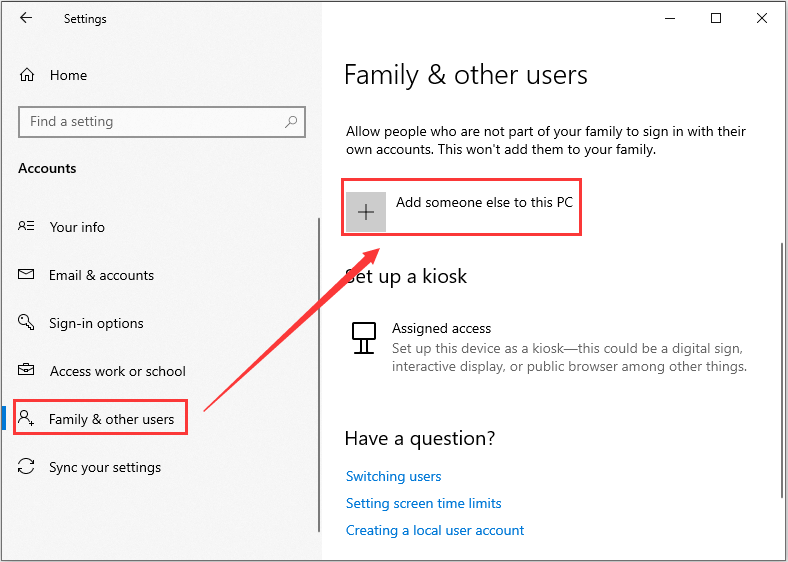
- Select the Settings option.
- Now, select Accounts.
- Then, press Other user.
- Select Add Account under the Add other user section.
- Enter the account information:
- If the user has a Microsoft account, you should enter the email address.
- If the person doesn’t have a Microsoft account, click on Sign up for a new email address to create one.
- You can choose the I don’t have this person’s sign-in information option to create a new email and MS account.
- For creating a local account, select Add a user without a Microsoft account.
- Follow the guide on your screen to finish setting up the account.
- Now, open Accounts from Settings again.
- Select Other user.
- Choose the flyout for the account you wish to change under Other users.
- Go to Account options.
- Press the Change account type option.
- Select Administrator from the dropdown menu.
- Lastly, press OK.
Windows Small Business Server 2011 & 2008 R2:
- Open the Start menu.
- Navigate to All Programs.
- Open the Windows Small Business Server.
- Then click on Windows SBS Console.
- Select Users and Groups.
- Then, choose the Add a new user account tab.
- Complete the user information and proceed with the Add a New User Account wizard.
- Assign administrator rights to the new user.
- Once you’re done with these steps, click Finish.
Upon creating the new user, log out of Windows and log back in using the newly created user credentials. Then, proceed with the installation and activation of your QuickBooks Desktop POS.
Method 7: Log into CAMPS to Check the Product Code
You can use the Customer Accounts Maintenance Portal (CAMPS) and enter your login credentials to check your product code. Find the correct product number here to resolve the invalid product code QuickBooks POS error message.
Method 8: Check the System Requirements of QB POS
Make sure that your workstation meets the system requirements for using the QuickBooks Desktop Point of Sale application. This would resolve any other issues you might be facing, along with the invalid product code error.
Method 9: Fix Any Installation Issues Using the QuickBooks Install Diagnostic Tool
You can be dealing with the invalid product number error in QuickBooks POS due to inherent installation issues with the application. You can use the QB Install Diagnostic Tool with the following steps to resolve it:
- Download and install the QuickBooks Tool Hub.

- After you finish installing the QuickBooks Tool Hub, proceed to open it.
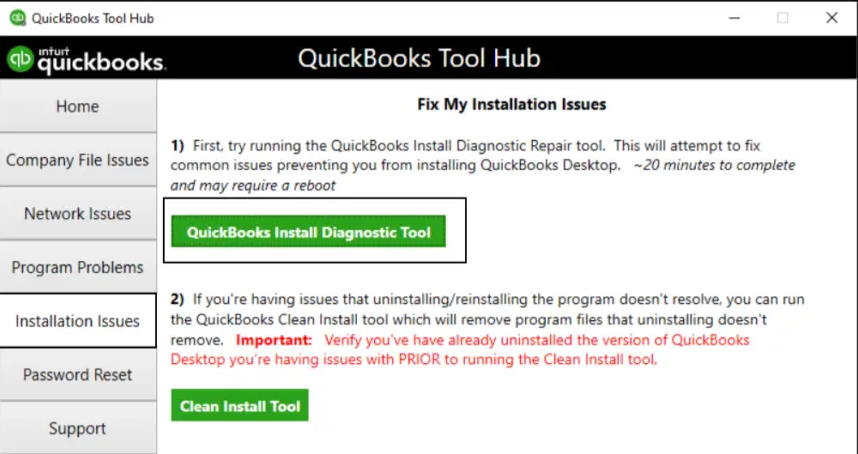
- Then, navigate to the Installation Issues tab
- Now, click on QuickBooks Install Diagnostic Tool.

- Wait for the tool to finish its work progress
- Try opening QB POS again and check if the error persists.
If the issue persists, move ahead to the next solution.
Method 10: Use the QuickBooks POS in Compatibility Mode
You need to run the QuickBooks POS application in compatibility mode according to your Windows version to ensure no error arises. The steps to do so are given below:
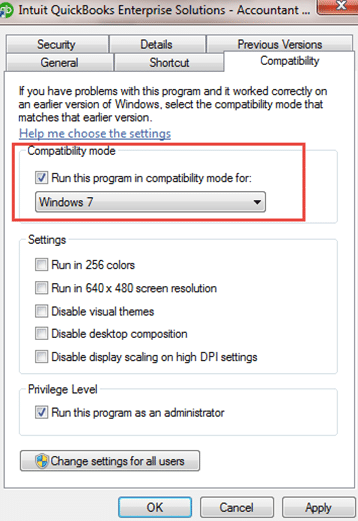
- Right-click on the QuickBooks POS icon.
- Then, select the Properties option.
- Now, navigate to the Compatibility tab.
- From the drop-down, tap the option “Run this program in compatibility mode for”.

- Choose the Windows version you use.
- Finally, select Apply.
This would resolve the invalid product code error in QB POS.
Method 11: Run Quick Fix My Program from the Tool Hub
You can use the Quick Fix My Program tool from the QB Tool Hub to eliminate any program problems with QB POS with the following steps:
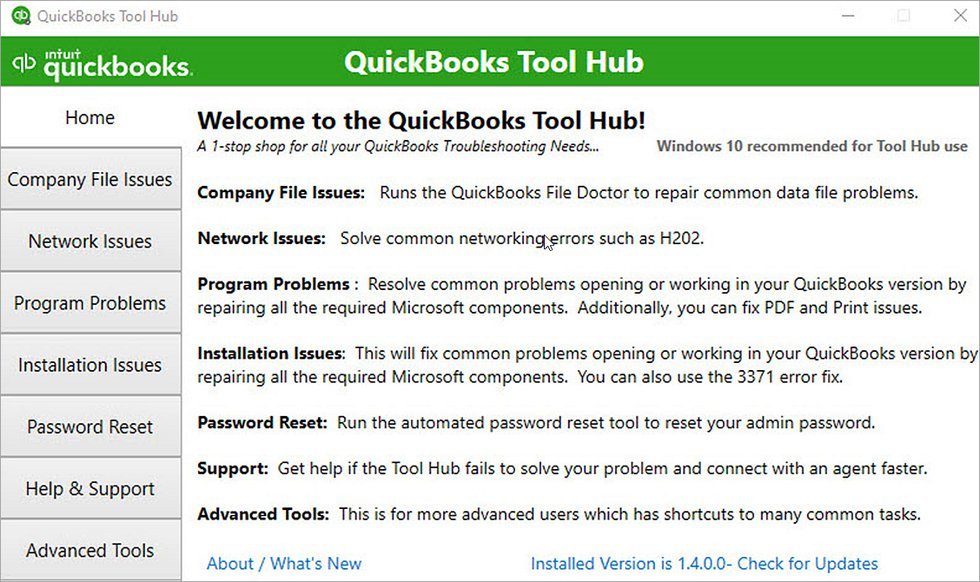
- Open the application.

- Navigate to the Program Problems tab.
- Select Quick Fix My Program.

- Wait for the tool to finish working
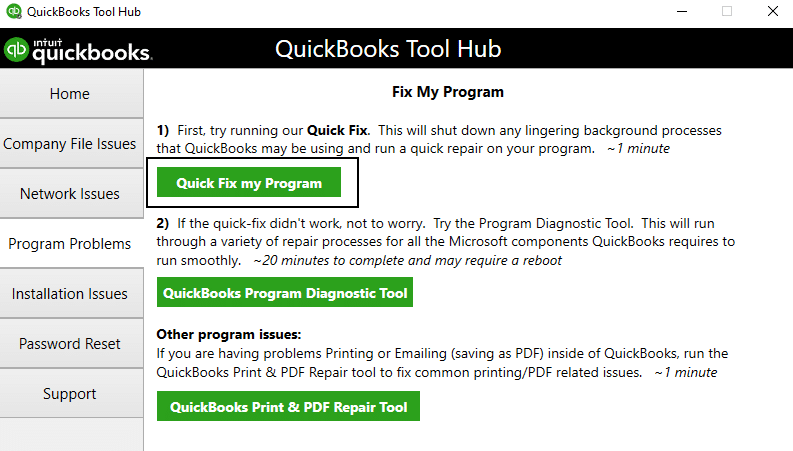
This would resolve any program problems with the QB POS app, ultimately getting rid of the invalid product number error.
Invalid Product Number QuickBooks POS – A Quick View Table
Given in the table below is a concise summary of this blog on the topic of Invalid Product Number QuickBooks POS:
| Description | Invalid product number QuickBooks POS error usually occurs when the user tries to activate, register, or install the QB POS application. This can hamper your workflow and important business processes. |
| Its causes | Corrupted or damaged files in the POS entitlement folder, the product code being invalid or incorrect, not using Windows as an admin, wrong date and time settings of your PC, damaged or missing files needed to register the app, and adding hyphens while entering the product code. |
| Ways to fix it | Deleting the corrupted entitlement folder contents, renaming the WSActivity file, clean installing QuickBooks POS, checking the system date and time settings, verifying the license and product numbers, creating a new admin user in Windows, logging into CAMPS to check the product code, verifying and meeting the system requirements for POS, using the QuickBooks Install Diagnostic Tool, running QB POS in compatibility mode, and utilizing the Quick Fix My Program tool. |
Conclusion
In this blog, we talked about the invalid product number QuickBooks POS issue and how it can hamper your work progress and crucial business processes. We covered all the potential factors that can trigger this issue, along with the step-by-step guided solutions for the same. However, if the error persists or you require an expert to diagnose and troubleshoot the problem, feel free to contact our Accounting Helpline experts at 1.855.738.2784. We will immediately look into your problem and resolve your issues on a priority basis!
FAQs
Which QBPOS, QB, and Windows versions can face the QB error message invalid product number?
The following QB, Windows, and QBPOS versions can face the error message invalid product number:
– Point of Sale 19.0
– QBDT 2020
– QB Desktop Pro 2020
– QB Pro 2021
– QB Point of Sale version 9
– Windows 10
– QB Pro 2019
– Windows 11
– QB Desktop Pro Plus 2023
– QB Enterprise 24
– QB Pro 2017
– QB Pro 2014
How can I change the date and time from the Control Panel to fix the incorrect product number message in QB POS?
Here’s how you use the Control Panel to change the date and time and fix the “QuickBooks Point of Sale was unable to activate the product” error message on your screen:
– Press Windows+R and access the run command.
– Enter “Control Panel” and tap OK to launch the Control Panel.
– Navigate to Clock and Region, then select Date and Time.
– Proceed to update your computer’s time and date.
Where will I get the license number if I purchased QuickBooks POS online?
If you purchased the QuickBooks POS software online, you can find the license number in the purchase confirmation email. If you can’t find it, it’s likely due to the mail being moved to the spam folder, so check accordingly.
How do I resolve the “QuickBooks invalid product number” message?
You can try the following troubleshooting methods to resolve the “QuickBooks POS invalid product number” message:
– Utilize the Quick Fix My Program tool from the QuickBooks Tool Hub
– Use the QuickBooks Install Diagnostic Tool to fix installation issues
– Install QuickBooks POS in compatibility mode
– Verify and meet the QuickBooks POS system requirements
– Use CAMPS to get the correct product and license details
– Clean install the QuickBooks Point of Sale application
– Create a new Windows admin user
– Ensure license and product numbers are for the same version by double-checking the email or CD
– Verify and change the system date and time if needed
– Rename the WSActivity file
– Delete the corrupted POS Entitlement Client Folder contents
Related Posts-
QuickBooks Error 80029c4a: Here’s a Quick Method to Fix
QuickBooks Tool Hub – One-Stop Solution for All QB Errors
Top Methods to Get Rid of QuickBooks Error 30 Easily
How To Fix QuickBooks Error PS038? Easiest Method
QuickBooks Error H202 in Multi-User & Solutions to Fix it
Guide to Fix QBCFMonitorService Not Running On This Computer

Edward Martin is a Technical Content Writer for our leading Accounting firm. He has over 10 years of experience in QuickBooks and Xero. He has also worked with Sage, FreshBooks, and many other software platforms. Edward’s passion for clarity, accuracy, and innovation is evident in his writing. He is well versed in how to simplify complex technical concepts and turn them into easy-to-understand content for our readers.