When you upgrade to a newer version of QuickBooks Desktop, you are required to change QuickBooks license number to register the latest product. It might be confusing for the users when it comes to updating the license number and product code after the product upgrade. Every year when a newer version of QuickBooks is launched, users start searching for “How do I Change my QuickBooks License Number?” or “How do I Add a License to QuickBooks?” Once you have received your license registration key and the new product number, it is quite easy to enter the product registration information in QuickBooks. This tutorial will show you a step-by-step method to change the license and product number in QuickBooks.
Need Help Updating License and Product Number in QuickBooks? Call Number 1.855.738.2784 to Get in Touch with our Support Experts
Difference between QuickBooks Product and License Number
Before following the steps below to change the QuickBooks registration information, make sure you have received both product key and the license key with your new QuickBooks version. You will find product registration information in email if you have purchased the product online or inside the box if purchased off-line from a product vendor. The QuickBooks product number is used to determine the manufacturer of the product and channel of the software, whereas the license number is used to verify the authenticity of software as a license code.

NOTE: To verify the current License number and Product number of your QuickBooks product, you can visit the QuickBooks Product Information page by pressing the F2 key on your keyboard after opening the QuickBooks Desktop application.
Steps to Change QuickBooks License Number Only
For Windows Operating System
- Open QuickBooks Desktop and click the Help tab.
- Select Manage My License and then hit Change My License Number.
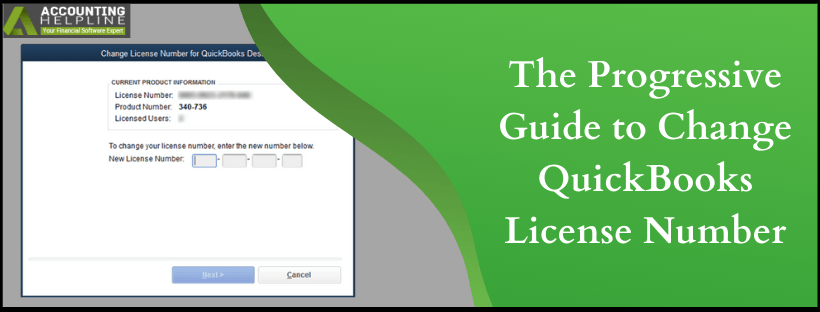
- Type the New License Number and then click Next.
- Hit Finish and restart the Windows.
IMPORTANT: QuickBooks will not fetch the updated license information until you restart your computer and you might get an error message “You’ve exceeded the maximum number of users who can access the company file at one time” if you are using QuickBooks in multi-user mode. So make sure to restart the server computer after installing the new license number.
Steps to Change both QuickBooks License and Product Number
Step 1: Open QuickBooks Registration File
For Windows Operating System
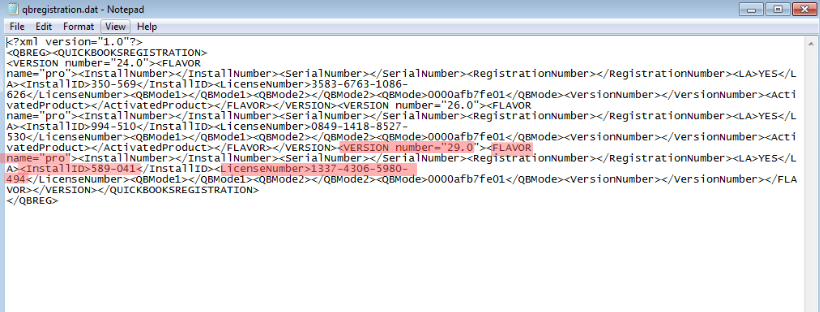
If you are looking for a way to update the QuickBooks product registration information i.e., the license number and the product code without reinstalling or removing the application then you can edit the QuickBooks registration file that is named as qbregistration.dat located in QuickBooks installation directory. Following are the steps to edit the QuickBooks registration file.
- Open QuickBooks Desktop and press the F2 key to open the Product Information window.
- Now press F3 to open the Tech Help window.
- Go to the Open File tab and then double-click the qbregistration.dat file from the list.
IMPORTANT: Before editing the file, make sure to take a backup of the QuickBooks registration file to avoid QuickBooks registration errors. Even a single typographical error can prompt errors while opening QuickBooks so, it is quite essential to avoid any mistakes made while making the changes to the qbregistration.dat file.
- Once you get the file opened in the text editor click Save as from the File tab.
- Select a location on your computer and click Save.
- Open the qbregistration.dat file once again from the Tech Help window.
- Exit QuickBooks Desktop application leaving the QuickBooks registration file opened.
- Manually you can also open the QuickBooks registration file by navigating to the QuickBooks installation folder.
- The file is usually saved inside the C:\ Program Data\ Common Files\ Intuit\ QuickBooks
Step 2: QuickBooks Registration File – Description
QuickBooks registration file stores information of all the previous versions of QuickBooks that you have installed earlier. The following terms specify the product version and edition in the qbregistration.dat file:
VERSION Number
- 26.0 -> 2016 version
- 27.0 -> 2017 version
- 28.0 -> 2018 version
- 29.0 -> 2019 version
FLAVOR Name
- Superpro -> QuickBooks Premier
- Pro -> Pro version of QuickBooks Desktop
- Accountant -> QuickBooks Premier for Accountant
- Bel -> QuickBooks Enterprise
- Belacct -> QuickBooks Enterprise Solution Accountant Edition
- InstallID -> Product Code in XXX-XXX format.
- LicenseNumber -> QuickBooks license number in XXXX-XXXX-XXXX-XXXX format.

QuickBooks Registration File
Step 3: Edit qbregistration.dat File
- Find the version of your QuickBooks Desktop in the file.
- Change the InstallID of the respective product version with the new product code.
- Now change the License Number in the text and make sure that you do not change any other text in the file.
- Click Save from under the File tab at the top.
- Close the file and restart the Windows.
- Now to verify the changes open QuickBooks and press the F2 key to open the Product Information window.
- Make sure the product number and the license number displayed in the window is matching with the product registration information that you have entered.
IMPORTANT: If QuickBooks is still displaying the old product code and license number even after making the changes in the qbregistration.dat file, then you might need to Reinstall QuickBooks to update license and product information in QuickBooks.
Steps to Update QuickBooks License and Product Number on Mac
- Open QuickBooks Desktop on your Mac computer.
- Click Manage My License from the QuickBooks section.
- Now hit Deauthorize This Computer.
- Once you get the confirmation popup click Deauthorize and Quit.
- Now open the QuickBooks Desktop again, and it will ask you –to complete the registration process to start using QuickBooks.
- Enter the new product registration information and follow the instructions displayed on the screen to complete the registration process.
NOTE: In case if you get errors while registering QuickBooks on your Windows computer, then you can follow the instructions mentioned in our article on How to fix QuickBooks Registration Errors.
Hopefully, this article has helped you change QuickBooks license and product number without reinstalling or uninstalling the QuickBooks Desktop from your computer. In any circumstances, if you are unable to install different license information in QuickBooks or dealing with some error while following the solution, then we suggest you contact our Support Team at 1.855.738.2784 for instant help and support.

Edward Martin
Edward Martin is a Technical Content Writer for our leading Accounting firm. He has over 10 years of experience in QuickBooks and Xero. He has also worked with Sage, FreshBooks, and many other software platforms. Edward’s passion for clarity, accuracy, and innovation is evident in his writing. He is well versed in how to simplify complex technical concepts and turn them into easy-to-understand content for our readers.

