
Last Updated on April 23, 2026
Unexpected errors are some of the most frustrating ones you can encounter in QuickBooks, and in this article, we will thoroughly analyze one, which is QuickBooks unexpected error 5.
QuickBooks is an excellent accounting and bookkeeping application, but it sometimes glitches due to bugs and problems. One common error QB users have discovered in their Event Viewer is QuickBooks unexpected error 5. It may appear as “An unexpected error has occurred in “QuickBooks: Got unexpected error 5 in call to NetShareGetInfo for path \\%filepath%.” You may see it alone or with several other errors, depending on your problem. Further, it impacts several QuickBooks operations like backing up files, opening them, or working on them. You may encounter crashes due to this error. Since it becomes challenging not being able to complete your QuickBooks operations, we suggest you read our comprehensive blog and resolve the problem quickly.
Are you Getting Error Code 5 While Running QuickBooks? Call Number 1.855.738.2784 for Troubleshooting Assistance.
Reasons that Triggers Unexpected Error 5 in QuickBooks
We have listed the exact causes that may lead to the unrecoverable QuickBooks unexpected error 5 on your system:
- Software issues may cause this unrecoverable and unexpected error.
- Data issues can trigger this problem.
- Operating system or PC issues can also trigger this problem.
- A modification in the installation files of QB can trigger this error and force your computer to shut down.
- Security software may be blocking QuickBooks processes and triggering the unexpected error 5.
- A possible webpage or browser issue may cause this error.
- A third-party application (specifically tracking apps) might cause problems.
- An incorrect date format can cause this error.
- It can be a security permissions issue.
Steps to Resolve QuickBooks Error Message 5
We have detailed the solutions to resolve the QuickBooks unexpected error message 5 below:
Solution 1: General Troubleshooting Procedure
We’ll try some general troubleshooting steps for the unexpected error 5 and see if it goes away while you access your company file:
Step 1: End the QB Program
We’ll begin the QuickBooks unexpected error 5 troubleshooting by ending this app on the Task Manager running in the background as follows:
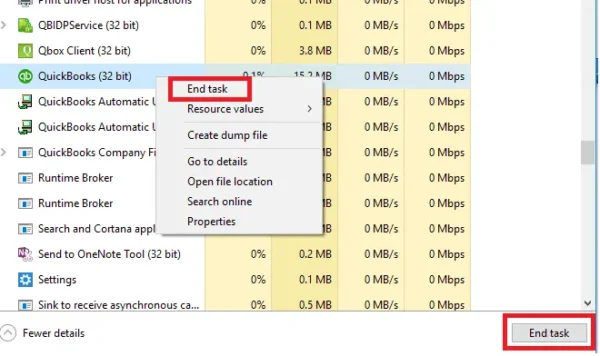
- Press Ctrl, Alt, and Delete simultaneously to launch the Task Manager.
- Tap Start Task Manager.
- Locate .qb.exe, .qb, and QuickBooks, right-click them and tap End Task.
Step 2: Suppress the Desktop While Accessing QB
After ending QuickBooks, opening it while it is suppressed will help us in resolving the unexpected error 5:
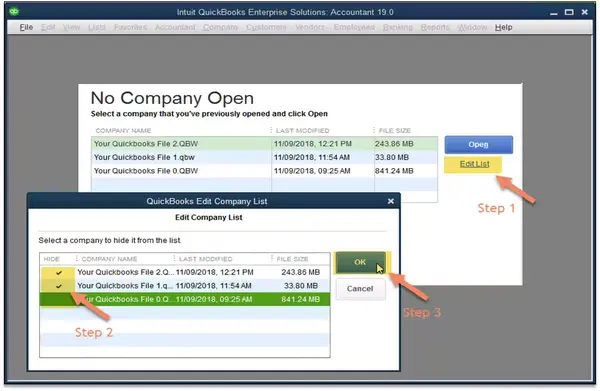
- Press and hold Ctrl on the keyboard.
- Now, double-click the QB program icon.
- Keep the Ctrl key pressed until the No Company Open window appears.
Step 3: Access a Sample Company File
Opening a sample company file helps users realize if the problem is with the company file or its location, so do the following:
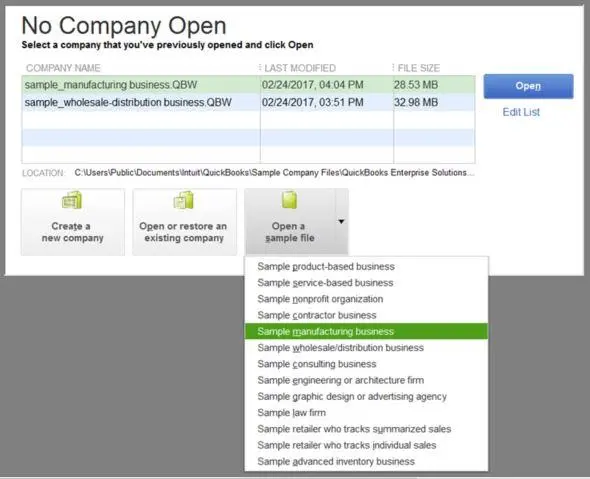
- Press the Ctrl key and double-click the QB program icon simultaneously.
- Access the No Company Open window by keeping the Ctrl key pressed.
- Once it opens, choose the Open a sample file option.
- Click any sample file from the list.
If the sample file successfully opens without the error, it suggests potential damage to either your company file or the folder containing it. Consider restoring your file using a recent backup or the Auto Data Recovery (ADR) feature to address this. If these measures prove insufficient, troubleshoot basic data damage to rectify the issue.
Step 4: Run Reboot.bat File
Next, try running the reboot.bat file to resolve this unrecoverable error:
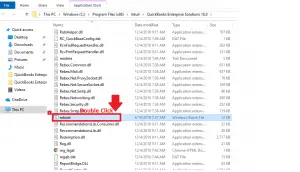
- Exit QB.
- Access the folder with the reboot.bat file.
- Right-click Reboot.bat and hit Run as administrator.
- A Command DOS window appears with quickly scrolling file names. This window will close automatically after this utility ends.
- You can reboot your PC and check if the unexpected error 5 appears now.
Step 5: Troubleshoot QuickBooks Desktop
The last step you can try is to troubleshoot the QB Desktop program and check the error. For this, you will require QuickBooks Tool Hub and its utilities like Quick Fix My Program and QuickBooks Install Diagnostic Tool. So, let’s look at the steps to download QuickBooks Tool Hub and access these utilities:
- Go to the official Intuit website to download Tool Hub.
- Once downloaded, run the setup file named “QuickBooksToolHub.exe” and begin the installation.
- Follow the on-screen InstallShield commands to complete the installation, and once installed, launch it using the shortcut icon you will find on your desktop screen.
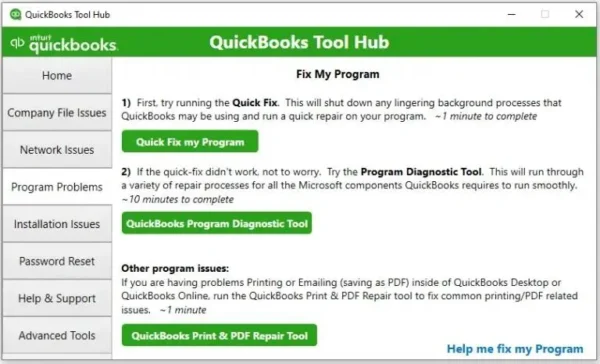
- Go to Program Problems in QuickBooks Tool Hub and run Quick Fix My Program first to resolve the unexpected error message 5.
- Then, you can go to Installation Issues and use the QuickBooks Install Diagnostic Tool.
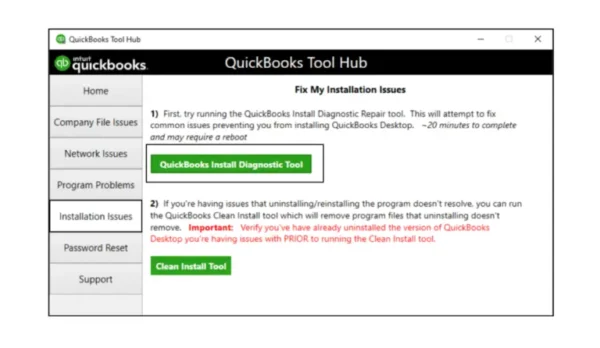
- This tool might run for 20 minutes or so and will provide results.
- You can check if the error 5 appears now.
Solution 2: Reset QB Updates and Back up the File
Now, let’s reset QuickBooks updates, then try backing up your file to see if the error 5 goes away:
- Navigate to Help in QuickBooks and click Update QuickBooks Desktop.
- Click on the Update Now tab.
- Enable the Reset Update checkbox.
- Initiate the download by selecting Get Updates.
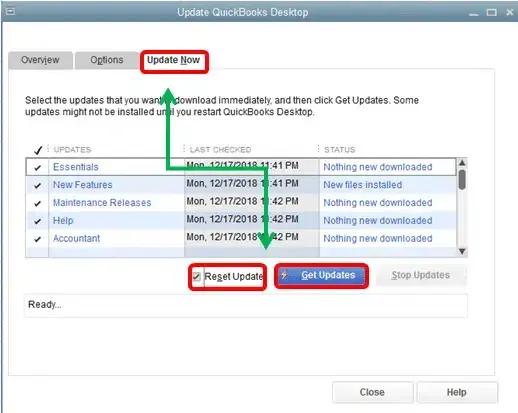
- Upon completion of the download, restart QuickBooks.
- Upon prompting, agree to install the new release.
Now, undertake QuickBooks company file backup as follows:
- Click File in QB and tap the Switch to Single-user mode option.
- Now, go to File again and click Back Up Company, then choose the Create Local Backup option.
- Click Local Backup in the window, then tap Next.
- Choose Browse in the Local Backup Only section and look for a place to save your company backup file.
- Arrange for the number of backups you need and run a test to ensure your file is in shape.
- Tap OK once your file is ready.
- Click Save it now, then Next.
Solution 3: Disable the Antivirus Software
If your antivirus software interferes with QuickBooks operations and causes the unexpected error 5, it’s wise to disable it as follows:
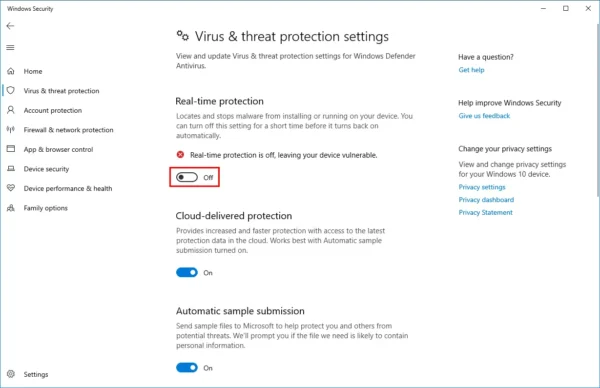
- Choose Control Panel from the Desktop or search it in the Start menu.
- After opening it, go to Programs and Features and look for your antivirus software.
- Right-click your antivirus software name in the programs list and click the Disable option.
- If required, restart your computer and see if the unexpected error 5 persists.
Solution 4: Open the Primary and Restored Backup of Your Company File Simultaneously
For this solution, we will restore a secure backup of your company file, then open your primary file along with the restored file to monitor them. While the steps to back up your company file are in solution 2, we will focus on restoring the backup:
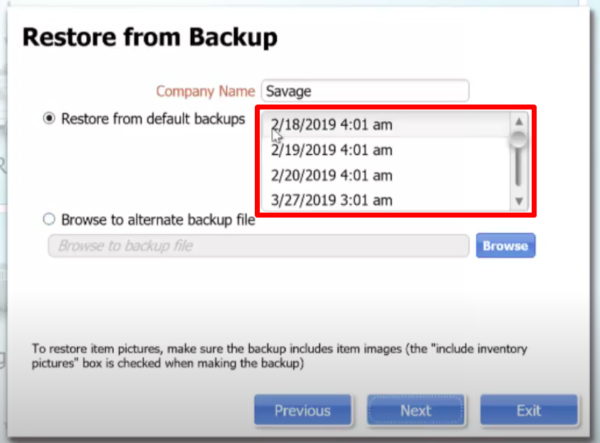
- First, navigate to the File menu in QuickBooks and tap the Open or Restore Company option.
- Click Restore a backup copy, and then hit Next.
- Choose Local Backup and select Next.
- Tap Browse on your computer to locate the backup company file, which typically looks like this: [Your company name].qbb.
- Decide on a folder to save your restored company file, and then hit Open.
- Note: If you save the backup in the same folder as your existing company file, there’s a risk of overwriting your data.
- You can either rename your existing company file or the backup to ensure unique names and avoid overwriting. Alternatively, you can save the backup in a separate folder.
- Tap Save when you’re ready. If there are messages regarding potential data overwriting, choose the option that matches your preferences. Only proceed with overwriting if you are certain it’s necessary.
Solution 5: Add Port Exceptions to Configure Firewall for QuickBooks
You should add port exceptions for your entire QuickBooks folder to ensure security software restrictions don’t cause the unexpected error 5:
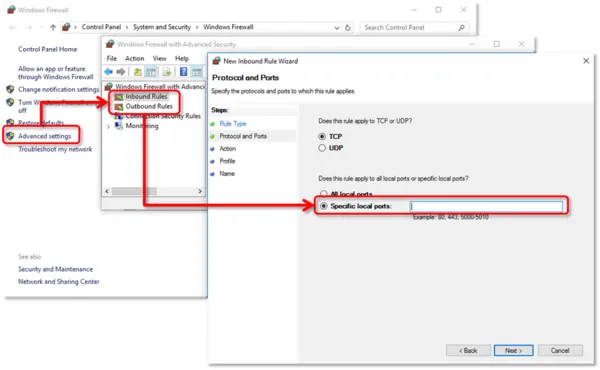
- Open the Start menu in Windows.
- Type “Windows Firewall” into search and open Windows Firewall.
- Select Advanced Settings.
- Right-click Inbound Rules (Create Outbound Rules later) and choose New Rule.
- Choose Port and then proceed with Next.
- For Windows firewall advanced settings rules and specific local ports, ensure that TCP is selected.
- When you reach the Specific local ports field, input the specific ports required for your QuickBooks version:
- QuickBooks Desktop 2020 and later: 8019, XXXXX.
- QuickBooks Desktop 2019: 8019, XXXXX.
- QuickBooks Desktop 2018: 8019, 56728, 55378-55382.
- QuickBooks Desktop 2017: 8019, 56727, 55373-55377.
- After entering the port number, tap Next.
- Hit Allow the Connection and proceed with Next.
- If prompted, ensure that all profiles are marked. Click Next.
- Create a rule and name it, for example, “QBPorts(year).”
- Once completed, select Finish.
- Then, do everything by choosing Outbound Rules in Step 4.
QuickBooks takes the help of executable files (.exe) for various tasks. To create exceptions for each executable QB file, follow these steps:
- Open the Start menu in Windows.
- Type “Windows Firewall” into search and open Windows Firewall.
- Tap Advanced Settings.
- Right-click Inbound Rules (Create Outbound Rules later), then hit New Rule.
- Choose Program and proceed with Next.
- Choose This Program Path and hit Browse.
- Locate and select one of the executable files to create exceptions. Then proceed with Next.
- Tap Allow the Connection and proceed with Next.
- If prompted, ensure that all profiles are marked. Click Next.
- Create a rule and name it, such as “QBFirewallException(name.exe).”
- Repeat the above steps to create outbound rules.
Solution 6: Run QB Database Server Manager on the Server
You can get help for the unexpected error 5 in QuickBooks by running the QB Database Server Manager on the server:
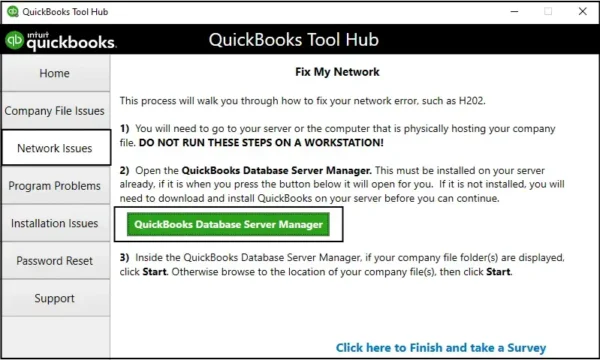
- Open QuickBooks Tool Hub.
- Choose Network Issues.
- Select QuickBooks Database Server Manager.
- Run this utility and see if your error goes away.
Solution 7: Change the Date Format
Change the date format when you get the error in Event Viewer and see if it resolves your crashing problem:
- Right-click the date and time at the bottom-right of the Taskbar and choose “Adjust date and time.”
- The Time and Language window will open up from where you will click “Language and Region.”
- Here, go to the Region section and tap the Change formats option.
- Now, alter your date, month, and year display format. If the date format is XXXXXXXX, change it to YYYYYYYY.
- Click Apply, then save and close the changes.
You can use it on your workstation if you are in a network environment.
Solution 8: Make Internet Explorer Your Default Browser
You may have to make Internet Explorer your default browser to resolve the QuickBooks error 5:
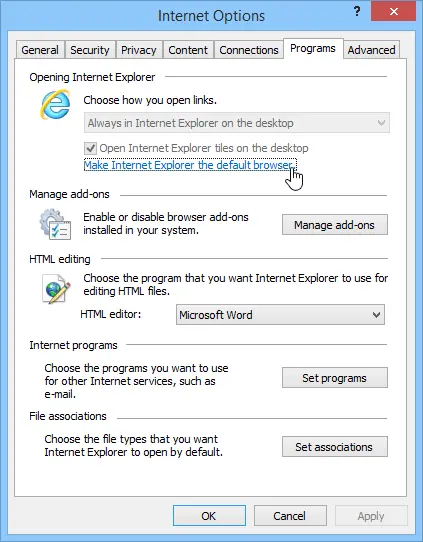
- Access Internet Explorer, tap the Tools option, and then hit Internet Options.
- Choose the Programs tab, then click Make Default.
- Tap OK, then close Internet Explorer.
Solution 9: Configure Internet Explorer and Add QB to Trusted Sites
Now, we’ll follow the steps to add QuickBooks to the Trusted Sites list in Internet Explorer:
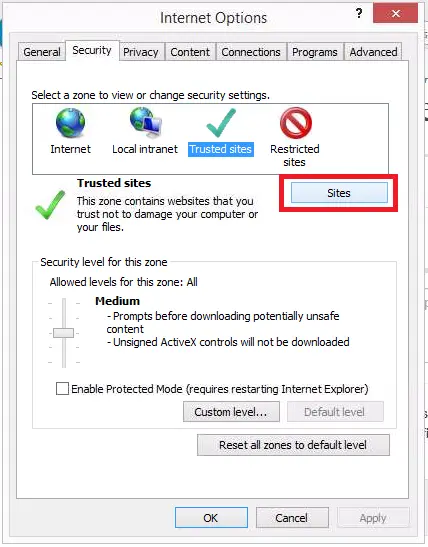
- Launch Internet Explorer.
- From the Command Bar, click on Tools.
- Navigate to Internet Options and then access the Security tab.
- Choose Trusted Sites and click on Sites.
- Input *.intuit.com and click on Add in the “Add this website to the zone” field.
- Within the Trusted Sites window, uncheck the option for Require server verification (https:) for all sites in this zone.
- Exit the Trusted Sites window and uncheck the Enable Protected Mode.
- Exit the browser.
Solution 10: Run Verify and Rebuild Data Utilities
Ensure to process your 1099 forms without the unexpected error 5 by running the Verify and Rebuild Data utilities:
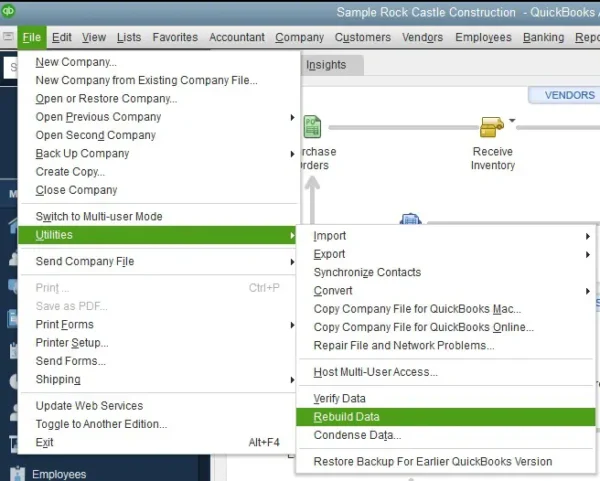
- Access File.
- Choose Utilities, then click Verify Data.
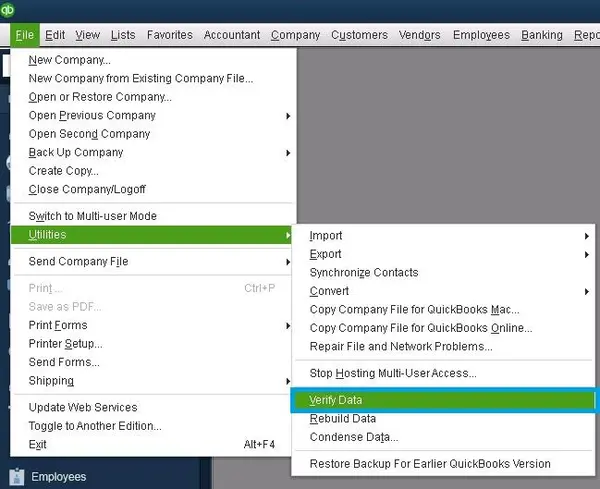
- Then, choose File, then go to Utilities, and hit Rebuild Data.
- A notification will appear, indicating the need to back up the file. Click OK.
- After receiving the message confirming the completion of the Rebuild process, click OK.
- Run the Verify Data tool to identify any remaining data damage errors. Select File, then Utilities, and hit Verify Data.
- Once the rebuild is over, click OK.
Conclusion
For any reason, if you are still struggling to get rid of the Unexpected Error 5 in QuickBooks, then we suggest you get in touch with us at 1.855.738.2784 for help. We use advanced tools and screen sharing that help us better recognize the root cause of the error to provide you with an instant resolution of the problem in the shortest time possible.
FAQ’s
Which QuickBooks editions and operating systems get QuickBooks unexpected error 5?
The QB editions you may get the unexpected error 5 in are as follows:
QB Pro 2018
QuickBooks Desktop 2022
QuickBooks Enterprise 2022
QuickBooks Pro 2020
Windows 10 Pro
QB Pro 2021
QB Pro 2022
What are the different instances where QuickBooks unexpected error 5 arises?
The various instances of QB unexpected error 5 are as follows:
A sudden unrecoverable error may appear in the event log when you can’t access your company file.
The Event Viewer log may catch these issues before the crash in QB occurs.
While trying to backup company files automatically on close, it may crash after 15% or so, and the error arises in the Event Viewer.
You may face problems with PDF printing and corruption when unexpected error 5 appears in the Event Viewer log.
If you have experienced issues before and resolved them, you might still get a couple of error messages related to unexpected error 5 (as mentioned in the blog). Although QB doesn’t crash, your Event Viewer may show these errors.
Your system might crash when you attempt a QB Login with this error in the Event Viewer.
The error may appear suddenly corresponding to an Optimizely script error on the page.
QuickBooks unexpected error 5 may emerge while using the 1099 wizard on a network environment.

Edward Martin is a Technical Content Writer for our leading Accounting firm. He has over 10 years of experience in QuickBooks and Xero. He has also worked with Sage, FreshBooks, and many other software platforms. Edward’s passion for clarity, accuracy, and innovation is evident in his writing. He is well versed in how to simplify complex technical concepts and turn them into easy-to-understand content for our readers.