Last Updated on March 10, 2025
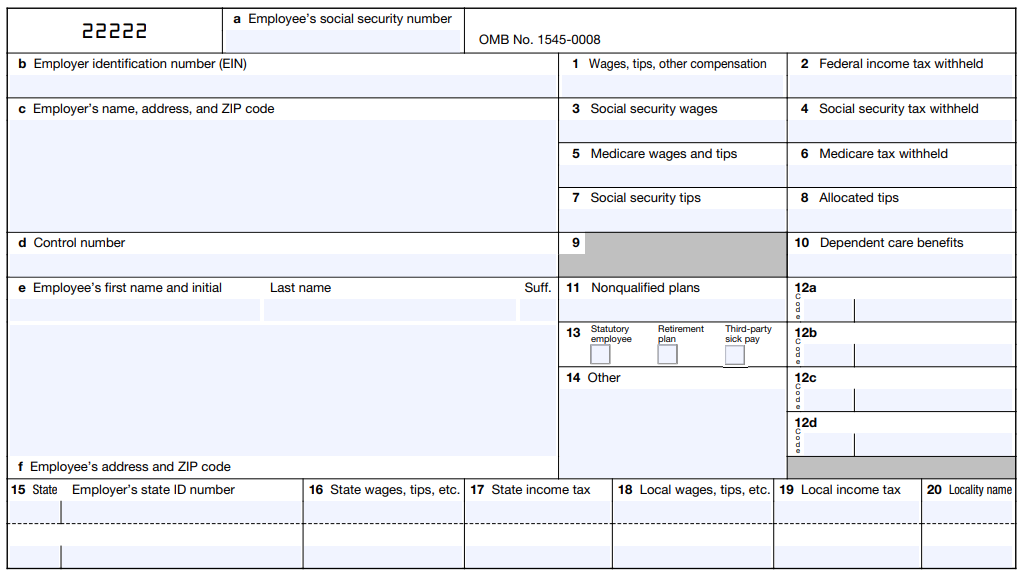
Employers are required to efile W2 and W3 before the end of the tax year, usually before 31 January. Both of these forms are filed with the Social Security Administration (SSA) to report employees’ annual income and the amount of various taxes paid by employees, such as Social Security taxes, State income tax, Medicare tax, and Federal taxes. The information on these forms must be filled out very carefully, as once you submit them, the IRS will match the information on the forms with your income and taxes. If you are an active user of QuickBooks Full Service payroll, then the service will automatically calculate all the taxes and file them for you on your behalf, whereas QuickBooks Enhanced Payroll users need to fill and submit the forms manually.
You can follow the steps in this guide to efile W2 and W3 forms in QuickBooks. However, if you don’t want to e-file your forms yourself or want to file them manually, you can contact our Accounting Helpline’s support team at 1.855.738.2784 for quick assistance.
User Requirements to efile W2 and W3 in QuickBooks Desktop Payroll
Before we learn how to efile W2 and W3 forms, you must fulfill the following requirements –
- You must be subscribed to QuickBooks Enhanced payroll services.
- QuickBooks Desktop application installed on your computer.
- An active internet connection.
- QuickBooks Desktop application and Payroll Tax Tables must be updated with the latest updates.
Steps to Create and eFile W2 and W3 forms in QuickBooks Desktop
If in case the limitations are exceeded while you efile W2 and W3 forms, you might get errors. You can also view these errors in detail by selecting the View Errors option, and once the errors are fixed, you can send the form by clicking the Submit Form button.
QuickBooks payroll service can only process payroll if the total amount paid to your employees is less than or equal to $9,999,999.99 and the number of employees is equal to or less than 800. You can read our blog on how to reprint W2s for your employees if you get a reprinting request. If you get any error, then we suggest you call Accounting Helpline’s Payroll Support Number 1.855.738.2784 for troubleshooting help.

To create and efile W2 form in QuickBooks Desktop, follow the steps as per your payroll version in the following manner –
QuickBooks Desktop Payroll Assisted
If you use QuickBooks Desktop Payroll Assisted, Intuit will file the W2s for you. You can print the copies for yourself or to send them to the employees (fees apply).
QuickBooks Desktop Payroll Enhanced
If you are a QuickBooks Desktop Payroll Enhanced user, follow the steps given below to e-file the W2s to the SSA –
Step 1 – Setup your W2 E-Filing
The first step is to set your W2 e-filing by using the steps below –

- Open QuickBooks, select Employees, then click Payroll Center and open the QuickBooks Desktop Payroll Setup.
- Go to the Payroll Center, move to the File Forms tab, and open the Other Activities list at the bottom corner.
- Select Change Filing Method, click Continue, and select Federal Form W-2/W-3 from the list of forms.
- Now, select Edit, click E-file, and click Finish.
- Once the enrollment instructions appear, read them, then close the View Enrollments window and select Finish Later.
Step 2 – Create the W2 Forms
Now, you can create the W2 forms by using the detailed steps below –

- Select Employees, click Payroll Tax Forms and W-2s, and select the Process Payroll Forms option.
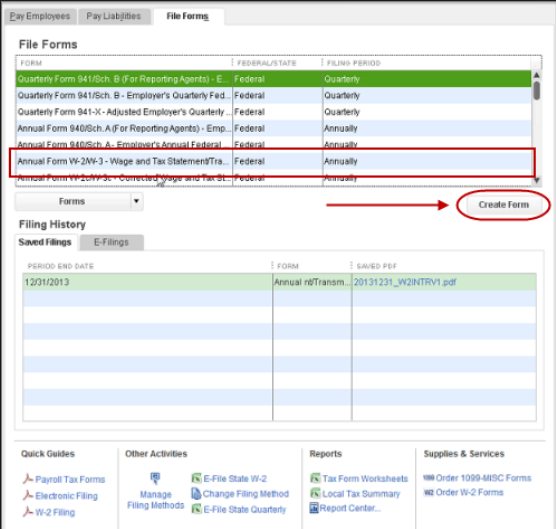
- Now, open the File Forms section, choose Annual Form W-2/W-3 – Wage and Tax Statement/Transmittal, and select the Create Form option.
Step 3 – Send the W2 Forms
The next step is to send the W2 forms electronically in the following manner –
- Open the Process W-2s section, select All Employees to file by batch, and open the Select Filing Period section.
- Enter the year of the form you’re filing, select OK, and open the Select Employees for Form W-2/W-3 window.
- Select the employees or select Mark All to select all employees displayed, and click E-File Federal Forms.
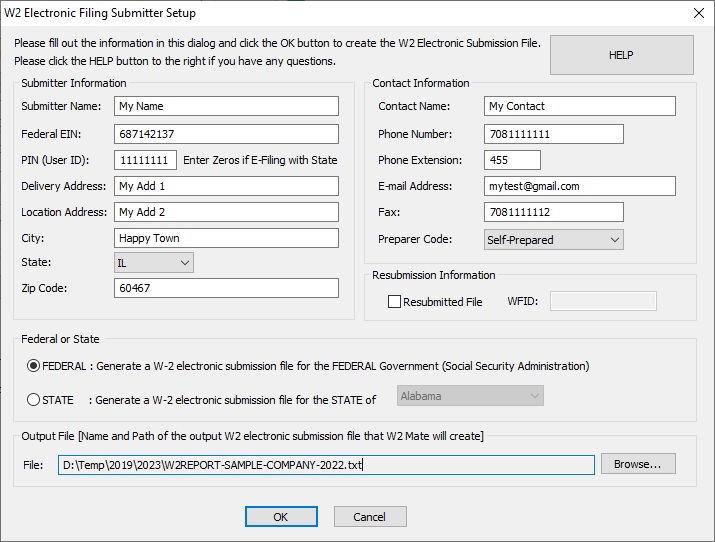
- Finally, enter your business phone number and email address, and select Submit.
Once done, you can print the W2 forms from QBDT and send them to the employees by January 31st. You can upload the W2s so your employees can view them in QuickBooks Workforce.
QuickBooks Desktop Payroll Standard or Basic
If you use QuickBooks Desktop Payroll Standard or Basic version, you need to file the W2 forms manually by January 31st.
Steps to File Your W2s Electronically in QuickBooks Online
Depending on your payroll tax setup, you can e-file your W2s in QuickBooks Online as follows –
- If you’ve set QuickBooks to pay your taxes and file your forms automatically, Intuit will file the W-2s for you and send copies to your employees.
- If you’re set up to pay and file electronically via QuickBooks, perform the steps below to e-file your W-2 forms.
- Suppose you opted to pay and file with the agencies yourself, e-file your W-2s by implementing the steps below. You can’t print the employer copies from QuickBooks, but you can print the copies and send them to your employees.
Steps to E-File your W2s in QBO
To file your W2s electronically in QuickBooks Online, perform the steps given below –
- Sign in to your QuickBooks Online account, click Taxes, and select the Payroll Tax option.
- Select Filings, then from W-2 Copies A & D (employer), select File, and click Annual Forms.
- Select W-2 Copies A & D (employer), click Continue, and if prompted, tell us whether the employees participated in a retirement plan during the tax year.
- On the Employer Copies: Form W-2 page, and click View to open the Acrobat Reader app.
- Review and print Copy D (Employer’s copy) for your records, then select Submit to authorize us to file Copy A of Form W-2 electronically.
- Once we’ve processed your W-2 filing, you will receive an email confirming the success.
- You can also check the status of your filing on the status page in the following manner –
- Select Taxes, click Payroll tax, then select Payroll forms or filings, and click W-2.
Once done, you can print your W-2s and send them to the employees by January 31st. Alternatively, your employees can also view their W-2s online in the QuickBooks Workforce portal.
Practical Steps to Fill Out Your W3 Form
If you want to fill out your W3 form, you must get a report that helps you fill out the form as follows –
QuickBooks Online Payroll
- Select Business Overview, then Reports, and open the Find report by clicking the name dropdown.
- Enter Payroll Tax and Wage Summary, then change the date range to This Year, and click Apply.
- Now, select the Share dropdown and select whether to save or print your report.
QuickBooks Desktop Payroll
- Firstly, go to the Reports menu, click Employees & Payroll, and select Payroll Summary.
- Further, ensure your date range spans an entire calendar year, and select Print.
Conclusion
By following the steps in this detailed guide, you will be able to efile W2 and W3 forms with SSA using QuickBooks. If you plan to manually file the form and taxes using the QuickBooks payroll service, carefully examine all the information to avoid mistakes and IRS penalties. If you face problems while performing the steps in this blog or are unable to e-file the forms, you might require expert assistance. You can contact our Accounting Helpline’s professional team at 1.855.738.2784 to get immediate help with the form filing.
FAQs
What are W2 and W3 forms used for?
W3 is a tax form used by employers to report combined employee income to the Internal Revenue Service (IRS) and the Social Security Administration (SSA). It needs to be filed for wages paid to employees from whom income, Social Security, and Medicare taxes were withheld.
W2 is sent to Social Security along with a W3 (Transmittal of Income and Tax Statements). While W2 shows employee’s total wages and taxes withheld, the W3 form summarizes the information from all the W2s that the employer has issues to the employee.
How can I print and efile W2 and W3s in QuickBooks?
To print your W2 and W3 forms in QuickBooks, use the following steps:
If you have the automated taxes and forms on:
– Firstly, click Taxes, then select Payroll Tax, and click the Filings option.
– Select to print the copies for W2 and W3 for both employer and employee, then click View or Manage.
– You can view/manage any of these forms – W2 copies A & D, copies B, C & 2, and W3 Transmittal of Wage and Tax Statements.
If you have the automated taxes and forms off:
– Select Taxes, click Payroll Tax, then select Filings and choose Resources.
– Click W-2s and select View on W-2, Copies A & D (employer), or W-3 Summary Transmittal of Wage and Tax Statements.
– To print your employee copies, W-2 Copies B, C, & 2 (employee), follow the steps below:
– Click Edit Box 12/13 to report company-paid group health insurance amounts or if you want to track a retirement plan outside QuickBooks.
– Select Manage W-2s.
– Review your W-2 print setting and edit if you need to change your paper type.
– Review your employees who need a printed W-2 and those who want a paperless W-2, then select View and Print.
– Select the print icon on the Adobe Reader toolbar, and select Print again.
When should you file the W3 form with the SSA?
Filing form W3 depends on how your W2s are filed with the SSA, and you can consider the following before filing W3:
– If you mail the W2 copy A to the SSA, file Form W3 along with it. Select “Get a report that shows my W-3 info” to see the details and complete Form W3.
– You don’t need to file Form W3 if Intuit files your W2s for you or you e-file them with our payroll services.
How can I correct a rejected e-file W2 form?
On the E-filing Rejected window, view the solution messages sent by the agency to correct the e-file form. You can also follow the steps below to fix the rejected form:
– Click Employees, choose Payroll Center, and go to the File Forms tab.
– In the Filing History section, click the E-Filing tab and select the Agency Rejected link.

Edward Martin is a Technical Content Writer for our leading Accounting firm. He has over 10 years of experience in QuickBooks and Xero. He has also worked with Sage, FreshBooks, and many other software platforms. Edward’s passion for clarity, accuracy, and innovation is evident in his writing. He is well versed in how to simplify complex technical concepts and turn them into easy-to-understand content for our readers.

