
Last Updated on April 16, 2026
QuickBooks Error 12007 is a common error that occurs while downloading QuickBooks Desktop or payroll updates to access the new features, security enhancements, etc. This
update error usually emerges when something blocks the connection to the internet or messes with these settings. You may also encounter this error in the File Doctor, leading to interruptions in the ongoing operations. Since you can’t finish the tasks you were working on, finding an effective fix for the error becomes crucial. So, let’s dive into the reasons and fixes for QuickBooks error 12007 in this comprehensive guide by experts.
Is it becoming challenging to resolve QuickBooks error 12007? Dial our Accounting Helpline toll-free number 1.855.738.2784 and let them resolve the problem. Their proficiency and dedication will fix the issue in no time.
What is QuickBooks Update Error 12007
QuickBooks update error 12007 appears with the following message in the popup:
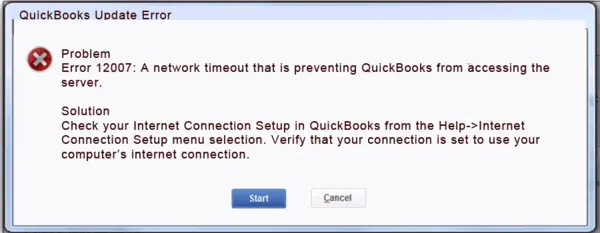
“QuickBooks Update Error
Problem
Error 12007: A network timeout that is preventing QuickBooks from accessing the server.
Solution
Check your Internet Connection Setup in QuickBooks from the Help -> Internet Connection Setup menu selection. Verify that your connection is set to use your computer’s internet connection.
<Start> <Cancel?>”
Since you can’t get the latest security patches and features via the updates and cannot continue activities on QuickBooks, you need to understand why your connection gets blocked to the internet and prevents updates from finishing successfully.
Reasons for QuickBooks Desktop Error 12007
Here are the primary reasons behind Error 12007 in QuickBooks:
- QuickBooks encounters difficulties connecting to the internet, resulting in update download errors.
- The Desktop faces challenges in establishing a connection for QuickBooks.
- Incorrect firewall or internet security configurations may block the program’s access to the server.
- Misconfigured Internet Explorer settings can trigger the QuickBooks error 12007.
- Incorrect SSL settings can contribute to the occurrence of QuickBooks Error Code 12007.
- If you don’t have Internet Explorer as your default browser, you may get the code 12007.
- If you use discontinued or outdated QB versions, you’ll get the error 12007 in QuickBooks.
- Third-party interferences can trigger the 12007 problem in QuickBooks.
- Installation problems in QuickBooks might need repair to ensure the performance doesn’t get disrupted.
Solutions for Error 12007 in QuickBooks Desktop
Here are the best solutions that work well in fixing the Error 12007 in QuickBooks Desktop:
Fix 1: Assess Connectivity & Internet Settings
The first solution to try when you get the error code 12007 in QuickBooks is to verify your connectivity settings. Here are the actions you are supposed to take:
Part 1: Choose Internet Explorer to be Your Default Browser
QuickBooks and Internet Explorer work hand-in-hand for various functionalities. Therefore, it is crucial to set IE as the default browser; otherwise, program malfunctions may occur. Here are the steps to ensure IE is set as the default browser for the QB program:
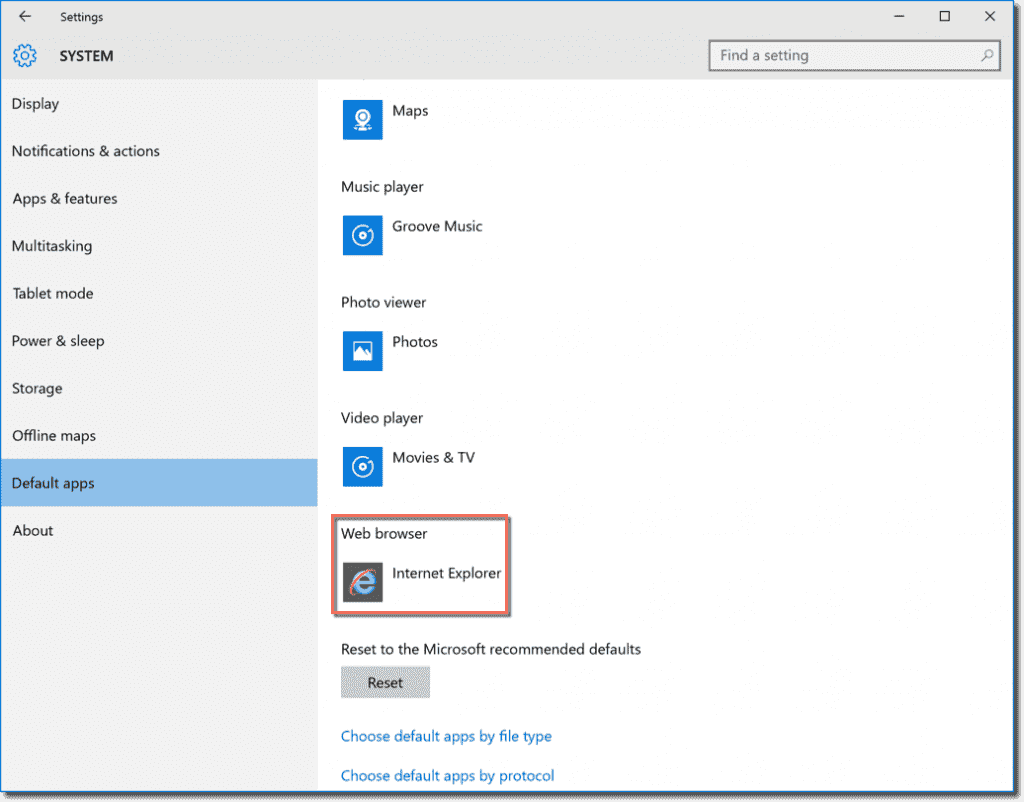
- Launch Internet Explorer and access the screen’s top-right corner.
- Click on the Tools icon and move forward with Internet Options from the drop-down list.
- Tap the Programs tab and navigate to the Default Web Browser section.
- Hit the Make Default button and then click OK.
- Reopen your browser and check QuickBooks to see if error 12007 has been resolved.
If the error 12007 persists, proceed to the next part.
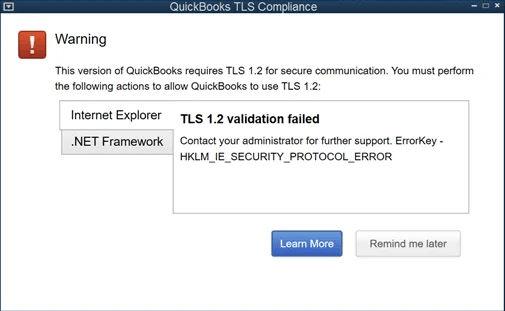
Part 2: Use The TLS 1.2 Utility
The TLS 1.2 utility within the Tool Hub assists users in updating their system to become TLS 1.2 compliant. This readiness tool ensures that your operating system, .NET Framework, and Internet Explorer settings align with the necessary standards, enabling you to run QuickBooks securely. Follow these steps to get help from the TLS 1.2 Readiness tool:
- Close QuickBooks.
- Download the latest version of QuickBooks Tool Hub by browsing the Intuit website.

- Save the file to a convenient location for quick installation.
- Once saved, double-click QuickBooksToolHub.exe to install it.
- Follow the InstallShield instructions and respond to the QuickBooks Tool Hub license agreement.
- After successful installation, open the tool hub using the desktop icon.
- Navigate to the Installation Issues tab after launching the QB Tool Hub.
- Locate and run the QuickBooks TLS 1.2 tool at the bottom right corner of the Tool Hub window.
- Select OK to access the TLS tool, then agree to the EULA Agreement by clicking Yes.
- Click Run.
- Once the TLS 1.2 tool completes its process, click Exit.
Part 3: Access Websites Outside QB Desktop
Attempt to access the secure website of your bank or financial institution directly without using QuickBooks. It will help determine the origin of the error 12007 in QuickBooks:
- Access your default browser and input the URL for your bank’s sign-in page.
- Check if you can successfully open the link or encounter any errors.
- If you face difficulties accessing secure websites outside of QuickBooks, consider seeking assistance from a computer or IT expert.
Fix 2: Verify The Internet Explorer Settings
Issues like QuickBooks file system error 12007 in Windows 10, which is related to downloading updates in QuickBooks Desktop, can occur due to Internet Explorer settings. You should review and adjust these settings following the steps mentioned below:
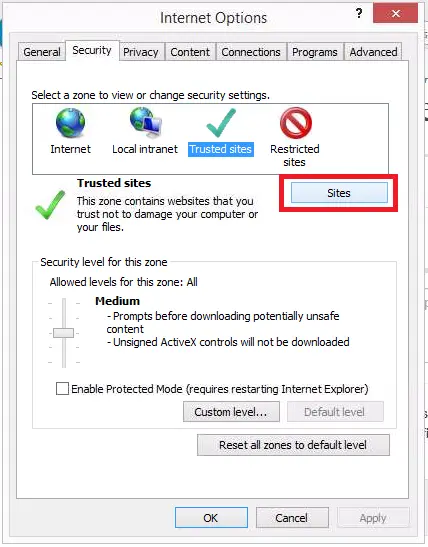
- Close the QuickBooks Desktop program, causing issues in updating. Launch Internet Explorer.
- Select Tools, then Internet Options.
Note: If you can’t locate Tools, press the Alt key. - Access the Security tab, click on the Globe icon, and ensure that you set the security level to no higher than medium-high.
- Hit the Connections tab. Choose the Never Dial a Connection option if you don’t use a dial-up node (DUN). If you use it, tap the appropriate ISP.
- Click OK.
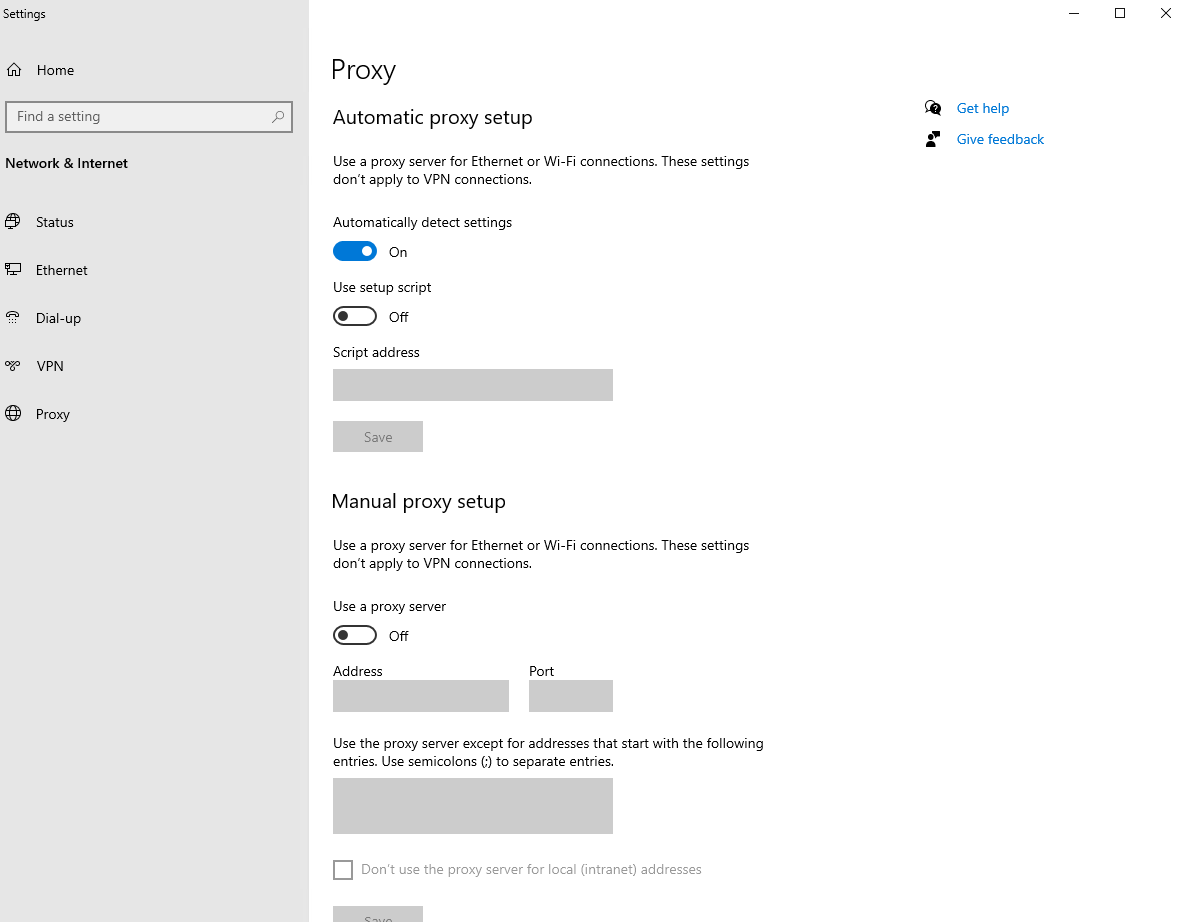
- Go to LAN Settings, confirm that “Automatically detect settings” is selected, and make sure that you remove the tick against the “Use a Proxy Server” checkbox.

- If you tap “Use a Proxy Server,” ensure to document the complete address and port. If the port is not 80, do not remove the tick against the “Use a Proxy Server” option. If the port is 80, you can clear the checkbox for the purpose of testing.
- Click OK.
- Get to the Advanced tab and select “Restore Advanced Settings.” Under Settings, access “Use TLS 1.2” and verify that it is selected.
Note: These options may not be present in all Internet Explorer versions. - Click OK.
- Close Internet Explorer and restart the PC.
- Open QuickBooks Desktop and attempt the update again to ensure no errors remain.
Fix 3: Access the Security Settings
When the above solutions don’t help in fixing the QuickBooks desktop error 12007, try to assess if another application or process is blocking the download. This process involves configuring the firewall, Internet security, parental control applications, etc., for QB Desktop updates, tax table updates, Windows firewall, and sending payroll data.
Step 1: Run QuickBooks File Doctor
Repair common errors and network problems with QuickBooks File Doctor. It will verify problems that occur in QuickBooks while establishing a connection to the internet:

- Open QuickBooks Tool Hub.
- Choose Company File Issues from the QuickBooks tool hub list.
- Start the QuickBooks File Doctor by selecting Run QuickBooks File Doctor. It may take up to a minute for the file doctor to launch.
Note: If the QuickBooks File Doctor doesn’t open, you need to search for QuickBooks Desktop File Doc and open it manually. - When you get to the QuickBooks File Doctor, choose your company file from the dropdown list. If your file isn’t visible on the list, select Browse and locate your file.
- Choose the Check your file and network option, then proceed with Continue.
- Enter your QuickBooks admin password to begin the File Doctor scan and select Next.
Step 2: Set Firewall Port Exceptions for QuickBooks Manually
Setting things manually by adding firewall port exceptions for QuickBooks can help remove the interferences interrupting connection to the internet:
- Click the Windows icon and R keys together to access the Run window.
- Type “Windows Firewall” when you search in the run window and click OK.
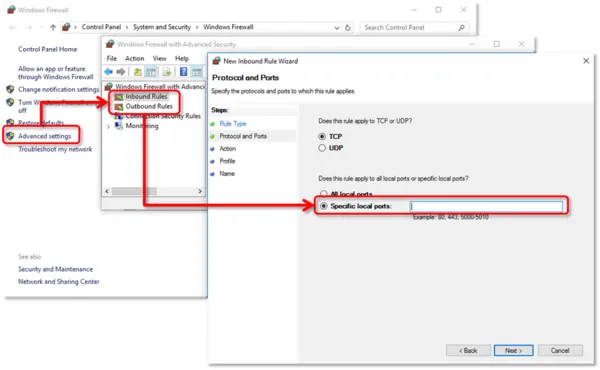
- Select Advanced Settings from the left menu in the subsequent window.
- Navigate to Inbound Rules, right-click, and choose New Rule.
- Click the Port button and proceed with Next, ensuring TCP is pre-selected.
- In the Specific local ports section, input the port numbers for your QuickBooks version. For multiple versions, apply the procedure for each:
- QuickBooks Desktop 2020 and after: 8019, XXXXX.
- QB Desktop 2019: 8019, XXXXX.
- QuickBooks Desktop 2018: 8019, 56728, 55378-55382.
- QB Desktop 2017: 8019, 56727, 55373-55377.
- Select Allow the Connection. Press Next.
- Choose all the profiles to mark, and click Next.
- Create the “QBPorts(year)” named rule.
- Click Finish and repeat the process to create an Outbound Rule.
- Access QuickBooks and your file.
Step 3: Create Windows Firewall Exceptions for All QB Programs
Since QB uses executable files that help perform a number of tasks, create port exceptions for each of QB executable files as follows:
- Open the Start menu.
- Type “Windows Firewall” when you search in the Start window and click OK.
- Choose Advanced Settings.
- Right-click Inbound Rules (Outbound Rules later) and select New Rule.
- Select Program, then Next.
- Hit This Program Path and click Browse.
- Locate and click one of the executable files from the provided table. Then click Next.
- Select Allow the Connection and Next.
- If prompted, choose all the profiles to mark and click Next.
- Create a “QBFirewallException(name.exe)“- named rule.
Repeat the steps to create outbound rules by using the same procedure above. Just select Outbound Rules in step 4.
Executable files | Location |
AutoBackupExe.exe | C:\Program Files\Intuit\QUICKBOOKS YEAR |
DBManagerExe.exe | C:\Program Files\Intuit\QUICKBOOKS YEAR |
QuickBooksMessaging.exe | C:\Program Files\Intuit\QUICKBOOKS YEAR |
C:\Program Files\Intuit\QUICKBOOKS YEAR | |
FileMovementExe.exe | C:\Program Files\Intuit\QUICKBOOKS YEAR |
QBServerUtilityMgr.exe | C:\Program Files\Common Files\Intuit\QuickBooks |
C:\Program Files\Common Files\Intuit\QuickBooks | |
QBUpdate.exe | C:\Program Files\Common Files\Intuit\QuickBooks\QBUpdate |
IntuitSyncManager.exe | C:\Program Files\Common Files\Intuit\Sync |
OnlineBackup.exe | C:\Program Files\QuickBooks Online Backup |
QBLaunch.exe | C:\Program Files\Common Files\Intuit\QuickBooks |
FileManagement.exe | C:\Program Files\Intuit\QUICKBOOKS YEAR |
DBmlsync.exe | C:\Program Files\Intuit\QUICKBOOKS YEAR |
Note: Seeing Program Files (x86) means you’re using a 64-bit operating system.
Now, access QB Desktop and turn to multi-user mode to verify any errors. Also, try updating the app.
Step 4: Verify Antivirus Settings & Permissions
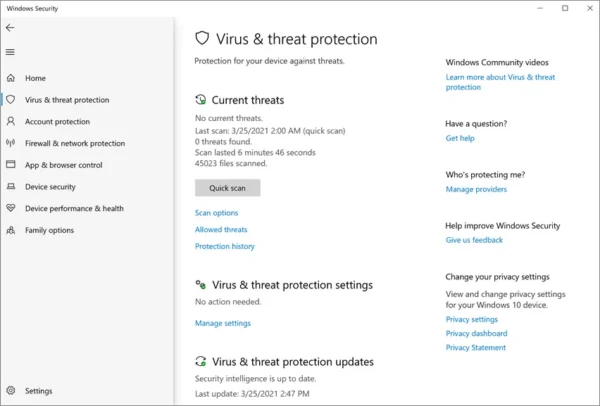
Look into your antivirus settings and ensure they don’t block QuickBooks programs and processes. If they do, follow the steps for your respective antivirus and unblock QuickBooks. You can also add QB port exceptions on your antivirus through the process in Steps 2 and 3.
Step 5: Reboot Your System
Restart your computer and ensure errors like 12007 do not appear due to firewall or antivirus settings.
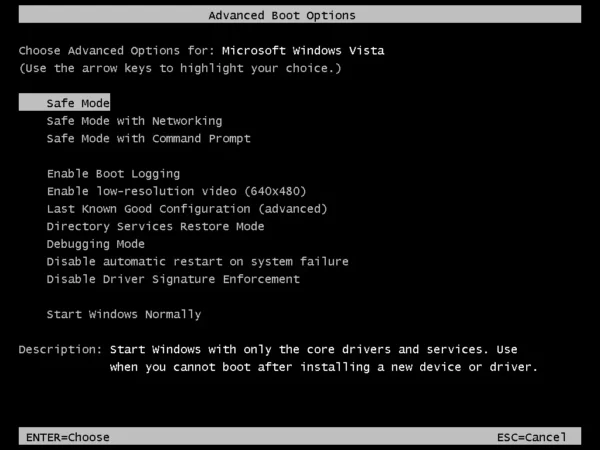
Fix 4: Start Your PC in Safe Mode with Networking
If previous solutions fail to resolve the issue, follow these steps to initiate Windows in safe mode with networking and proceed with the update:
- Press the Windows logo key + I for Settings to open. If unsuccessful, click the Start button, then navigate to Settings.
- Access System > Recovery.
- Tap the “Restart now” option in the Recovery Settings section next to Advanced Startup.
- After your PC reboots and gets to the “Choose an option” screen, follow this path: Troubleshoot > Advanced options > Startup Settings > Restart. You may get asked to enter your BitLocker recovery key.
- Once you reboot your PC, a list of options will appear. Click Option 4 or press the F4 key to initiate your PC in Safe Mode. Alternatively, select option 5 or press F5 for Safe Mode with Networking if you require internet access, especially for updates.
- Update QuickBooks and check if the error 12007 persists as follows:
- Tap Help.
- Choose Update QuickBooks Desktop.
- Click Update Now.
- Hit Get Updates.
Now, to get out of safe mode, do the following:
- Tap Windows + R.
- Input msconfig > OK.
- Choose the Boot tab.
- Remove the tick with the Safe Boot option under Boot Options.
Fix 5: Reset QuickBooks Desktop Update
Switch your QuickBooks Desktop to single-user mode from the File menu, then undertake the steps to reset the QuickBooks Desktop update. It will help you download and install an update that doesn’t face any glitches. Here’s how resetting the QuickBooks Desktop update is possible:
- Open your company files and QuickBooks.
- Click the Start menu.
- Scroll/ Search and locate QuickBooks Desktop, right-click, and tap Run as administrator.
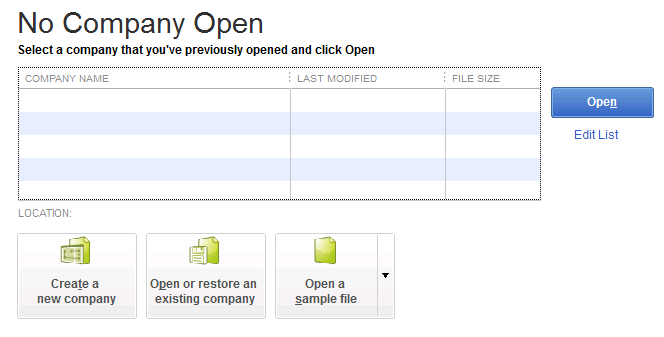
- On the No Company Open screen, tap the Help menu and select Update QuickBooks Desktop.

- Move to the Options tab, hit Mark All, and then tap Save.
- Navigate to the Update Now section and click to tick the Reset Update checkbox.
- Click Get Updates when you’re prepared to receive them.
- After completing the update, close and reopen QuickBooks. Confirm Yes to start installing the updates.
- Restart your system after you complete the installation.
Download the Update Patch Directly from the Internet
If the QuickBooks error 12007 continues, you have the option to directly download the update patch from the website and then apply it within QuickBooks through the steps below:
- Visit the QuickBooks Desktop downloads website to avail of the updates.
- On the Downloads & Updates page, clarify by choosing your QuickBooks Country, Product, and version.
- Click the Search button.
- Choose the Get the latest updates link.
- Click the Save File button.
- Locate the downloaded file and run it, then install and ensure the 12007 error goes away.
Fix 6: Install QuickBooks Again in Selective Startup
Resolve QuickBooks error 12007 by moving to the Selective Startup mode. This process removes interruptions in the background that cause problems while downloading updates. Before initiating the selective startup process, ensure the following:
- Create a backup of your company file by navigating to the File menu > Back Up Company > Create Local Backup > Back up Now.
- Make a copy of the QuickBooks Desktop product and license information and store it safely.
Procedure 1: Turn to Selective Startup
Seek assistance from your computer’s manufacturer or a Windows expert if you encounter difficulties with the steps:
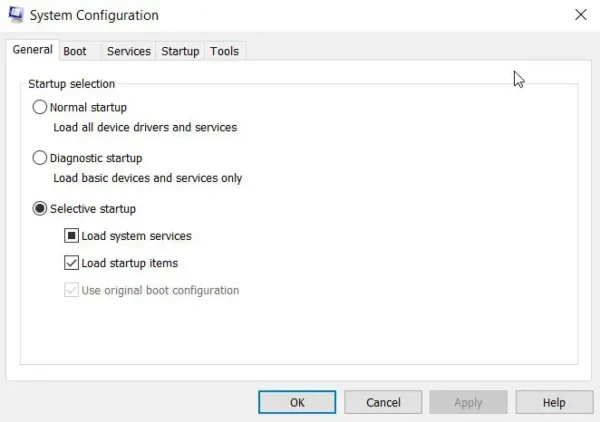
- Press Windows+R to get the Run dialog to open.
- Type msconfig in the Run box’s search field and click OK.
- Hit the options- Selective Startup and Load System Services in the General.
- Tap the Services tab and then Hide All Microsoft Services.
- Click Disable All.
- Uncheck the box- Hide All Microsoft Services.
- Scroll and tap the Windows Installer option from the services.
- Click OK.
- Reboot the PC via the System Configuration options.
Procedure 2: Uninstall QuickBooks Desktop
Remove QuickBooks Desktop in Selective Startup through the steps mentioned below:
- Access the Start menu, type “Control Panel” to search, and launch this window.
- Choose Program/Programs and Features/Uninstall a Program (the options may vary depending on the Windows OS version you have).
- Select the QuickBooks Desktop version you want to uninstall from your system by locating it in the list of programs.
- Choose Uninstall/Change, then select Remove and Next.
- If you can’t find the uninstall/change option, log out and log back into Windows as an administrator or a user with administrative privileges.
Procedure 3: Install QuickBooks Desktop
After deleting the program, reinstall a fresh package through the steps mentioned below:
- Ensure your computer meets all the required QuickBooks requirements.
- Download the QuickBooks Desktop version you require from official Intuit sources and save it in a convenient location, such as the desktop or downloads folder.
- Have your product and license numbers ready for reference.
- Initiate the installation process by launching the QuickBooks.exe file.
- Follow the on-screen instructions, agree to the license agreement, and move forward by clicking Next.
- Enter your product and license numbers in the specified fields, then click Next.
- Click either Express Install or Custom and Network Install, depending on your specific requirements.
- Complete the installation by following the prompts, ensuring a successful QuickBooks installation.
Procedure 4: Return to Normal Mode
After reinstalling QuickBooks Desktop, you can easily switch back to normal mode and resolve the error 12007:
- Press Windows+R to get the Run dialog to open.
- Type msconfig in the Run box’s search field and click OK.
- Choose Normal Startup, which is available in the General
- Click OK.
- Tap Restart on the System Configuration window to proceed.
Fix 7: Repair The QuickBooks Program
If you encounter program issues in QuickBooks Desktop, you can use the Repair tool in the Control Panel to effectively address them. Some update interruption errors like QuickBooks error 12007 may appear due to program framework problems, missing components, etc. So, we’ll use the repair option through the steps that appear after we create a backup of the company files. It’s advisable to create a backup of your company file to safeguard yourself against accidental data loss:
- Open the QuickBooks application to access the File menu. Choose “Switch to Single-user Mode.”
- Navigate back to the File menu, select “Back up Company,” and then click “Create Local Backup.”
- In the next window that pops up on the screen, choose “Local Backup” and hit “Next.”
- Hit “Browse” when you come to the “Local Backup Only” section and specify the location for saving your backup company file.
- Optionally, mark the desired number of backups to maintain.
Note: Use the options in the Online and Local Backup section to schedule backup reminders, removing the need for manual scheduling. - The system conducts a test to ensure your backup file isn’t corrupted before saving.
- When ready, click “OK.”
- Choose “Save it now” and the “Next” button.
- QuickBooks will create one backup of the company file, and upon completion, you’ll receive a confirmation message.
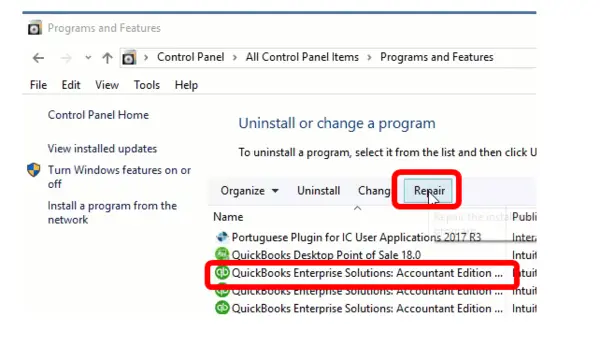
Now, let’s explore the steps that help use the Repair tool in the Control Panel:
- Restart the system and access the Start section in Windows.
- Locate the Control Panel either through the search field or by selecting it from the list.
- Click “Programs and Features” and then move to “Uninstall a Program.”
Note: If your system doesn’t have “Programs and Features,” select “Programs,” and then hit “Program and Features.” Alternatively, if you are in Category view, you can tap the “Uninstall a program” option directly. - From the list of installed programs on your computer, select QuickBooks and tap “Uninstall/Change.”
- Click “Continue” or “Next,” and then choose “Repair.”
- Press “Next” again and let the tool initiate its diagnostic process.
- Once the process is over, you can click “Finish.”
After you repair the QB program, run QuickBooks as an administrator by right-clicking and choosing the “Run as administrator“ option.
Fix 8: Repair QuickBooks through QB Tool Hub
You can also undertake a complete QuickBooks application repair through the tools available in QuickBooks Tool Hub. These utilities are available in different sections of the Tool Hub, which you can access as follows:
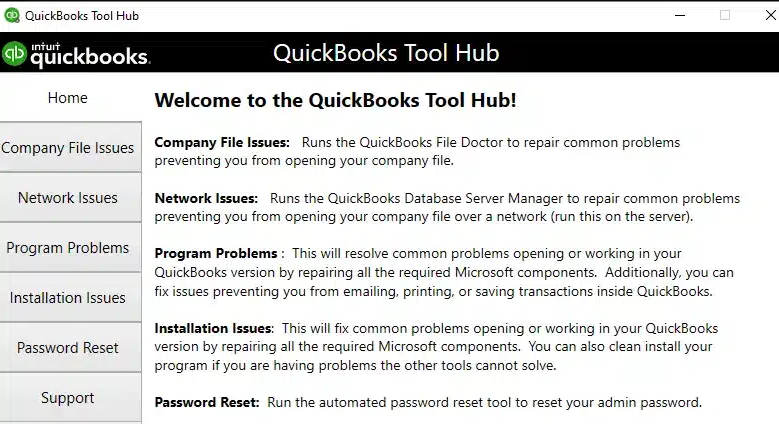
Quick Fix My Program
A mini-repair of the QB app to ensure it doesn’t cause performance issues can happen with QuickBooks Tool Hub as follows:
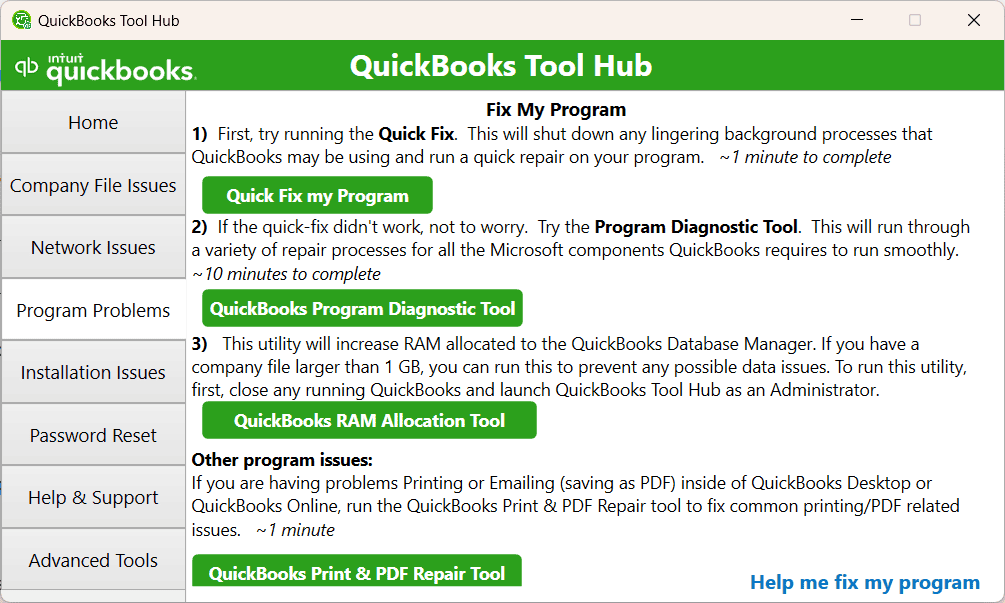
- Open QuickBooks Tool Hub.
- Select Program Problems.
- Click Quick Fix My Program.
- Access the QB app and your data file.
QuickBooks Install Diagnostic Tool
If issues arise due to problems during the QuickBooks installation, using the QuickBooks Install Diagnostic Tool can effectively handle common installation problems.
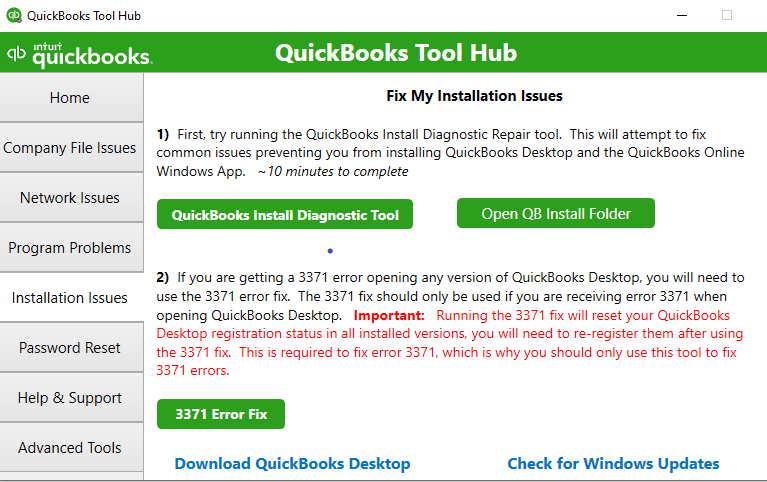
Follow these steps:
- Open the QuickBooks Tool Hub.
- Tap “Installation Issues.”
- Select “QuickBooks Install Diagnostic Tool” and let the tool run. This install diagnosis may take up to 20 minutes.
- After the tool completes its task, restart your computer and launch QuickBooks Desktop. Open your data file.
- Ensure your QuickBooks is updated to the latest release to get the most recent fixes and security updates in place.
Fix 9: Upgrade QuickBooks
Ensure you read the updated QuickBooks discontinuation policy. So that you do not use the versions discontinued by QB for long, as they can not be updated any longer. They may result in QuickBooks error 12007, so the only option is to upgrade them to the latest versions. Download the QuickBooks Desktop version by visiting the QBDT Downloads & Products page and answering the questions.
Summing Up
We hope our in-depth blog about QuickBooks error 12007 clarifies all your doubts regarding the error and helps you resolve it thoroughly. We have mentioned all the relevant reasons that can cause this error and working solutions that can give immediate results. However, if you find yourself stuck at any step or require an expert to take over the mess, call our Accounting Helpline specialists at 1.855.738.2784. Our dedicated experts will pick up your information securely and fix it as quickly as possible.
FAQs
What are the various instances where QuickBooks Desktop error 12007 arises?
Here are the different scenarios where you can notice QuickBooks update error 12007:
– The QuickBooks error message 12007 appears in File Doctor when you try updating the program, leading to the inability to print P60s.
– QuickBooks error 12007 appears in the File Doctor when you try fixing your Bills (paid bills appear under the unpaid category), throwing light on an incorrect QB update.
– The issue revolves around the inability to restore a backup from a company file on an older computer to a new Windows 10 computer with QuickBooks Pro 2009. During the restoration process, a hurdle arises at the Username/Password step, indicating a version mismatch where the software on the new computer is at R5 while the file being opened is at R14. Attempts to upgrade are restricted by multiple upgrade errors, specifically Error #12007, resulting in unsuccessful access to the data.
– While the automated reset password tool says the details don’t match, the update now command gives QuickBooks errors 12007 and 12029.
– The QuickBooks error 12007 in File Doctor might prevent migration from Desktop Pro 2021 Release R4P to QuickBooks Online.
– The program faces performance issues and then throws QuickBooks error 12007 on the screen.
Which QB and Windows versions face the error 12007 in QB?
The QuickBooks versions that may encounter the error 12007 in QuickBooks are as follows:
– QB 2019 is unable to upgrade to 2020 R6
– QB Online
– QB 2009 Pro R5 unable to upgrade to R14
– Windows 10
– QB 2008
– QB Desktop Pro 2021 Release R4P
– QB Premier 2016
– Windows 7
How can I print my P60 forms if I get the error 12007 in QB Desktop?
Suppose you want to print the P60 forms but can’t due to the 12007 error in QB. In such cases, ensure you review these forms and set their alignment correctly. You can avoid wasting preprinting forms by checking the alignment option:
– Prior to printing on preprinted forms, print a duplicate on plain paper.
– Compare the printout with a preprinted form by holding it up to the light to verify alignment.
– If any issues are detected, you can make the necessary adjustments.
What do I do about the error 12007 accompanying the slow working of the QB application?
If your QB program runs slow, you have tried condensing your company file, and the update process throws the QuickBooks error 12007 on the screen, understand the following:
Root Cause:
The problem observed on Win7 Virtual Desktop Infrastructure may stem from the network hardware device connected to the machine. If the network device does not support TCP/IP scaling, it can result in sluggish performance.
Solution:
To address this issue, disable the auto-tuning level of TCP. Follow these steps:
– Open Command Prompt with administrative rights (Run as Admin).
– Input “netsh interface tcp set global autotuninglevel=disabled” into the command prompt.
– After executing the command, restart the machine.
How do I fix the error code 12007 in QB?
The error 12007 in QuickBooks Desktop can be resolved through the list of solutions below:
– Ensure Internet Explorer is your default browser.
– Use these Tool Hub utilities:
QuickBooks TLS 1.2 Readiness tool for proper security settings and compliance
QuickBooks File Doctor for network and file issues.
QuickBooks Install Diagnostic Tool for installation glitches.
Quick Fix My Program for problems with the program’s running.
– Look into Internet Explorer’s settings.
– Add QuickBooks Ports to the exceptions list of the firewall and antivirus system.
– Install QB in Safe Mode.
– Reinstall QB in Selective Startup.
– Repair the program through the Control Panel.
– Upgrade QB if it is discontinued.
– Reset the QB Desktop updates.
– Download QuickBooks Desktop updates from the internet directly.

Edward Martin is a Technical Content Writer for our leading Accounting firm. He has over 10 years of experience in QuickBooks and Xero. He has also worked with Sage, FreshBooks, and many other software platforms. Edward’s passion for clarity, accuracy, and innovation is evident in his writing. He is well versed in how to simplify complex technical concepts and turn them into easy-to-understand content for our readers.