
Last Updated on April 20, 2026
QuickBooks hosting mode is off issue can annoy a user considerably when trying to access this feature. Look into what you can do to fix this issue effectively. Also, understand the reasons why it occurs so you can avoid it in the future.
The Hosting feature in QuickBooks allows other devices, known as workstations, to access and operate the files that are stored on the host computer, which holds the company file. But, in some cases, if this feature is disabled or incorrectly set up, it results in the “Hosting Mode is Off QuickBooks” error. There can be various factors that can disable the hosting mode, like a misconfiguration in the system settings, a backend coding glitch, etc. In this blog, we will focus on sharing with you a detailed guide on how you can undo this error, along with other triggers and preliminary checks that you must keep in mind.
We understand if you do not wish to handle sensitive issues on your own. Get in touch with our Accounting Helpline advisors and resolve this issue within a few minutes. Contact us at 1.855.738.2784.
What is the QuickBooks Stop Hosting Multi-User Access Error?
The multi-user access option allows QuickBooks users to access the company file located on another server. However, the QuickBooks stop hosting multi-user access error can prevent this from happening, hampering the software performance. Various triggers can be behind this issue. The multi-user mode might not get installed properly, or the QB server mode might have some issues. These issues result in challenges in accessing QuickBooks in the multi-user mode.
This error prompts users to think about how to turn on hosting mode in QuickBooks. So, let’s look into the causes of the disabled hosting mode and its resolution.
Why QuickBooks Hosting Mode is Disabled?
The following reasons explain in detail why QuickBooks Pro hosting multi-user gets disabled:
- The Hosting settings are incorrectly set up.
- Insufficient Windows file permissions to QuickBooks.
- If QuickBooks is not installed or correctly installed on the host computer.
- The company file is out of access for the database server.
- The system’s firewall or anti-virus programs prohibit QuickBooks activities.
- QuickBooks hosting multi-user access might not be able to find the IP address for the system.
- A damaged.ND file may cause this issue.
- QuickBooks Database Server Manager might not be installed on the system.
- The QuickBooks DBXX service hasn’t started, leading to the error.
- Invalid entries in the Windows registry due to unsuccessful installation or modifications in the software can lead to problems in hosting multi-user access QuickBooks.
- The system shut-down was improper due to sudden power failure or some other reasons.
- Accidental deletion of essential files in the system can attract this annoying error.
Based on these causes, let’s now dig into the solutions to fix this error and turn on the hosting mode for QuickBooks.
Pre-requisites to Make the Hosting Mode Work
Before we jump to the steps that will help you get back to working in the hosting mode, ensure that your computers fulfill the following conditions-
- The systems are well configured for the multi-user mode.
- The QuickBooks company file is stored in a shared folder.
- The host computer has a network drive to access all workstations easily.
- Download the QuickBooks Database server manager of the same version as that of your QuickBooks.
What should you do when QuickBooks Desktop Hosting Mode is off?
Configuring the “QuickBooks Multi-User Hosting Not Working” error is a lengthy process. However, if you follow all the steps correctly, this error will go away permanently-
Step 1 – Check the QuickBooks Server Settings for Multi-User
Begin by verifying the multi-user settings in QuickBooks as follows:
- Sign in to your device using your Admin login credentials.
- Test the speed of your internet connection.
- Access QuickBooks.
- Tap on the File tab.
- Press the “Switch to Multi-User Mode” option.
- If the system prompts a permission box, click on Yes.
- Hit the OK button in the Multi-User window.
- Click on the Company tab.
- Press the Set up Users & Passwords option.
- Move to Set up Users.
- You need to click on the Add Users button to add all the users who will access QuickBooks.
Step 2- Enable the Network Discovery
Ensure your server and workstations are on the network as follows:
- Press the Windows icon.
- In the search bar, type Control Panel.
- Click twice on the Control Panel tab.
- Tap on Network Sharing Center.
- Select Change Advanced Sharing Setting.
- Zoom the profile in use.
- Move to the Network Discovery section
- Press the Turn on Network Discovery option.
- Navigate to Password Protected Sharing.
- You need to disable this feature here.
- Tap on Save Changes.
- Repeat the steps on all devices.
Step 3- Access your Company File
Try accessing your company file to ensure it is not damaged:
- Click on the File tab.
- Press Open or Restore Company File.
- Look for the location of the file.
- Choose the file with the .QBW extension.
- Hit the Open button.
- Use your login details to authorize the action.
Step 4- Turn off the Hosting Feature on the Client Devices
Switch the hosting feature on the client system off as follows to stop hosting multi-user access:
- Access QuickBooks on the Client system.
- Go to the File menu.
- Select the Utilities option.
- If you see Host Multi-User Access, you can skip this computer.
- If Hosting Multi-User Access is displayed on the screen, you must turn it off by choosing the Stop Hosting
- Multi-User Access option.
- Repeat the steps on all Client Computers.
Step 5- Verify the efficient processing of QuickBooks services
See if all the QB services like QBDXX and QBCFMonitorServices are running efficiently as follows:
- Launch the Run window by pressing the Windows icon and R key on the keyboard simultaneously.
- Here, type services.msc and hit Enter.
- In the Services window, locate QuickBooksDBXX services.
- Double-click it and go to the recovery tab now.
- Here, try to restart the QuickBooksDBXX services for the first, second, and subsequent failures.
- Once done, repeat the same steps for QBCFMonitorServices.
- Now, try attempting to open and use the software again.
Step 6- Try adding the server to the Windows Hosts File
Add your IP address to the Windows hosts file as follows:
- Access the Windows hosts file.
- After listing the last IP address, insert an input point and enter the server’s IP address.
- Now, go to the Tab option and enter the server name.
- In the File menu, click Save.
- Now, exit from the same File menu.
- Now, try accessing the company file.
Step 7- Check the Folder Permissions
Verify the folder’s permission in the system to see that the folder holding the company file has the authority to share data with other systems in the network. The steps to follow this solution are as follows:
- Ensure by checking the folder permissions before you change them.
- Now, go to the Start menu and hit the File Explorer option.
- Right-click the folder that stores the company file and opt for Properties.
- Now go to the security tab and hit the Advanced option.
- Select QBDataServiceUserXX and hit the Edit icon.
- Now, set specific settings to Allowed. These include Traverse Folder/Execute File, Write Attributes, Read Extended Attributes, Read Permissions, etc.
- If permissions aren’t correctly set up, right-click the folder with the company file and go for its Properties.
- Hit the Security option and then Edit.
- Choose QBDataServiceUserXX, allow it full control access, and press OK.
- Apply these changes and confirm them per the on-screen commands.
- Now, to modify the permissions of the folder, go to the Start menu and look for File Explorer.
- Hit the specified folders you wish to change the permissions for. You can find the list of folders on the web. Some folders may have specific versions, so be prepared for that. You might not have all the folders.
- Right-click the folders and choose Properties.
- Choose Everyone in the Security tab.
- Select Full Control > Apply > OK.
If these steps aren’t helpful, you can move to the next solution to turn off hosting in QuickBooks.
Step 8- Install QuickBooks Database Server Manager
Installing QuickBooks database server manager on the server can ensure safety in sharing files over the network. The solution to fix the issue can be implemented as follows:
- The database server manager is already a part of QuickBooks Desktop, so download it from official sources.
- Close all the programs active on Windows, including QB, and initiate installing the software on the server computer that hosts the company files.
- Launch the downloaded file from the location where you saved it, namely the Setup_QuickBooks.exe file.
- You need to follow the instructions on the screen to complete the installation and setup.
- When QB asks for the install type, set it to Custom or Network. Click Next and ensure not to select Express.
- Select the best option for network setup and hit the next option.
- Follow the instructions on the screen, select Install, and Windows might ask for permissions.
- Now, you can finally set the firewall permissions, update the database server manager, and use the application.
Step 9- Set Windows Admin Rights
Setting the Windows rights to admin gives you access to modify the firewall permissions and Windows settings as follows:
- Check your Windows versions and ensure adding a user as an admin. Implement the measures per your Windows version.
- Now, you can grant QuickBooks program access as an admin user as follows:
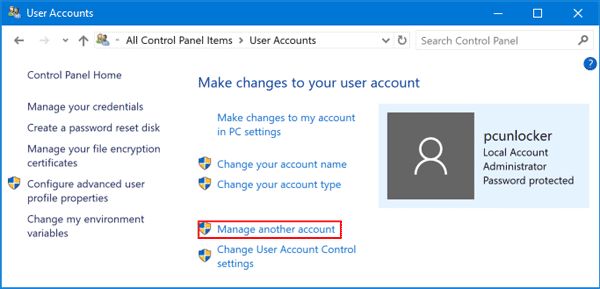
- Close QB Desktop and go to the Windows start menu.
- Launch Control Panel and go to the User accounts.
- Find QBDataServiceUserXX for your QB version.
- Select the Change account type > Administrator.
- Apply the changes made.
- Repeat the steps for each version of QB Database Server Manager.
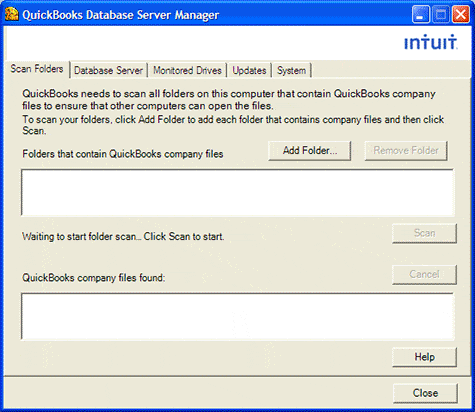
Step 10- Scan Folders using QBDBSM
Use the QuickBooks database server manager to scan the folders and enable accessing files over the network. The steps to follow that will help rectify the QuickBooks hosting mode is off error are as follows:
- Go to the Start menu on Windows to scan the folders on the server computer.
- Type database in the search field to get QuickBooks Database Server Manager as a result.
- Go to the Scan Folders tab.
- Find the folder that contains the company file through the Browse option.
- Select it, click OK, and then start the scanning procedure.
- After pressing the Start Scan button and it is running, you should see your folder.
- QuickBooks company file found section. The folder is now ready to access.
- The Monitored Drives tab also allows for monitoring the drives.
- Manage them and start the Database Server Manager again.
Step 11- Use the QuickBooks File Doctor Tool
You can benefit from the QB file doctor tool, which is proficient in reversing the damage to the company files. Apply it as follows:
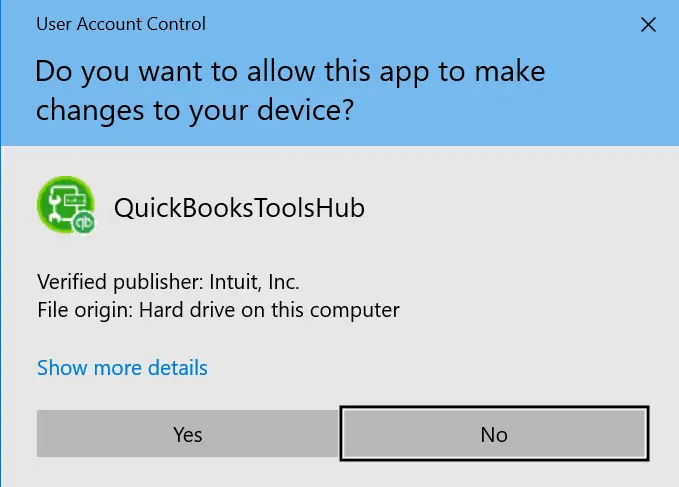
- Begin by downloading the QuickBooks Tool Hub file from the Intuit website.

- After storing this file in an easy-to-access location, go there and double-click it to initiate installation.
- Accept the terms, conditions, agreements, and more to finish successfully installing it.
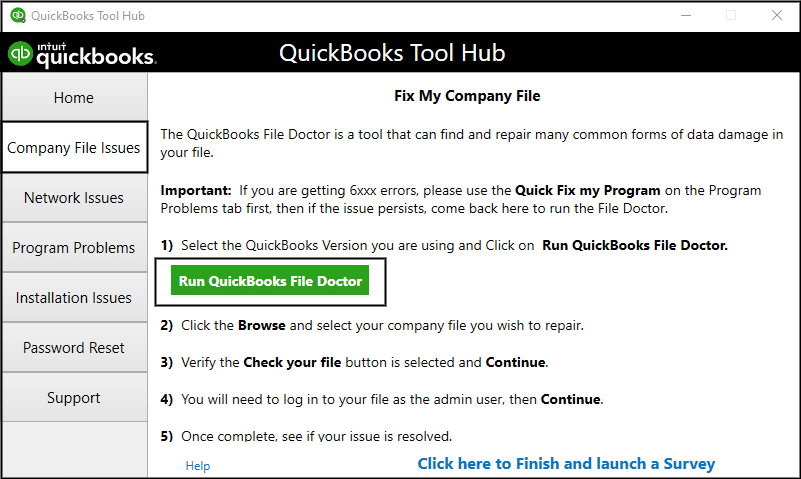
- Now, it’s time to run it on the system. Open and go to the Company File issues section.
- Here, you’ll find two utility tools: Quick Fix My File and QuickBooks File Doctor.

- You can attempt to use both to fix your issues.
- Here, select the QB file doctor and allow it to scan the files for issues.
- Let it repair and take the time it needs.
With this detailed blog, we know why QuickBooks Hosting Mode is Off. Also, we have figured out a method that will enable the Hosting Mode. We are optimistic that the steps mentioned above guided you thoroughly on how to resolve this tiny glitch. If you have any doubts or queries regarding the same, feel free to get connected with our Accounting Helpline specialists at 1.855.738.2784 anytime.
FAQs
Describe the different hosting modes of QB and which to choose to resolve the QuickBooks Hosting Mode is Off error.
The three hosting modes in QB include:
1. Hosting off or not hosting mode.
2. Hosting only local company files.
3. Hosting both local and remote files.
Users can access any one of them based on their current needs.
What to do if the TCP/IP adapter is not working, leading to the QB hosting user mode being off error?
If the TCP/IP adapter is not working, follow the steps mentioned below:
1. Launch the run window and type cmd.
2. Press enter and type ipconfig in the command prompt window.
3. Let it run and configure the settings.
How do you turn on hosting mode in QuickBooks?
If you are operating your QuickBooks in a multi-user environment, you need to enable the hosting mode. To turn on hosting mode in QuickBooks, open the File menu and choose Utilities. Now, tap on the Host-Multi User Access option. If you don’t see this option, it means hosting is already enabled on this computer.
Related Posts-
A Comprehensive Guide to the QuickBooks Migration Tool for Data Transferring
Is Your QuickBooks Update Stuck? Know How to Fix It!
An Expert’s Guide on QuickBooks Write Check Columns Missing
QuickBooks Print and PDF Repair Tool: How to Fix Print Problems
07 Solutions to Fix QuickBooks Not Sending Emails Issues
Comprehending the QuickBooks Error 15276 With Causes & Solutions

Edward Martin is a Technical Content Writer for our leading Accounting firm. He has over 10 years of experience in QuickBooks and Xero. He has also worked with Sage, FreshBooks, and many other software platforms. Edward’s passion for clarity, accuracy, and innovation is evident in his writing. He is well versed in how to simplify complex technical concepts and turn them into easy-to-understand content for our readers.