Last Updated on January 1, 2026
Now that you have purchased a license for QuickBooks Enterprise, you must be looking to host your company file over a shared network or a server for simultaneous access. This can help you boost your accounting and bookkeeping processes, ultimately rocketing your business progress. To run a QuickBooks Enterprise Server, you must first see if your PC matches the system requirements to do so. We have covered everything you need to know to use the QB Enterprise app on a server in this blog!
Are you having trouble hosting your QuickBooks company file over a shared network or a server? Feel free to contact our Accounting Helpline’s experts today at 1.855.738.2784 to resolve your problem in no time!

QuickBooks Enterprise Server Requirements – A Table
Given in the table below are all the system requirements you need to know to use the QuickBooks Enterprise app on a server:
| Operating System | Windows 11, 64-bit, natively installed |
| Database Servers | Windows Server 2022, Standard and Essentials Windows Server 2019, Standard and Essentials Windows Server 2016, Standard and Essentials |
| Browser Requirements | QB Enterprise requires internet access and Google Chrome |
| Processor | 2.4 GHz minimum |
| Workstation RAM | 8 GB minimum, 16 GB recommended |
| Server RAM | 1–5 Users: 8GB 10 Users: 12GB 15 Users: 16GB 20+ Users: 20+GB |
| Disk Space | 2.5GB of disk space (additional required for data files) |
| Windows | Only the North American version of Windows is supported. Regional settings are supported when they are set to English. Admin rights are required for the server computer when hosting multi-user access. The Windows should be natively installed and not require running in a virtual environment or emulation software. |
Install the QuickBooks Database Server Manager for the Enterprise Server
To use the QuickBooks Enterprise Server, you have to install the QB Database Server Manager with the steps given below:
- Close all open programs on your server computer:
- Including QuickBooks Enterprise.
- Open the installation file you downloaded:
- It is named Setup_QuickBooks.exe.
- Follow the instructions on your screen.
- When you have to choose the install type, click on Custom or Network Options:
- Ensure not to select Express Install.
- Press Next.
- Select the best option for your network setup, then select Next:
- Both options would install the QB Database Server Manager.
- If QB Enterprise is already installed on your server computer, this won’t overwrite any existing company data.
- Then, choose between the two options:
- Select I’ll be using QuickBooks Desktop on this computer, AND I’ll be storing our company file here so it can be shared over our network if you want to install Database Server Manager and QB Enterprise on your server computer.
- Select I will NOT be using QuickBooks Desktop on this computer if you only want the Database Server Manager on your server computer.
- Follow the rest of the instructions on your screen.
- Hit Install when you’re ready.
QB would create a new Windows user for each version of the Database Server Manager. For example, Database Server Manager 2023 shows up as QBDataServiceUser33. You should then proceed to give this new user permission to access the folders that hold your company files, with the steps given in the next section.
Set Up Folder Sharing for QB Database User
- Locate the folder you want to share.
- Right-click on the folder.
- Click on the Properties option.
- Navigate to the Sharing tab.
- Select Share this folder.
- You can enter a new name in the Share Name field to change the name of the shared folder.
- Go to the Security tab.
- Click on Permissions to set permissions for each user who will access your folder.
- Hit Apply.
- Press OK.
Then, proceed to configure the Database Server Manager with the steps given in the next section.
Configure the Database Server Manager
You can skip this section if you wish to use the default settings of the Database Server Manager; otherwise, follow along with these steps:
- Open the Start menu.
- Type in Services.
- Open Services.
- Select and open the QuickBooksDBXX (XX is the version number of the Database Server).
- Navigate to the General tab.
- Look for Service Status.
- If it’s Started or Running, select Stop.
- Go to Startup type.
- Select Automatic.
- Navigate to Logon.
- Press Local System Account.
- Go to the Recovery tab.
- Select Restart the Service from the following dropdown menus:
- First failure
- Second failure
- Subsequent failures
- Move back to the General tab.
- Press Start to start the Database Server Manager.
Now, you have to set up Firewall permissions for the Database Server Manager.
Set Up the Firewall Permissions
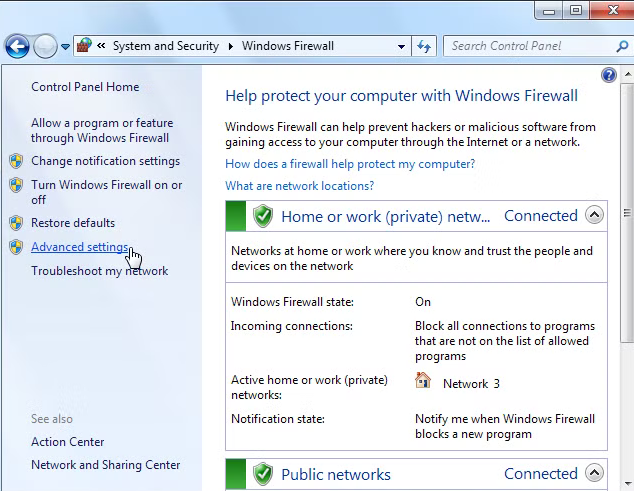
- Open the Start menu.
- Search for and open the Windows Firewall.
- Click on Advanced Settings.

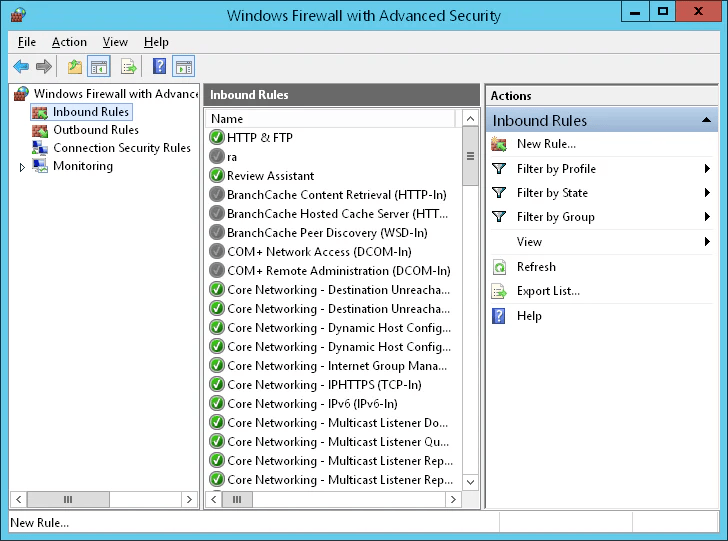
- Right-click on Inbound Rules:

- You’ll create Outbound Rules later on.
- Select New Rule.
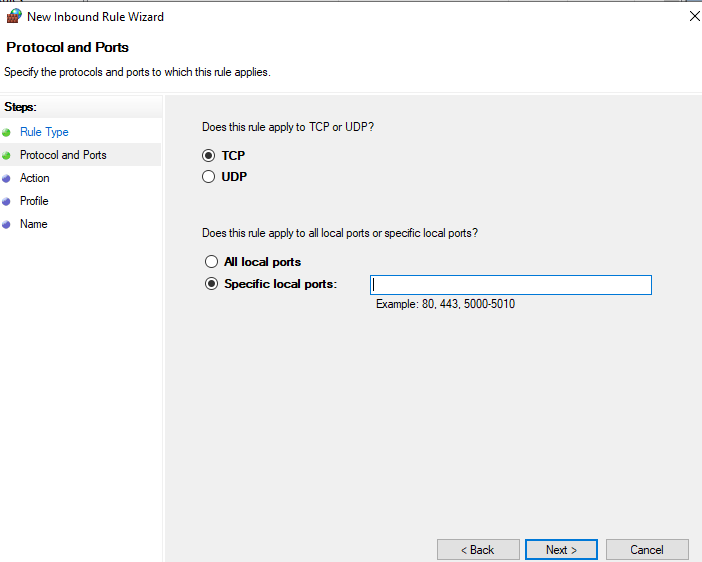
- Click on Port.
- Hit Next.
- Ensure that TCP is selected.
- Go to the Specific local ports field.

- Enter the specific ports needed for your QB year version:
- QuickBooks Desktop 2020 and later: 8019, XXXXX
- QuickBooks Desktop 2019: 8019, XXXXX
- QuickBooks Desktop 2018: 8019, 56728, 55378-55382
- QuickBooks Desktop 2017: 8019, 56727, 55373-55377
- Get Dynamic Port Number:
- Open the Start menu.
- Type in QuickBooks Database Server Manager.
- Open the QuickBooks Database Server Manager.
- Navigate to the Port Monitor tab.
- Find your QB version.
- Note down the port number.
- You’ll use this for your Firewall port exceptions.
- Press Next after entering the port number.
- Click on Allow the Connection.
- Hit Next.
- Ensure all profiles are marked if you are prompted.
- Select Next.
- Create a rule.
- Name it something like QBPorts(year).
- Hit Finish.
Now, let us see how you can set up the QuickBooks Enterprise Server by using the Database Server Manager.
Use the QuickBooks Database Server Manager | Guided Steps
After you install the Database Server Manager, you will have to scan your company files. Once you scan these files, you will be able to access your company files from other computers on your server. The steps to use the Database Server Manager are given below:
Step 1: Scan Your Folders
You have to scan the folders containing your company files before sharing them. Follow the steps given below to scan them:
- Open the Start menu on your server computer.
- Search for and open the QuickBooks Database Server Manager.
- Navigate to the Scan Folders tab.
- Click on Browse.
- Choose the folders holding your company files.
- Press OK when you’re finished.
- Hit Start Scan.
The folders would appear in the QuickBooks company files found section after the scan is finished. You should now be able to access the company files in these folders from other computers on your network.
Step 2: Monitor Your Drives
The drives that contain your folders appear in the Monitored Drives tab after you scan them. You can select the drive to monitor these folders. To monitor your drives, follow the steps given below:
- Navigate to the Monitored Drives tab.
- Mark the checkboxes for the hard drives holding your company files:
- Only add drives holding your company files.
It’s important to know that you can’t monitor mapped drives.
Step 3: Manage the Database Server Manager
There are several other tabs in the Database Server Manager that help in running it smoothly. Some of the tabs and uses are:
- The System tab tells you where Database Server Manager is installed on your computer.
- The Database Server tab gives you the real-time status of the tool and who’s connected to it.
Restart the Database Server Manager
If you are unable to open the Database Server Manager or see an error, you can restart it with the steps given below:
If You Installed QuickBooks Enterprise and Database Server Manager
- Open the QuickBooks Enterprise server PC.
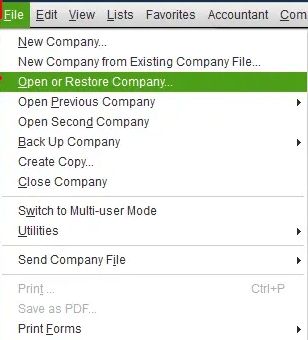
- Navigate to the File menu.
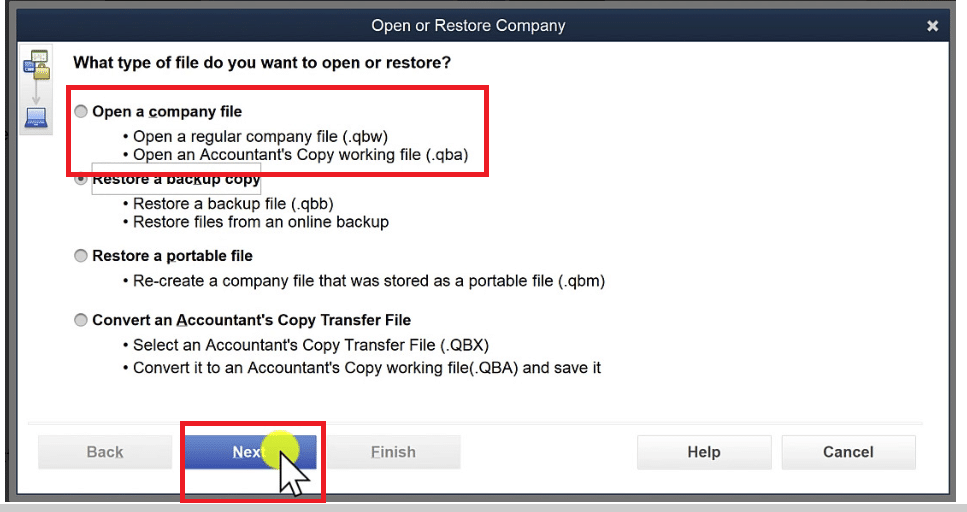
- Click on Open or Restore Company.

- Choose the Open a company file option.

- Find and open your company file.
- Hit Next.
- Select the Open file in multi-user mode checkbox.
- Press Open.
- Sign in to your company file.
- Navigate to the File menu.
- Choose Close Company/Log off.
- This would close your company file on the server.
- Open the Start menu.
- Search for and open the QuickBooks Database Server Manager.
If everything works, you’re good to go.
If You Only Installed the Database Server Manager
- Open the Start menu.
- Search for and open the Control Panel.
- Choose and open Administrative Tools.
- Select Services from the list.
- Right-click on the QuickBooksDBXX service.
- Press Restart.
This completes the QuickBooks Enterprise Server setup.
QuickBooks Enterprise Server – A Quick View Table
In the table below is given a concise summary of this blog on the topic of the QuickBooks Enterprise SQL Server:
| Description | By using QuickBooks Enterprise Server, you can host your company file over a shared network or a server for simultaneous access. This can help you boost your accounting and bookkeeping processes, ultimately rocketing your business progress. |
| Install QB Database Server Manager | 1. Install the QB Database Server Manager. 2. Set up folder sharing. 3. Configure the Database Server Manager. 4. Set up Firewall permissions for the Database Server Manager. |
| Use the Database Server Manager | 1. Scan your folders. 2. Monitor your drives. 3. Manage the Database Server Manager. |
| Troubleshoot errors | 1. Open the QuickBooks Enterprise server PC. 2. Navigate to the File menu. 3. Click on Open or Restore Company. 4. Choose the Open a company file option. 5. Find and open your company file. 6. Hit Next. 7. Select the Open file in multi-user mode checkbox. 8. Press OpenSign in to your company file. 9. Navigate to the File menu. 10. Choose Close Company/Log off. 11. This would close your company file on the server. 12. Open the Start menu. 13. Search for and open the QuickBooks Database Server Manager. |
Conclusion
By configuring QuickBooks Enterprise Server, you can host your company file over a shared network or a server for simultaneous access. This can help you boost your accounting and bookkeeping processes, ultimately rocketing your business progress. We have covered the steps you need to know to use your QuickBooks Enterprise application on a server with the help of the Database Server Manager in this blog. If you are having trouble hosting your QuickBooks company file over a shared network or a server, you can contact our Accounting Helpline’s experts at 1.855.738.2784 today to resolve your issue at a moment’s notice!
FAQs
How can I use QuickBooks Enterprise on a server?
You can use QB Enterprise on a server by installing the QuickBooks Database Server Manager to scan and share your company files with other systems.
How much RAM do I need for a QuickBooks Enterprise Server?
The RAM you need for your QB Enterprise Server depends on the number of users:
– 1–5 Users: 8GB
– 10 Users: 12GB
– 15 Users: 16GB
– 20+ Users: 20+GB
How to fix errors with the Database Server Manager?
You can fix errors with the Database Server Manager using the steps given below:
– Open the QuickBooks Enterprise server PC.
– Navigate to the File menu.
– Click on Open or Restore Company.
– Choose the Open a company file option.
– Find and open your company file.
– Hit Next.
– Select the Open file in multi-user mode checkbox.
– Press Open.
– Sign in to your company file.
– Navigate to the File menu.
– Choose Close Company/Log off.
– This would close your company file on the server.
– Open the Start menu.
– Search for and open the QuickBooks Database Server Manager.
Related Posts-
QuickBooks Full Service Payroll for Small Businesses
Troubleshooting Methods to Fix the QuickBooks Error 10000
6 Ways to Troubleshoot QuickBooks Error 1642
Resolving the QuickBooks Error 6144 and 103 With Guided Methods
How to Fix QuickBooks Script Error- An Error has Occurred
QuickBooks Error H202 in Multi-User & Solutions to Fix it

Edward Martin is a Technical Content Writer for our leading Accounting firm. He has over 10 years of experience in QuickBooks and Xero. He has also worked with Sage, FreshBooks, and many other software platforms. Edward’s passion for clarity, accuracy, and innovation is evident in his writing. He is well versed in how to simplify complex technical concepts and turn them into easy-to-understand content for our readers.