
Last Updated on September 18, 2025
QuickBooks is a well-known software for bookkeeping and accounting tasks, which is ideally suited for small and mid-sized businesses. The QuickBooks payroll is a useful feature for businesses that helps in managing the pay structure of their employees. There are payroll tax tables that help companies create accurate financial reports and audit financial data. Intuit frequently releases new updates for both QB payroll and tax tables, which users should download and install to enhance their accounting tasks. However, while doing so, you might run into a 12XXX series error, such as QuickBooks error 12009.
“Error 12009: QuickBooks is unable to access the server due to a network timeout.”
Let us learn more about the issue in this blog.
The QuickBooks error 12009 may hinder your accounting tasks. If you want a quick resolution and guidance to fix it, then connect with an Accounting Helpline’s expert. Dial 1.855.738.2784 today.

An Introduction to QuickBooks Error 12009
The QuickBooks error code 12009 is a technical issue that you might get as you attempt to update your Desktop application or payroll service. This error is a part of the 12XXX series code that often occurs as you are downloading payroll or QBDT updates. If you get this error, then you won’t be able to update either your QB program or the payroll service, which can disrupt your workflow. You won’t be able to finish your tasks, or the program will operate strangely, leading to performance issues. Therefore, it is crucial to troubleshoot the QuickBooks Payroll error 12009 as soon as you can to get it back on track and continue your work seamlessly.
Reasons Behind the QuickBooks Error Code 12009
The following key factors may lead to QuickBooks Pro error code 12009, which prevents you from downloading QB or payroll updates.
- You may have a poor and weak internet connection.
- Firewall or Internet security settings may prevent the connection between QuickBooks and the Intuit server, leading to QB error 12009.
- Antivirus software might interrupt or slow down the program.
- Web browser settings may not support QuickBooks.
- Misconfigurations in SSL settings can also cause QB error code 12009.
- The application might have failed to recognize the internet connection.
- Your default browser may not be set up correctly.
These are the leading factors behind the QB error code 12009. Now, to troubleshoot this problem, refer to the following section.
Delve into Troubleshooting Methods for QuickBooks Error 12009
Listed below are resolutions that may help you fix the QB Pro error 12009 effectively, as well as prevent it from occurring again.
Review your Internet Connection
An unstable or weak internet connection might cause QuickBooks error 12009. Verify that your internet is stable enough to support the connection through these steps.
Check to make sure you can connect to secure websites outside of QuickBooks.
- Download and run the TLS 1.2 Utility.
- Try to access a secure website like the sign-in page of your bank, other than QuickBooks Desktop, using your preferred browser like Google Chrome or Microsoft Edge.
Note: If you fail to access a secure website, then your internet connection needs to be fixed.
Move on to the next step for downloading and running the TLS 1.2 Utility to fix QB error 12009.
Download the TLS 1.2 Utility and Run it on Your System
The TLS 1.2 Utility ensures that your system is fulfilling the Windows Operating System, Internet browser, and .NET requirements to prevent QuickBooks error code 12009. It makes your QuickBooks Desktop compliant with all connections and provides greater security and stability.
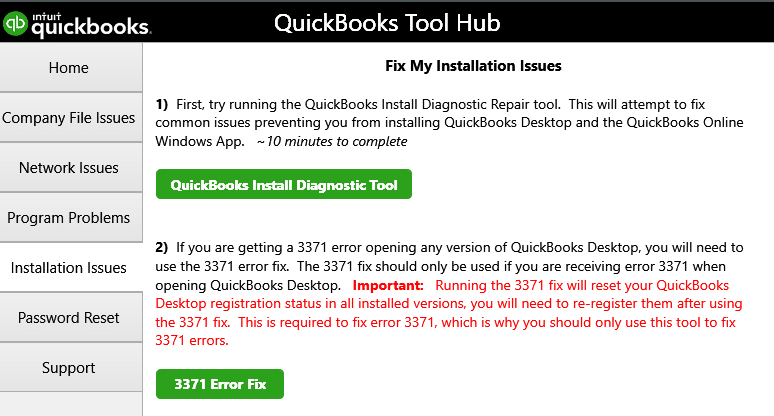
- Head to QuickBooks Tool Hub and click on Installation Issues.

- Now, choose the QuickBooks TLS 1.2 tool, then hit OK to open it.
- After that, hit Yes to the EULA Agreement, followed by clicking on Run.
- Finally, tap Exit after the tool is finished.
Do you get a QB TLS error? Then resolve it with the assistance of this guide. If the QuickBooks Desktop error 12009 persists, then try the following method to fix it.
Check Advanced Internet Settings
Follow this method to see the advanced Internet settings and ensure no hindrance might prevent the QuickBooks payroll update and lead to QB error code 12009.
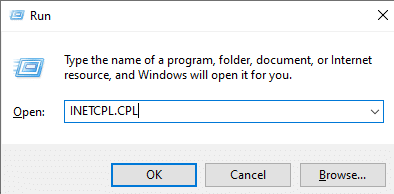
- Close QuickBooks Desktop windows, then open the Run window by pressing Windows key+R.

- Type INETCPL.CPL in the input box and tap OK.
- Locate the Globe icon under the Security tab. Make sure this zone has a medium to high level of security.

- If you don’t use the dial-up node (DUN), then head to the Connections tab and choose Never Dial a Connection. In case you do use DUN, then choose an appropriate ISP and press OK.
- Verify that the automatically detecting settings checkbox is on under the LAN Settings. However, ensure that the “Use a Proxy Server” checkbox under the LAN option is unchecked. If it is ticked, then you must provide the complete address and port.

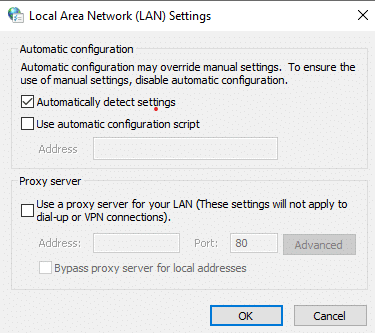
For testing purposes, you can unmark the checkbox only if the port is 80. However, do not untick the Use a Proxy Server checkbox if the port is not 80.
- Click OK after you’re done.
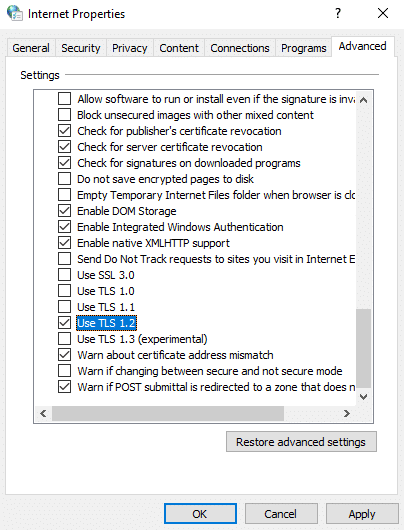
- Additionally, select Restore Advanced Settings in the Advanced tab. Make sure that Use TLS 1.2 is selected under the Settings section. Some versions of Internet browsers may lack these options.

- Finally, hit OK to close the Browser.
Once done, reboot your system and then launch the program. Now, try to update QB Desktop or payroll once again and see if you can update it successfully. If you can’t, then move on to the next solution for fixing the QuickBooks payroll error 12009.
Check Security Settings
A third-party program or application may have caused QuickBooks error code 12009. Therefore, we must determine whether another program or piece of software is causing the problem and fix it with the following steps.
- Set up Windows Firewall for QuickBooks desktop, payroll, tax tables updates, etc.
- Moreover, ensure that you add an exclusion for the QuickBooks application in Windows Firewall port exceptions.
- Lastly, restart your computer and try downloading the payroll tax table and QuickBooks updates once more.
Now, follow the method below to run Windows in safe mode with networking to narrow down the root cause of QB Pro error code 12009 and resolve it.
Run Windows in Safe Mode with Networking
Windows uses a limited set of files and drivers when safe mode is enabled. You can attempt to update QuickBooks and payroll in safe mode. If it works, then it’s likely that default settings and fundamental device drivers caused the QuickBooks error 12009. One more thing to take note of is that by using Windows in safe mode, you can identify the issue’s root cause and fix it. Now, follow the steps given below for running Windows in safe mode with networking.
- First, tap on the Windows Start button and head to Settings.
- Now, choose System followed by Recovery.
- Choose Restart now from the Recovery options.
- Once the computer restarts, you’ll get the Choose an option screen, proceed with Troubleshoot followed by Advanced options, and there, select Startup Settings, then finally Restart. Do note that you might be asked to provide your BitLocker recovery key.
- Now, once your system restarts again, you will see a list of options to choose from, displayed on your screen. In order to turn on your computer in Safe Mode with Networking, press F5.
This should resolve the QuickBooks error code 12009; if not, then follow the next method.
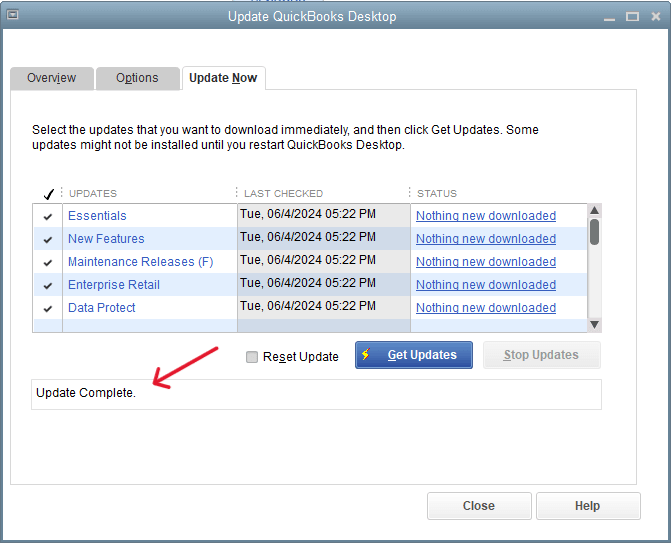
Reset QuickBooks Updates
Internal issues during updates, like not using it in single-user mode, may have caused the QB error 12009; therefore, you need to reset updates. Follow this process to reset the updates with simple steps.
- Launch QuickBooks and expand the Help menu.
- Choose Update QuickBooks Desktop, then hit Update Now.

- Tick the Reset Updates checkbox and select Get Updates.
- Wait for the update to complete, then exit and restart QuickBooks. Also, hit “Yes” to install the updates.
- Finally, restart your computer after installing the updates and then launch QuickBooks.
If the QuickBooks update error 12009 persists, then follow the solution mentioned next.
Reinstall QuickBooks in Selective Startup
If you fail to download updates, install, or uninstall QB or payroll on your device, then try switching to Selective Startup and then attempt to get rid of the QuickBooks Pro error code 12009. You can use Selective startup to ensure that there is no interference from other apps. You can follow this procedure to switch setups with ease.
Points to Consider Before You Begin
- Create a backup of your company file.
- Write down your QuickBooks Desktop product and license info.
Has your QuickBooks backup failed? Refer to this guide for creating a proper backup to resolve the issue.
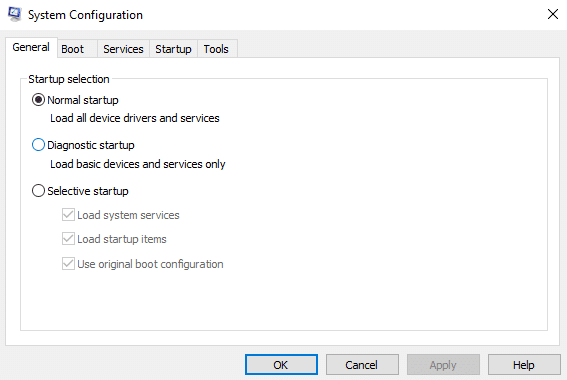
Switch to Selective Startup
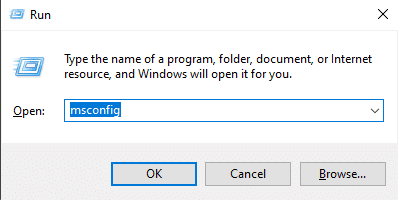
- Tap Windows+R keys together to open the Run command.

- Enter ‘msconfig’ in the open box as shown below and hit OK.
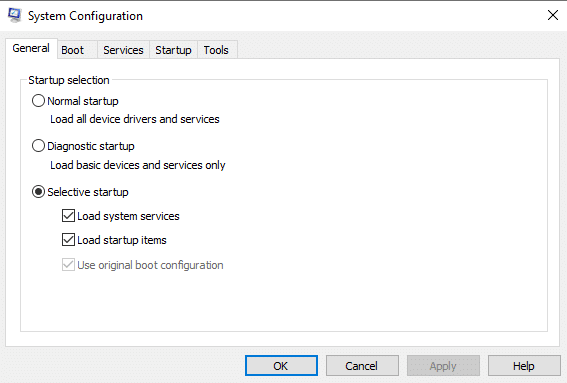
- Locate and tap on Load system services and Selective startup in the General tab.

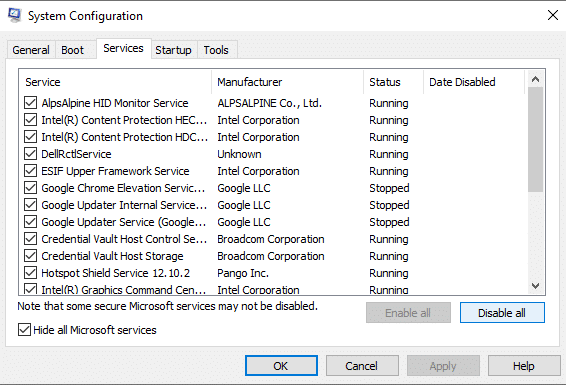
- Head to the Services tab and, similar to below image, check the Hide all Microsoft Services box.

- Then click on the “Disable all“ option and uncheck the “Hide all Microsoft services” box.
- Now choose Windows Installer from the services list and tap OK.
- Then click on Restart from the System Configuration window.
Uninstall or Install QuickBooks Desktop
- Now re-install the QuickBooks Desktop application.
- Press Windows+R keys on your device to launch the Run command.
- Enter msconfig in the open box and hit OK.
- Navigate to the General tab and choose Normal startup, then press OK.

- Under the System Configuration window, click on Restart.
Now, verify if this process helped resolve the QuickBooks error 12009; if not, proceed to the following method to fix this issue.
Review the TCP and Port Settings in Windows Firewall
The QuickBooks error code 12009 may be a result of Firewall interruptions, hence you need to modify the settings to ensure QB can operate smoothly.
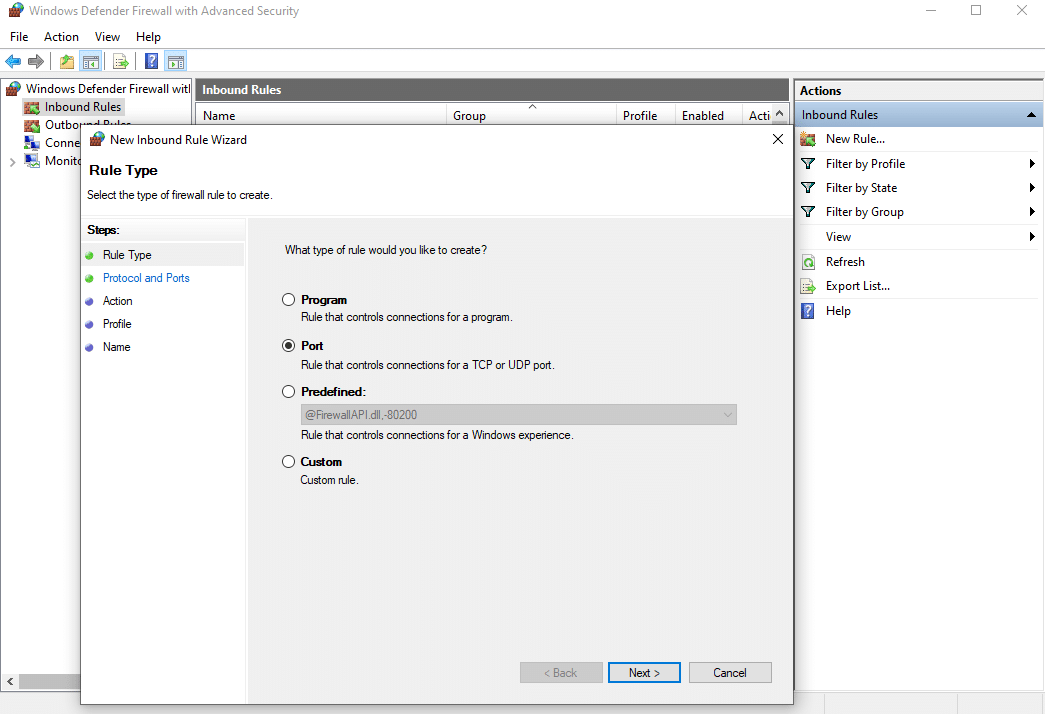
- Hit the Windows key to launch the Start menu.
- Type “Windows Firewall” in the search box and open it.
- Then locate and tap on Advanced Settings in the left menu.
- Now, click on Inbound Rules and choose New Rule.

- Then choose the Port option followed by Next.
- Ensure that the TCP is selected by default in this window.
- Now, find the Specific local ports field and enter the specific ports for your QuickBooks version, such as these:
- QuickBooks Desktop 2020 and later: 8019, XXXXX.
- QuickBooks Desktop 2019: 8019, XXXXX.
- QuickBooks Desktop 2018: 8019, 56728, 55378-55382.
- QuickBooks Desktop 2017: 8019, 56727, 55373-55377.
Get a Dynamic Port Number
- Hit Next after you have entered the port number.
- Now, click on the Allow the Connection button and again tap Next.
- Ensure that all the profiles are ticked in the Prompt window, then click on Next.
- Now create a rule and enter a name like “QBPorts(year).”
- After you have completed these steps, hit Finish.
Now, you may repeat the same steps from the Advanced Settings to create Outbound Rules till finish.
Quickview Table for QuickBooks Error 12009
Tabulated below is a summary of the blog that provides a concise overview of the QuickBooks Pro error code 12009 that occurs while you update your QBDT application or payroll service:
| Error message | Error 12009: QuickBooks is unable to access the server due to a network timeout. |
| Its causes | Weak internet connection, firewall or Internet security settings preventing the connection between QuickBooks and Intuit server, antivirus software interrupting with the program, web browser settings unsupported for QuickBooks, misconfigurations in SSL settings, or the application failed to recognize the internet connection, or the default browser is not set up correctly. |
| Troubleshooting methods | Review your internet connection, download and run the TLS 1.2 Utility, check Advanced Internet settings, check security settings, run Windows in safe mode with networking, reset QuickBooks updates, reinstall QB in selective startup, and review the TCP and Port settings in Windows Firewall. |
| Tools required | QuickBooks Tool Hub, TLS 1.2 Utility |
Bringing It All Together
QuickBooks error 12009 can occur when you are trying to update QB Desktop application or payroll services. There are several factors that may cause this issue, including a weak internet connection, an incorrect firewall, or Internet security settings that prevent the connection.
Antivirus software interruptions, unsupported web browser settings, and misconfigurations in SSL settings are some other reasons. Methods to effectively get rid of the QuickBooks error code 12009 for numerous causes are given in this blog so that you can easily resolve this problem and continue your accounting tasks seamlessly.
However, you can experience issues while attempting to resolve the error 12009 in QB Desktop. Our Accounting Helpline’s experts are always ready to assist you. Dial 1.855.738.2784 and speak with an expert to get back on track.
Frequently Asked Questions (FAQs)
What is Error Code 12009 in QuickBooks Desktop?
QuickBooks error 12009 occurs while you try to update the QBDT application or payroll service. It can interfere with your work operations by preventing you from updating the payroll services or the QB application. Either the program will operate in a strange manner and cause performance problems, or you won’t be able to complete your accounting tasks. In order to resolve the QuickBooks error code 12009, you must troubleshoot it as quickly as possible.
How to Resolve the Error 12009 in QuickBooks?
There are multiple ways for you to troubleshoot the QuickBooks error 12009; some of them are listed below:
– Review your internet connection
– Download and run the TLS 1.2 Utility
– Check Advanced Internet settings
– Check security settings
– Run Windows in safe mode with networking
– Reset QuickBooks updates
– Reinstall QB in selective startup
– Review the TCP and Port settings in Windows Firewall.
What causes error 12029 in the QuickBooks support update?
The QuickBooks error code can occur due to various factors such as weak internet connection, restrictions between QB Desktop and the Intuit server caused by the firewall or Internet security settings, interruptions with the program from antivirus software, unsupported web browser settings for QuickBooks, misconfigurations in SSL settings, or the application might fail to recognize the internet connection, or your default browser may not be set up correctly.
Related Posts-
Looking To Import IIF Files In QuickBooks Desktop? Here’s How
The Guide You Need to Fix QuickBooks Direct Deposit Issues
Fix QuickBooks Error 1601: Problem with Windows Installer
A Comprehensive Guide to the QuickBooks Migration Tool for Data Transferring
How to Fix QuickBooks Payroll Update Not Working Error? Experts Solutions
How To Fix QuickBooks Error PS038? Easiest Method

Edward Martin is a Technical Content Writer for our leading Accounting firm. He has over 10 years of experience in QuickBooks and Xero. He has also worked with Sage, FreshBooks, and many other software platforms. Edward’s passion for clarity, accuracy, and innovation is evident in his writing. He is well versed in how to simplify complex technical concepts and turn them into easy-to-understand content for our readers.