
Last Updated on April 16, 2026
QuickBooks Error H202 emerges while trying to switch from single-user mode to multi-user mode. Repeated occurrences of this error can be frustrating. So, let’s dig into the causes and symptoms and troubleshoot solutions to resolve this error like a pro.
QuickBooks is a multi-dimensional accounting software that has been providing world-class financial solutions to businesses across the globe. It allows users to work on single-user and multi-user modes for flexible working and seamless switching between the two different modes.
However, QuickBooks error H202 is an error that arises in the application when the user attempts to host the company file in a multi-user environment. Experts suggest that if your files are damaged or the Database Server Manager is inactive, you may fall prone to this error. The quickest way to eradicate this is to run the tools in QuickBooks Tool Hub on your system. But, if it does not help, study the info in this article and put an end to the error.
QuickBooks error H202, if not fixed on time, can become an irreversible error. Contact our Accounting Helpline certified experts at 1.855.738.2784 and get rid of the problem immediately.
What is QuickBooks Error Message H202?
QuickBooks error H202 In Multi-User mode belongs to the most infamous category of errors, which is H-series. These errors, including error H202, are triggered when the multi-user mode in the program is not set up correctly. The most common instance where such an error is triggered is opening the company file saved on the server or enabling multi-user mode on any system in the network.
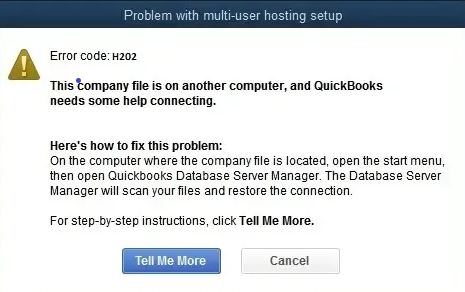
Supported by a subtext saying, “This company file is on another computer, and QuickBooks needs some help connecting,” error H202 is a technical issue that restricts the user from working on their company file.
Why Does QuickBooks Error Code H202 Arise?
Below, we have discussed some of the most commonly seen reasons that influence the occurrence of QuickBooks Error Code H202 on Windows OS–
- The multi-user network or connection is blocked or unable to communicate with the server.
- A misconfiguration in QuickBooks’ hosting settings prompts the error.
- Damage or corruption in the company file or support file can also lead to this hiccup.
- QuickBooks services are inactive or disabled on the server.
- An issue arising from the end of the firewall can lead to QuickBooks error code H202 In Multi-User mode.
- An inappropriate setup of the DNS settings can cause the flash error code H202 to appear on the screen.
- QuickBooks Database Server Manager is unresponsive.
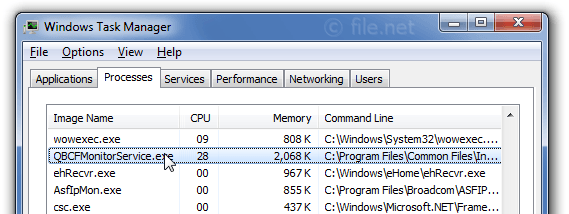
- Critical QuickBooks services like QuickBooksDBXX and QBCFMonitor may face issues running in the background, leading to this error.
Instant Methods to Fix QuickBooks Multi-User Mode Error H202
In order to get rid of Error Code H202 in QuickBooks Desktop, you need to implement the following solutions: If one solution does not help, jump on to the other –
Solution 1 – Examine the Services on the Host Computer
For QuickBooks to function uninterrupted, it is important that QB services are running without any issues on the server. This is how you can ensure the same –
- Access your host computer and press the Windows and R keys together on your keyboard to open the Run window.
- Go to the search panel, type “services.msc,” and click on the OK button.
- In the following services screen, locate and select the QuickBooksDBXX option (XX is your QB year version).
- Ensure that the Startup Type for this option reflects Automatic.
- Also, check the Service Status. If it does not display the Started or Running mode, click on Start to do so.
- Next, you need to tap on the Recovery button and choose “Restart the Service” for these categories –
- First failure
- Second failure
- Subsequent failure
- Save the changes by hitting the Apply button and then OK.
- Once this is done, repeat the procedure and choose QBCFMonitorService in Step 3.

- After this, access all of your workstations and enable multi-user mode for all of them.
Solution 2 – Try to Ping the Host System through the Workstation
It is essential to review your connection by pinging your server from one of the workstations –
- Go to the host system and open the Windows Start menu.
- In the search panel, type Run and select the option to bring up the prompt box.
- Now, write CMD in the search space of the Run box and click on the OK button to trigger a black window with a blinking cursor.
- Type “ipconfig/all” on the screen and hit the Enter key.
- You will be displayed some details on the screen from which you need to go to the Windows IP Configuration section and locate your Host Name on the right side.
- Copy the server’s name and save it in the Notepad.
- Next, you need to open one of your workstations and bring up the Run window.
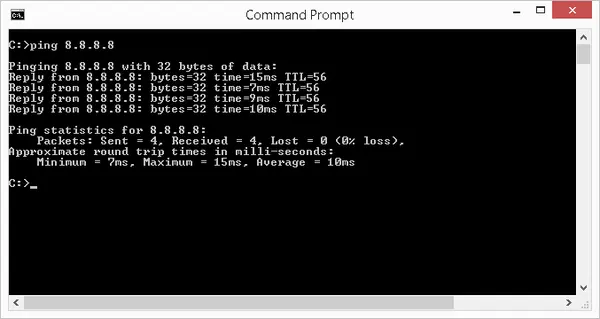
- Get to the CMD screen and type “ping [your server name]” – input the name you copied, exclude the brackets, and press the Enter key.
- Perform the same steps for all the workstations that are encountering this issue.
If you find that the packets sent to the server are lost from any of the workstations, you need to consult your IT team to get these connection issues fixed first.
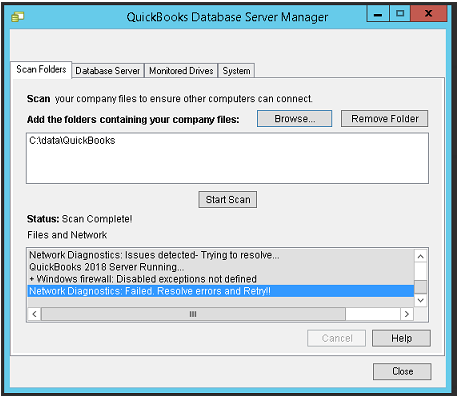
Solution 3 – Fix the Network Issues with QB Database Server Manager
Through this method, you must fix the multi-use mode issues on your system and also repair the access permissions of your firewall –
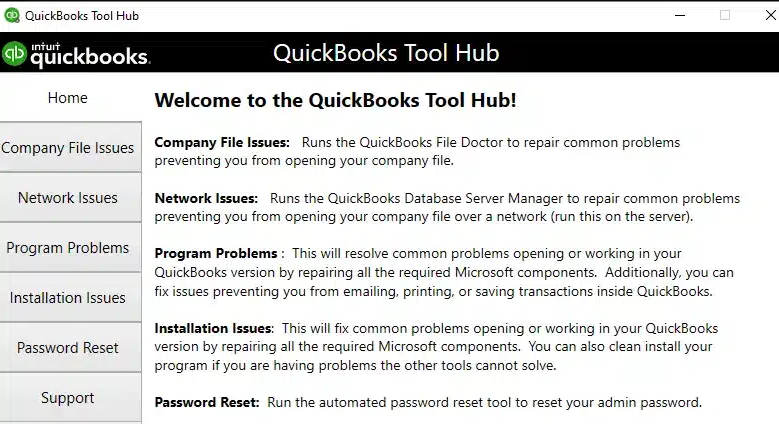
- Download the latest version of QuickBooks Tool Hub from Intuit.

- Double-click on the downloaded file to begin with the installation.
- After the installation, open the tool on your system and go to the Network Issues tab.
- Choose QuickBooks Database Server Manager and install it if required.
- Click on Start Scan and search for your company file by pressing the Browse button.
- Hit Start Scan again, and do not close the window until the scan is completed.
- Tap on Close and open QuickBooks.
- Switch to multi-user mode and check if the error has been rectified.
Solution 4 – Take Help from the QuickBooks File Doctor Tool
QuickBooks File Doctor is an excellent tool to diagnose and repair several errors in QuickBooks. Users can download and install it from Intuit’s official website.
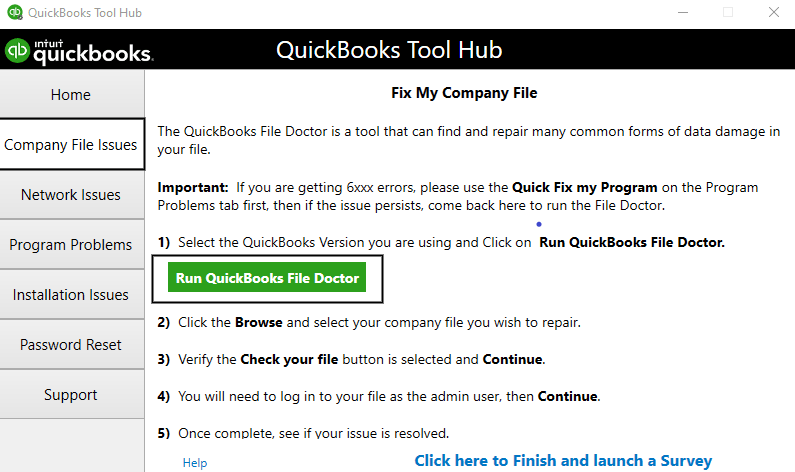
- After finishing the installation, run the QuickBooks Tool Hub and select Company File Issues from the menu.
- Locate and select QuickBooks File Doctor from the list of options.
- From the drop-down menu, select the company file. If the file isn’t visible, you can browse and search from the available list.
- After finding the file, tick the box next to Check your File and Continue.
- Now, type the admin username and password in the box and choose Next.
Note: The time taken by the QB file doctor tool will depend on the file’s size. You can open the file and QB application after the scan finishes.
Solution 5 – Create a New Folder for the QBW File
Moving the QuickBooks file to a new folder can help fix the error h202 and bring effective results. It involves:
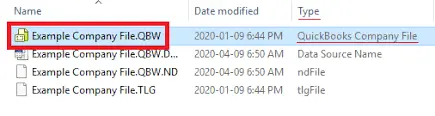
- Create a new folder on the server computer.
- Move the QuickBooks company file to the new folder after providing adequate permissions.
- Open the company file in the multi-user mode again from the new folder to verify if the issue is with the company file or the original company file folder.
- If you can access the file from the new folder, this indicates that the original company file folder is damaged and you need to create a new one.
- If you can’t open the company file from the new folder, this indicates issues in the company file itself.
Solution 6: Fix Issues with QuickBooksDBXX and QBCFMonitorService Services
QuickBooksDBXX and QBCFMonitorService are two crucial services that QuickBooks Desktop requires to host the company file in a multi-user environment. If any of these services do not have the required admin rights to run on the server system, you can face issues in the form of Error H202 in QuickBooks Desktop.
- Move to the folder where the company file is saved on your system and right-click it.
- Now select Properties and move to the Security tab.
- Select Advanced and choose QBDataServiceUserXX.
- Click Edit and set the permissions to Allowed for the following settings.
- Traverse Folder/Execute File
- List Folder/Read Data
- Read Attributes
- Read Extended Attributes
- Create Files/Write Data
- Create Folders/Append Data
- Write Attributes
- Write Extended Attributes
- Read Permissions
If you find that the permissions are not set correctly, follow the instructions below.
- Again, right-click the company file folder and select Properties.
- Go to the Security tab and select Edit.
- Select QBDataServiceUserXX and set it to have Full Control.
- Click Allow, and to save the changes, click Apply and OK.
Solution 7: Set Folder Permissions in Favor of QuickBooks
Inadequate folder permissions will not give QuickBooks Desktop access to the files required to host in multi-user mode. This is how you can make the necessary changes to the folder settings to avoid error H202 while hosting multi-user mode.
- Go to the File Explorer and move to each folder listed below one by one.
- C:\Program Data\Intuit\Entitlement Client\v8
- C:\Program Data\Intuit\Entitlement Client\v6.0
- C:\Program Data\Intuit\Entitlement Client\v5
- C:\Program Data\Intuit\Entitlement Client\v3
- C:\Program Data\Intuit\Entitlement Client
- C:\Program Data\Intuit\QuickBooks Enterprise Solutions X.0 (X = version) or C:\Program Data\Intuit\QuickBooks 20XX (XX = year)
- C:\Program Data\COMMON FILES\INTUIT
- C:\Program Data\COMMON FILES\INTUIT\QUICKBOOKS
- C:\Users\Public\Public Documents\Intuit\QuickBooks\FAMXX (XX = year)
- C:\Users\Public\Public Documents\Intuit\QuickBooks\Company Files
- C:\Users\Public\Public Documents\Intuit\QuickBooks\Sample Company Files\QuickBooks Enterprise Solutions X.0 (X = version) or C:\Users\Public\Public Documents\Intuit\QuickBooks\Sample Company Files\QuickBooks 20XX (XX = year)
You might not have all these folders, as each folder listed above is specific to certain QuickBooks Desktop versions.
- Go to the Properties of these folders by right-clicking them.
- Move to the Security tab and select Everyone.
- If you don’t see the Everyone Option in the Group or User Name section, simply click Add and type Everyone.
- Now, to save the changes, click OK and choose Full Control.
- Click Apply and OK, and then check if you can host the company file in multi-user mode.
Solution 8: Set the Required Permissions on Windows to Host the Company File
If your company file lacks the required permissions on the Windows OS, you are bound to get multi-user error H202. This is how you can set the permissions for the company file to avoid multi-user errors in QuickBooks Desktop.
- Go to the File Manager and move to the folder where the company file is saved.
- Right-click the folder and choose Properties.
- Click the option that says Sharing and hit Share Add.
- Select the QBDataServiceUserXX service for your version of QuickBooks Desktop and give Full Control access to both users.
- Click Share to conclude the procedure.
Solution 9: Make the Necessary Changes to the Windows Host File
Windows Host File has the crucial info network configuration, which simply means the location of the server (IP address) and workstations connected to each other in the network. If this crucial info in the Windows Host File is incorrect, workstations in the network can’t connect to the server, triggering the error H202.
- Press Windows + R > Type CMD > Press Enter.
- Enter the ipconfig command and hit Enter.
- Note down the name of the IP address (IPv4) and the Host Name in the notepad.
- Now, get the same info from all the workstations connected to the network.
- Exit QuickBooks if it is running on the system and move to the following folders to find the Host File.
- C:\Windows\System32\Drivers\Etc
- C:\Windows\Syswow64\Drivers\Etc
- Open the Host File and select Notepad if prompted to choose an application.
- Now, add the IP address along with the system name in the file, and you must use the Tab key to enter any spaces in the text.
- You must ensure that the server system has the info of the workstation, and every workstation must have the required info of the server system. This info includes the IP address and the system name.
- Press Ctrl + S to save the changes, and copy this file by pressing Ctrl + C.
- Now rename the original Host File by adding OLD to its name and save this new file as “hosts” in the folder.
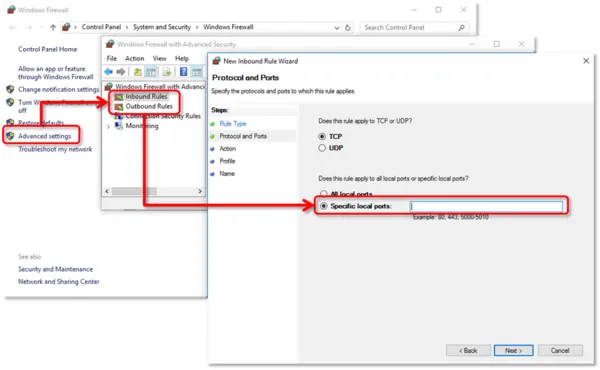
Solution 10: Remove Any Restrictions by Windows Firewall and Internet Security Settings
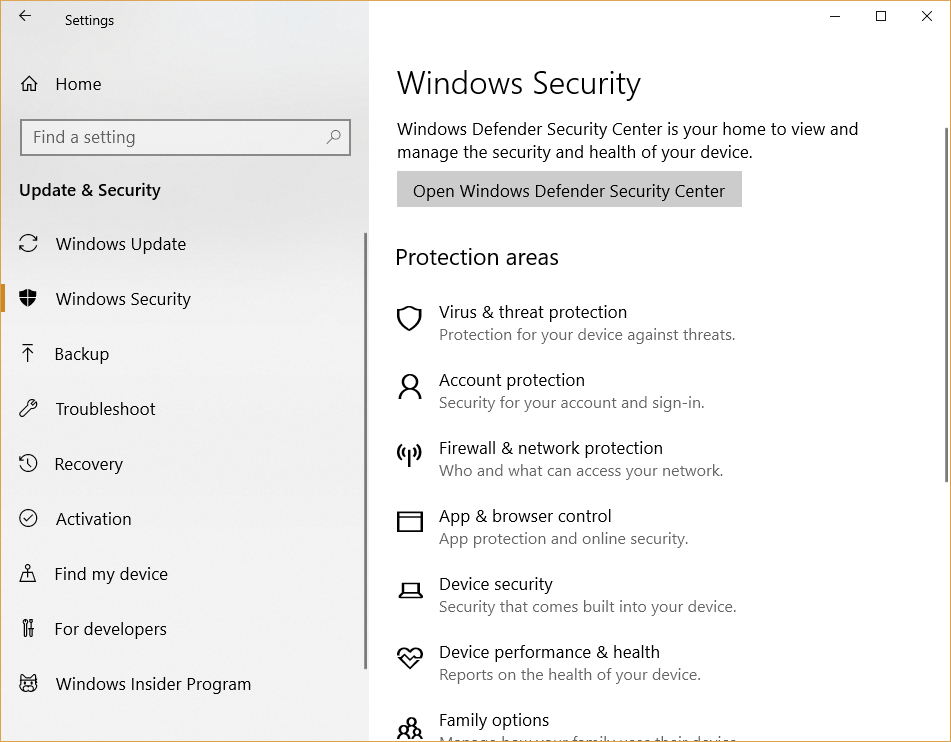
Windows Firewall and Internet security settings can restrict QuickBooks Desktop from connecting to the server system and also to the company file saved on it. Follow our article on how fixing the Windows firewall is blocking QuickBooks issues for detailed instructions on getting rid of any restrictions imposed by these Windows security features.
Conclusion
Finally, we have reached the end of our blog on QuickBooks Error H202. We hope that after going through the information mentioned above, you will be able to understand and resolve multi-user error h202 in a better manner. For situations where nothing helps, and the issue persists, we suggest consulting an expert as soon as possible. Connect with Accounting Helpline crew at 1.855.738.2784 for prompt assistance.
FAQ’s
Should I Turn the Host Multi-user Access Option Off to Fix QuickBooks Error H202?
Yes, you should keep the host multi-user access option disabled on the workstations. Workstations are computers in the network that do not host company files. Only the server should host the file to avoid errors like QuickBooks Error H202 in Single User Mode.
How to Avoid Getting Error H202 in QuickBooks?
You can avoid getting an H202 error by following the instructions below:
– Begin with refreshing the QuickBooks Database Server Manager on the server.
– Add the system’s services to the Windows Admin group after verification.
– Next, configure the firewall to ping the server.
– End by adding the server’s IP address to the Windows host file.
What are the Symptoms of QuickBooks Error Message H202?
If you are unable to identify the difference between QuickBooks error H202 server 2016 and any other issue arising in your program, have a look at the standard symptoms of the error to confirm –
– You may be unable to work on the multi-user mode or switch to the single-user mode.
– QuickBooks screen may stop responding or turn blank.
– Windows might shut down suddenly to prevent damage to the computer device.
– The screen becomes blurred.
– Certain tabs in the QB window might not work.

Edward Martin is a Technical Content Writer for our leading Accounting firm. He has over 10 years of experience in QuickBooks and Xero. He has also worked with Sage, FreshBooks, and many other software platforms. Edward’s passion for clarity, accuracy, and innovation is evident in his writing. He is well versed in how to simplify complex technical concepts and turn them into easy-to-understand content for our readers.