Last Updated on April 17, 2026
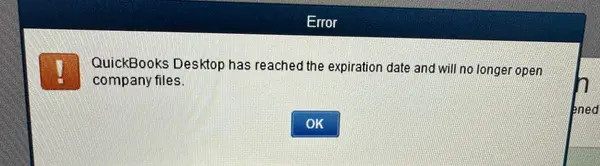
Once installed onto the host server and workstations, QuickBooks does not require validating the license every now and then. Yet, there have been cases reported when clients have to go in and revalidate their licenses every week or so. The QuickBooks desktop has reached the expiration date. The error seems to come up when QuickBooks is unable to connect to the QBW32.exe file. Users at times encounter the issue with the following warning: “QuickBooks Desktop has expired. To continue using QuickBooks Desktop, you must buy QuickBooks Desktop now”.
The temporary fixes are available by entering the license and validating it. But, here we are going to provide you with the permanent solution to the QuickBooks Desktop expired message and the ” will no longer open company files error.
Dial the Accounting Helpline support number 1.855.738.2784 to get help with this warning: QuickBooks Desktop has expired. The experts will provide quick solutions, eliminating the need for temporary solutions.
Why does the Error Message QuickBooks Desktop has Expired appear frequently?
A number of reasons have been observed that bubble up the error message QuickBooks Desktop has expired. Some of those reasons for frequent error occurrence are listed below:
- You may have subscription errors in QuickBooks triggering this message.
- Your subscription details might not be updated in the CAMPS portal.
- A damaged Windows file may restrict QuickBooks Desktop from connecting to online services.
- A problem with the file where QuickBooks saved your product and license info may cause this error.
- Problems with the internet connection may trigger this error.
- Your QuickBooks license registration might be damaged.
- Server issues may need fixing for this error to go away.
Step-by-Step Methods to Remove QuickBooks Desktop Expired Warning
Here’s what you need to do to fix the QuickBooks Desktop has Reached the Expiration Date Windows 10:
Solution 1: Configure the Firewall or Other Antivirus Software Settings
Firewall configurations can help remove blockages caused by QuickBooks as follows:
- Click on the Windows Start menu, and in the text box, type Windows Firewall to search for it.
- Open Windows Firewall and choose Advanced Settings.
- On the Inbound Rules, right-click and select New Rule.
- Choose Port and then select Next.
- TCP must be selected.
- In the Specific Local Ports field, enter the ports as per the QuickBooks year version.
- QuickBooks Desktop 2020: 8019, XXXXX.
- QB Desktop 2019: 8019, XXXXX.
- QuickBooks Desktop 2018: 8019, 56728, 55378-55382.
- QuickBooks Desktop 2017: 8019, 56727, 55373-55377.
- Once you have entered the port number, click on Next.
- Choose Allow the Connection and press Next.
- All the profiles must be marked before you click on Next.
- Create a rule with a name such as “QBPorts(year).”
- Once done, click Finish.
The above steps are to be repeated so as to create outbound rules.
Open QuickBooks and check if the QuickBooks Desktop has expired warning is gone.
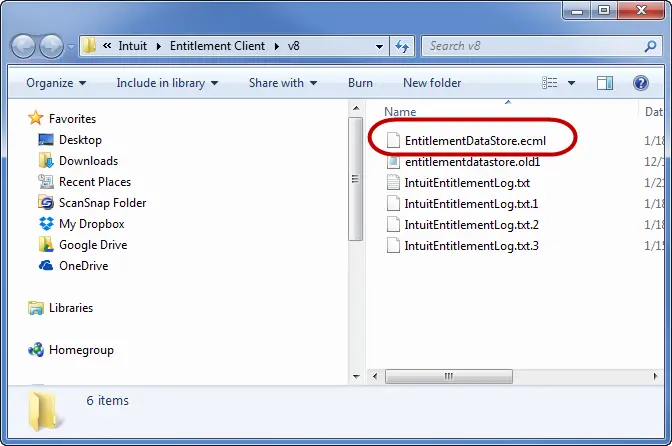
Solution 2: Remove the EntitlementDataStore.ecml File
Because a damaged license registration file can cause problems with QB Desktop, resolve the issue as follows:
- If QuickBooks Desktop is open, close it.
- Look that no QuickBooks processes must be running.
- Use the Ctrl+ Shift + Esc keys to open the Task Manager.
- Choose the Processes.
- With the help of the Processes Name header, sort the processes alphabetically.
- Search for the variations of exe and select it to End Task.
Open the entitlement data folder for your operating system and version of QuickBooks with the steps below:
- Open the Run window by using the Windows + R keys together.
- Enter C:\ProgramData\Intuit\Entitlement Client\v8 (or v6) and press Enter. (The folder location is the same for all QuickBooks Desktop and QuickBooks Desktop Enterprise versions.)
- When you have found the file, right-click on it and choose Delete.
- Click Yes to confirm the deletion process.
- Register the QuickBooks application again and see if the error message QuickBooks Desktop has expired is gone.
Solution 3: Update QuickBooks Desktop and the Database Server Manager
You may need updated versions of QuickBooks Desktop and Server Manager to remove the expiration message in QuickBooks Desktop:
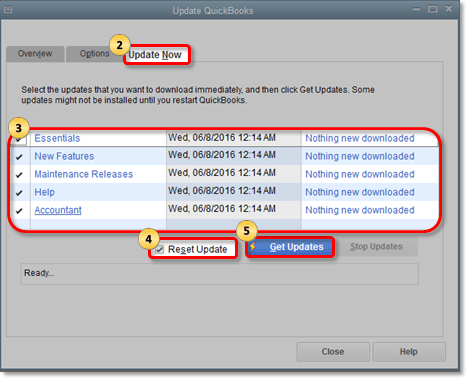
- Download the latest version of QuickBooks.
- In the Select Country drop-down, choose your country.
- Similarly, select Product and Version, then hit on Search.
- Get Updates and save the downloaded file at an easily accessible location.
- Open the downloaded file from your saved location to install it.
- This will also update QuickBooks Database Server Manager.
- Reboot the server after the installation.
- After the server is updated, the workstations will display the following message: The Company file needs to be updated to work with this version of QuickBooks Desktop.
- There might be a prompt to create the backup, follow the steps as the database structure can be modified.
- Once the process is completed, open the file.
Solution 4: Use QuickBooks File Doctor Tool
The QuickBooks File Doctor tool can be beneficial when removing the expiration date message:
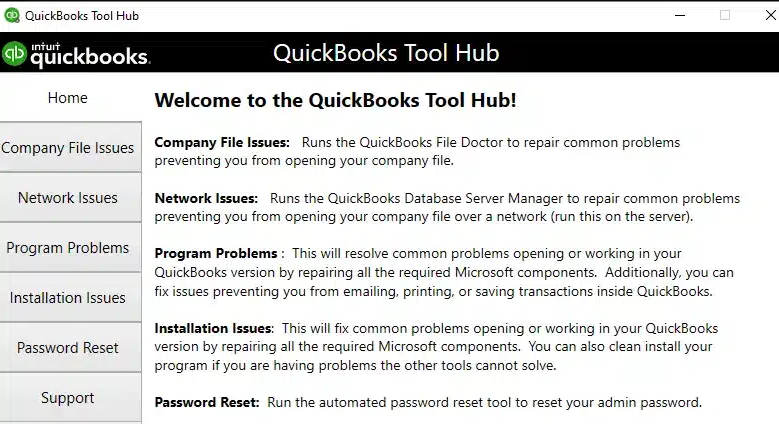
- Close QuickBooks and download the QuickBooks Tool Hub.
- Save the file at an easily accessible location.
- Open the location where the exe file was downloaded.
- With the on-screen instructions, install the QuickBooks Tool Hub after agreeing to the terms and conditions.

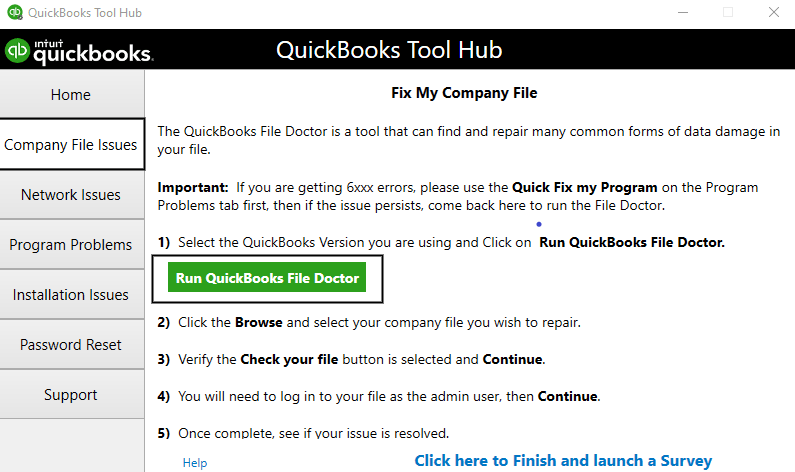
- When QuickBooks Tool Hub has opened, click on the Company File Issues
- Click Run QuickBooks File Doctor.
- The QuickBooks file doctor may require a minute to open before it works on the QuickBooks Desktop has expired issue.
- In QuickBooks File Doctor, select your company file from the drop-down menu. If you don’t see your file, select Browse and search to find your file.
- Choose Check your file (middle option only).
- Press Continue after that.
- Enter your QuickBooks admin password and then select Next.
Solution 5: Run QuickBooks Install Diagnostic Tool
A damaged Windows file might trigger the QuickBooks Desktop has reached the expiration date message. Remove this issue as follows:
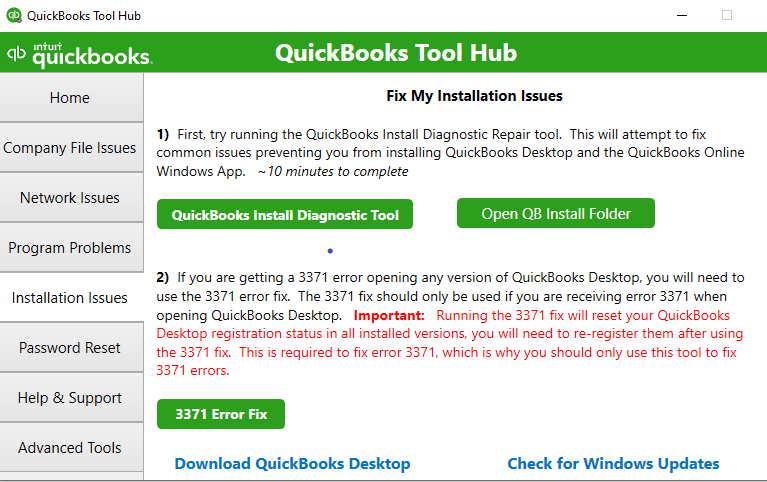
- Download and use QB Tool Hub.
- Select Installation Issues.
- Select QuickBooks Install Diagnostic Tool.
- Run the scan and rectify the issues.
Solution 6: Enter CAMP(s) to Update Billing Info
Ensure your QB billing details are updated as follows:
- Enter the Customer Account Management Portal (CAMPs) with administrative privileges.
- Choose QuickBooks Desktop from your list of products and services.
- Click on “Details” adjacent to your QuickBooks Product.
- Click “Edit” next to your Payment Method and proceed to update your payment information. Once you’ve made the necessary changes, select “Save and Close.”
- Launch QuickBooks Desktop.
- Navigate to the Help menu and hover your cursor over “Manage My License.” From the dropdown menu, choose “Sync License Data Online.”
Solution 7: Verify Your Internet Connection Settings
To check the reliability of your secure internet connection, access a web browser and visit the banking website.
If you encounter difficulties accessing the banking page, it means QuickBooks won’t be able to receive updates. In such a case, contacting your internet service provider (ISP) for assistance is advisable.
However, if you can successfully access the banking website, proceed to follow these steps in QuickBooks Desktop:
- Go to the Help
- Choose Internet Connection Setup.
- Select the option that says Use this computer’s internet connection settings for this application.
- Click Next.
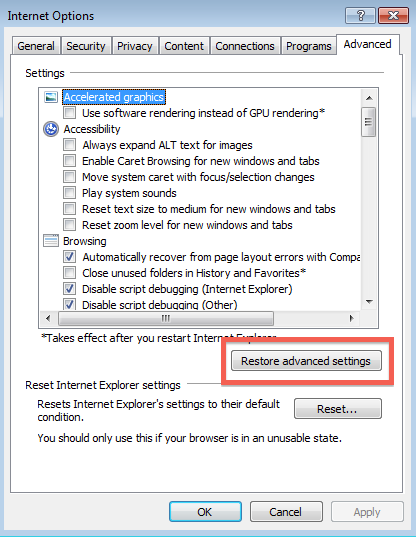
- Select Advanced Connection Settings.
- On the Advanced tab, choose Restore Advanced Settings.

- Click OK.
- Select Done.
- Now, you can proceed to update QuickBooks Desktop once more.
With the steps above on frequent warnings of QuickBooks Desktop has expired or QuickBooks Desktop Has Reached the Expiration Date, we aimed at a permanent fix. If, after a while, the error message QuickBooks Desktop has expired still pops up, contact the Accounting Helpline team at 1.855.738.2784 for better troubleshooting help and assistance.
FAQs
Why do I see the message “QuickBooks Desktop has Reached the Expiration Date”?
This message can result from various factors, including:
– Errors related to your QuickBooks subscription.
– Outdated subscription details in the CAMPS portal.
– Windows file damage that hinders QuickBooks Desktop’s online service connectivity.
– Issues in the file where QuickBooks stores product and license information.
– Internet connection problems.
– Damage to your QuickBooks license registration.
– Need for server-related problem resolution to resolve this error.
How do I resolve the QuickBooks Desktop has reached its expiration date message?
The following solutions will help fix the problem of QuickBooks Desktop has reached the Expiration Date:
– Firewall configurations to ensure it doesn’t restrict the server connections
– Deleting the damaged product registration, aka EntitlementDataStore.ecml file
– Updating QB Desktop and server manager
– Employing QB File Doctor or Quick Fix My File
– Applying QB Install Diagnostic Tool scans
– Updating Billing Details in CAMPS
– Verifying the Internet Connection Settings
What are the signs that the QuickBooks Desktop has reached its expiration date message?
You may experience the following issues when you see this message:
– You may be unable to extend the company file
– You may encounter problems while integrating and syncing details from one app to another
– Other QuickBooks operations might get hampered with this message
When does the QuickBooks Desktop have reached its expiration date message appear?
You may face this message in the following scenarios:
– When your product license registration file is damaged
– When your billing details are outdated
– When you’re working on your company file
– When you’re trying to sync your data from one app to another
– When you have damaged Windows files
What precautions should I take to avoid the QuickBooks Desktop has reached its expiration date message?
Keep the following precautions in practice:
– Stay Updated: Regularly update your QuickBooks Desktop software to the latest version. Intuit often releases updates and coverings that may include security improvements and bug fixes.
– Maintain a Reliable Internet Connection: A dependable internet connection is necessary for QuickBooks to validate your license and subscription. Ensure you preserve a consistent and reliable internet connection.
– Frequently Back Up Data: Regularly back up your company data for data loss prevention in case of unexpected disruptions.

Edward Martin is a Technical Content Writer for our leading Accounting firm. He has over 10 years of experience in QuickBooks and Xero. He has also worked with Sage, FreshBooks, and many other software platforms. Edward’s passion for clarity, accuracy, and innovation is evident in his writing. He is well versed in how to simplify complex technical concepts and turn them into easy-to-understand content for our readers.