Last Updated on March 11, 2025
QuickBooks error 9000 interrupts payroll data and direct deposit facilitating procedures, hampering operations and activities. You can encounter considerable losses if you don’t address this burdening problem while managing your payroll. So, consider this guide as your friend to navigate the troughs of this challenging error, grasping your system.
Sending payroll data or direct deposits of paychecks is impossible if you have encountered QuickBooks error 9000. It happens when QuickBooks cannot communicate with its server for some reason. QuickBooks has many reasons for experiencing internet connectivity issues; fixing these causes will automatically eliminate this error from the application. Further in this article, we will focus on details and explore what could trigger error 9000 in QuickBooks and the solutions we need to remove the error permanently.
Handling QuickBooks error 9000 can be a significant roadblock in hassle-free application runs. Although we have simplified its procedure in this extensive guide, we would love for you to reach our Accounting Helpline support team at 1.855.738.2784 if anything challenges you. We wouldn’t want you to get stuck and feel helpless on this wild ride. Let our support team aid you in getting out of this tough time
What is QuickBooks error 9000?

QuickBooks error code 9000 emerges when users attempt to send payroll data or deposit salaries to employees’ accounts using QB’s ‘direct deposit’ tool. The issue indicates connection problems with the QB server or your system’s internet settings.
Further, QB’s communication with the Intuit server may be hampered for you to see the QB error 9000.
Different QuickBooks error 9000 messages you may experience when this code infects your system include:
“Error 9000: The application has encountered problems, so it needs to be closed. Sorry for the inconvenience.
OR
Error 9000: QuickBooks is unable to open this company file.
OR
QuickBooks Error code 9000, or there is a payroll connection server error. Try again later.”
If you encounter these caution signs, we suggest you examine your system for the following causes.
Reasons for QuickBooks error 9000
The multiple factors leading you to error 9000 QuickBooks Desktop are as follows:
Internet Connection Issues
- Slow or Unstable Connection: A sluggish or irregular internet connection can derange the communication between QuickBooks and the Intuit server, leading to error 9000.
- Internet Interruptions: If your internet connection experiences interruptions during data transmission to or from QuickBooks, it can trigger this error.
Firewall or Security Software
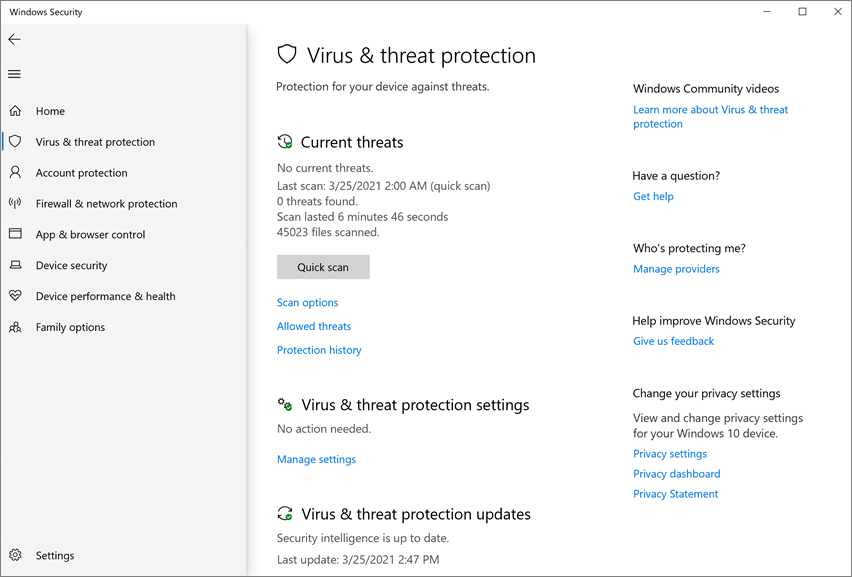
- Blocking QuickBooks: Firewall or security software on your computer may put up barricades for the QuickBooks application from entering the internet’s gates. You may struggle with these programs labeling QuickBooks as a potential security threat.
- Incorrect Configuration: Other times, the firewall or security software may be misconfigured, deterring QuickBooks from inducting a secure connection.
Outdated QuickBooks
- Compatibility Issues: The Intuit server may stop responding to outdated QuickBooks applications’ server. Since you can’t access the newest features, smooth communication gets interrupted.
Incorrect TLS Settings
- TLS Version Mismatch: QuickBooks depends on Transport Layer Security (TLS) to secure data transfer. If your computer’s TLS settings are mismatched, or there’s a contrast between the version of QuickBooks and the server, error 9000 can occur.
Date and Time Settings
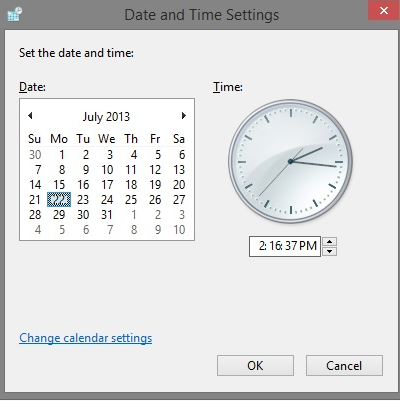
- Incorrect Date or Time: The synchronization between QuickBooks and the server may be infected by inaccurate time and date, generating communication issues.
Internet Explorer Settings
- Dependency on Internet Explorer: QuickBooks Desktop may count on Internet Explorer settings for particular online functions, even if you primarily use a different web browser. If Internet Explorer settings are unsuitable, it can affect QuickBooks’ internet connectivity.
QuickBooks Sync Manager Issues (for QuickBooks Desktop)
- Sync Manager Problems: Issues with the QuickBooks Sync Manager, a QuickBooks Desktop component, can disrupt data synchronization between your company file and the server.
Network Issues
- Local Network Problems: Issues with your local network, such as router malfunctions or network configuration problems, can intrude on QuickBooks’ ability to join the internet and the server.
Third-Party Software Interference
- Conflicting Software: Other software running on your computer, especially security or system management software, may meddle in QuickBooks’ internet access or its capability to establish a secure connection.
Server Downtime:
- Intuit Server Maintenance: The Intuit server may occasionally undergo maintenance or experience downtime, causing connection problems during such periods.
QuickBooks Company File Corruption
- Data File Issues: Errors or corruption within your QuickBooks company file can influence the software’s ability to send data to the server, potentially resulting in error 9000.
Incorrect SSL Settings
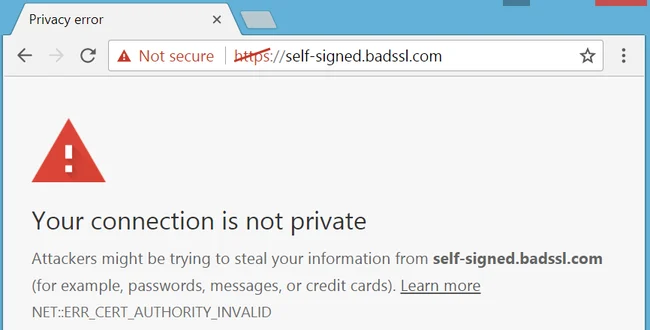
- SSL Configuration: Outdated or inaccurate SSL (Secure Sockets Layer) configurations on your computer can hinder QuickBooks’ capacity to create secure connections for transmitting data.
Thus, if you’re encountering QuickBooks error 9000 in your operations, assess your system to find its root cause.
In what circumstances does QuickBooks Encounter Payroll Connection Server Error or Error 9000?
First, let’s discuss the reasons that cause QuickBooks Payroll Connection Server Error 9000.
- If your internet connection is not working correctly.
- The date and time on your system are not correct.
- If you are using QuickBooks in Multi-User mode.
- Internet browser’s security certificates are expired.
- Your computer’s firewall is interrupting the QuickBooks Desktop application.
- Internet is facing a network time-out problem.
These constitute the several instances leading up to QuickBooks error 9000.
Symptoms of QuickBooks Error 9000
The message code 9000 QuickBooks Desktop shares the following signs to reveal its presence:
- Error Message: An error message clearly noting QuickBooks error 9000 and problems causing inconvenience will light up on your screen. The description in the warning will give you insights into the problem.
- Freezing or Crashing: When trying to execute specific tasks, like sending payroll information or processing direct deposit paychecks, QuickBooks might experience freezing, unresponsiveness, or crashing.
- Slow Performance: You may observe that QuickBooks operates at a reduced speed compared to its typical performance when accessing online functions or executing tasks that depend on an internet connection.
- Failed Data Transmission: While attempting to transmit data to the Intuit server, such as payroll details or updates, you might face recurrent failures or disruptions while transferring the data.
- Inability to Update: Due to communication issues with the server, QuickBooks might encounter difficulties downloading and installing updates, encompassing software patches and payroll updates.
- Inability to Send Forms: If you’re attempting to send forms like invoices, reports, or emails through QuickBooks, you may encounter errors related to data transmission.
- Connection Errors: You may see messages implying that QuickBooks cannot establish a connection with the server or that there are problems with the internet connection.
- Delays in Online Banking: If you use QuickBooks for online banking, you may experience delays or errors when downloading bank transactions or reconciling accounts.
Sync Manager Issues (QuickBooks Desktop): In QuickBooks Desktop, the QuickBooks Sync Manager may exhibit errors or fail to sync data with the server. - Payroll Processing Issues: QuickBooks error 9000 has the potential to impact tasks related to payroll, like processing direct deposits, leading to delays or errors in the payment of employees.
These signals need your immediate attention so you can resolve QuickBooks error 9000.
Consequences of QuickBooks Error 9000
Getting QuickBooks error 9000 causes the following outcomes:
- Lagged Payroll Processing: If the error transpires while sending payroll data, it can linger in processing employee salaries and payroll-related tasks.
- Data Transmission Errors: QuickBooks may be unable to disseminate critical financial data to the Intuit server, potentially leading to inaccuracies in financial statements and records.
- Software Performance Issues: Error 9000 has the potential to slow down QuickBooks, make it less responsive, or even lead to software crashes, which can hinder your ability to use the software effectively.
- Inability to Update QuickBooks: Communication problems with the server may deter you from downloading and installing essential software updates, including critical security patches and feature enhancements.
- Online Banking Delays: If you operate QuickBooks for online banking, you may undergo delays or errors when attempting to download bank transactions, reconcile accounts, or manage financial data.
- Frustration and Downtime: Managing QuickBooks error 9000 can result in annoyance and time lost as you troubleshoot and try to address the problem.
- Risk of Data Loss: While rare, severe transmission problems can potentially result in data loss or deterioration within your QuickBooks company file.
- Impact on Business Operations: This error can potentially disrupt daily operations and produce financial discrepancies for businesses that heavily depend on QuickBooks for financial management.
Thus, these outcomes need to be avoided by implementing the instant troubleshooting solutions mentioned below.
Requirements To Satisfy Before Fixing QuickBooks Error 9000
The conditions that you must satisfy before you attempt fixing what is QuickBooks error 9000 are as follows:
- Access to QuickBooks: Make sure you can get to the QuickBooks software and the company file that’s encountering the error 9000. Opening QuickBooks is vital to produce the essential changes and adjustments.
- Administrative Rights: It would help to affirm that you possess administrative privileges or adequate permissions on the computer where QuickBooks is installed. Administrative access is frequently necessary to alter settings and configurations.
- Internet Connectivity: A stable and correctly working internet connection is necessary to rectify the error 9000 in QB. A robust internet link ensures you can communicate with the Intuit server.
- QuickBooks Account: Confirm that you maintain an active QuickBooks account and possess a valid subscription if you utilize a subscription-based software edition.
- Company File Backup: Do not kickstart QuickBooks error 9000 troubleshooting before assembling your company file backup. Any wrong happenings during the troubleshooting procedure won’t be able to harm your files.
- QuickBooks Updates: You should examine and install any accessible QuickBooks updates. If you maintain QuickBooks in an up-to-date state, it assists in occasionally addressing errors, as updates often comprise bug fixes and enhancements.
- System Conditions: Meeting the minimum system requirements for running QuickBooks is another requirement to fulfill while troubleshooting QB error 9000. Inadequate hardware or outdated software can generate compatibility issues and errors in the app.
- Administrator Password (if applicable): If you’ve specified an administrator password for QuickBooks, ensure you have it on hand. You might need it to make specific changes or configurations.
- Firewall and Security Software Settings: You should become familiar with your firewall and security software configurations. You may have to revamp these settings to enable QuickBooks to establish online communication.
- Knowledge and Resources: Further, add a cherry to the cake by having access to resources like QuickBooks support documentation, user guides, or online resources that can guide on resolving error 9000. Understanding the specific steps for your QuickBooks version can be very worthwhile.
- Alternative Internet Connection: If your primary internet connection is problematic, having an alternative internet connection option, such as a mobile hotspot or a different ISP, can be helpful for troubleshooting.
- Time and Patience: Addressing QuickBooks errors may require considerable time and tolerance, especially when dealing with various resolution procedures. In fact, you should be ready to adhere to a methodical approach for diagnosing and resolving the problem.
After these prerequisites are in place, the following section will allow you to implement how to fix QuickBooks error 9000.
How to Rectify QuickBooks Payroll Connection Server Error or Error 9000?
We’d like you to consider the points below and jump into troubleshooting later:
IMPORTANT:
- Make sure all the Windows drivers are updated and free from corruption.
- Check if you have the latest version of the QuickBooks Desktop application installed. If not, Update QuickBooks without delay.
- Take a backup of your QuickBooks data before performing any troubleshooting steps.
- If you can’t connect to the internet outside of QuickBooks, try basic internet troubleshooting, like resetting your router and switching to a hard-wired connection. If none of them works to help you connect to the internet, contact your ISP for help.
Following are the troubleshooting steps to get rid of Error 9000 in QuickBooks:
After you’ve verified why I am getting QuickBooks error 9000, the following resolution methods will solve your problem:
Solution 1: Set up QuickBooks Desktop Internet Connection Settings:
A proper internet connection setup ensures that QuickBooks can easily connect to the server, and internet connection issues are not the reason you are getting the error.
- Open the QuickBooks application and click the Help tab.
- Now select “Use my computer’s Internet connection settings to establish a connection when this application accesses the Internet. “
- Now click Next and go to Advanced Connection Settings.
- Select LAN settings, click the “Automatically Detect Settings” check box, and ensure the “Proxy Server” check box is unchecked.
- Now click OK and then click Done.
Solution 2: Run Disk Cleanup Tool to remove junk files and temporary memory files:
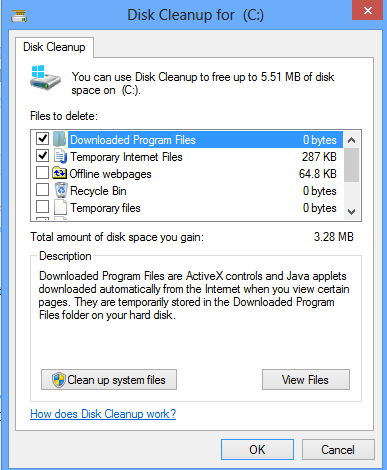
System junk files can severely affect the performance of programs running on them and trigger issues like error 9000 in QuickBooks. So, getting rid of these junk files stored on your system becomes crucial to resolve the error.
- On your keyboard, press the Windows key + R
- A Run box will appear with a text box in it.
- Type “cleanmgr” in the text box and press Enter.
- Now, the disk cleanup utility will appear on the screen.
- Select the C: drive from the drop-down list and click OK.
- A new disk cleanup window will appear on the screen.
- Click the OK button on that window to clean up all the junk and temporary files from the system.
Solution 3: Perform System Restore:
If none of the solutions mentioned above help fix the error, you will need to restore your system to a previous restore point when QuickBooks was not facing issues sending payroll data to Intuit.
- Click the Start button on your keyboard.
- Under the Start menu, click Control Panel.
- Now, type System Restore in the search box at the window’s top right side.
- Click System Restore and enter the administrator’s password if it prompts you to do so.
- Now select a Restore Point you have created earlier and click Next.
- Follow the on-screen instructions to complete the Restore process.
If none of the troubleshooting steps mentioned above works for you, you can try reinstalling the QuickBooks Desktop application, but make sure to take a backup of company file data before that.
Solution 4: Flush the Domain Name Server (DNS)
Flushing the DNS (Domain Name System) cache can help resolve network-related issues by emptying your computer’s outdated or corrupted DNS records. Here we present you the actions to flush the DNS cache on a Windows computer:
Action 1: Open Command Prompt with Administrative Privileges
- Shove the keyboard’s Windows key.
- Input “cmd” into the search streak.
- Right-tap “Command Prompt” in the search consequences.
- Decide “Run as administrator” from the highlighted menu.
- It unfurls Command Prompt with elevated privileges.
Action 2: Flush the DNS Cache
- Reach into the Command Prompt window.
- Input the following command.
- Hit Enter.
- ipconfig /flushdns
- You should witness a message inferring that the DNS Resolver Cache has been successfully flushed.
Action 3: Close Command Prompt
Seeing the success message should push you to shut down the Command Prompt window.
Your DNS cache erases with these steps, and we would like you to reboot your gadget or network devices (such as routers). This step helps in initializing the modifications seamlessly.
Solution 5: Undertake Firewall Configuration
If you rearrange your firewall and antivirus backgrounds, you can remove any impositions by this system restricting the app’s functionality. Here is the procedure to manage this hurdle:
Step 1: Load and Install QuickBooks Tools Hub
We urge you to fix the common errors by employing the QuickBooks Tools Hub at your aid. First, close QuickBooks. Then, consider our recommendation for using the Tool Hub on a Windows 10, 64-bit system for the finest experience.
- Shut down QuickBooks.
- Initialize the latest version (1.6.0.3) of the QuickBooks Tool Hub.
- Reserve the file in an easily accessible location.
- Your Downloads folder or Windows desktop can be such places. Note: If unsure about your existing Tool Hub version, you can pick the Home tab to verify it and validate your version from the bottom.
- Unlock the downloaded file (QuickBooksToolHub.exe).
- Install, accept the agreement, and track every other command on the screen.
- After installation, double-click the icon on your Windows desktop to launch the tool hub. If you can’t find the icon, you can search for ‘QuickBooks Tool Hub’ in Windows and open the program.
Step 2: Run QuickBooks File Doctor
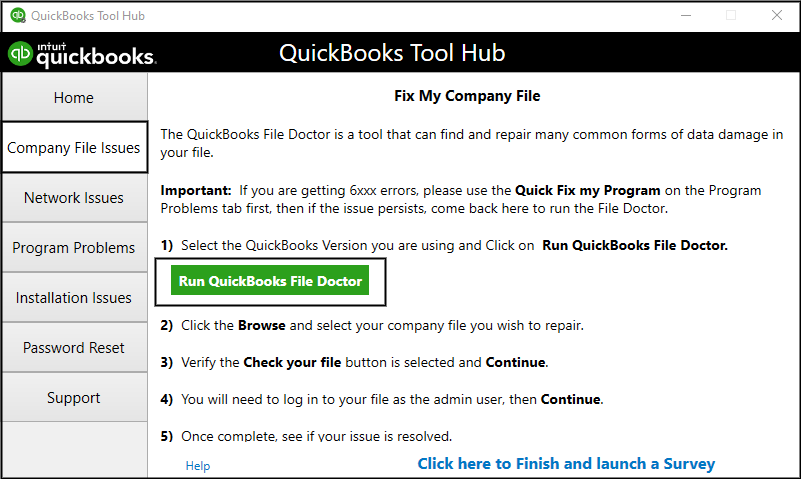
Along the way to the tool hub, move the cursor to Company File Issues.
- Pick ‘Run QuickBooks File Doctor.’
- You may have to linger for a minute for the file doctor to extend. Note: For situations when QuickBooks File Doctor doesn’t open, we want you to search for ‘QuickBooks Desktop File Doc‘ and spread it manually.
- Investigate the QuickBooks File Doctor components.
- Hover over your company file from the drop-down menu.
- An invisible file can arise by tapping ‘Browse’ to locate it.
- Prefer ‘Check your file and network.’
- Hit ‘Continue.’
- Put in your QuickBooks admin password.
- Tap ‘Next.’
- The scan duration depends on your file size, usually up to 5 minutes.
- Extend your QuickBooks app and company file as soon as the scan ends.
- Even if the scan says it was unsuccessful, it might still resolve your issue.
If you still encounter errors or can’t open your company file, proceed to Step 3.
Step 3: Manually Configure Firewall
Manual configuration will aid if QuickBooks File Doctor doesn’t resolve the firewall issue.
Count Firewall Port Exception for QuickBooks:
- Unfurl the Windows Start menu.
- Scour for ‘Windows Firewall‘ and open it.
- Pick ‘Advanced Settings.’
- Right-hit ‘Inbound Rules.’
- Prefer ‘New Rule.’
- Tap ‘Port.’
- Select ‘Next.’
Remind yourself to choose ‘TCP.’ Investigate the ‘Specific local ports’ field. Penetrate the ports mandated for your QuickBooks version:
- QuickBooks Desktop 2020 and after that: 8019, XXXXX.
- QuickBooks DT 2019: 8019, XXXXX.
- QuickBooks DT 2018: 8019, 56728, 55378-55382.
- QuickBooks DT 2017: 8019, 56727, 55373-55377.
Important: QuickBooks Desktop 2019, 2020, and future versions use dynamic ports, not a range, assigned during installation for exclusive use.
- Succeed in entering the port number.
- Hit ‘Next.’
- Pick ‘Allow the Connection.’
- Then ‘Next.’
- All the profiles available should have a mark, mainly if nudged.
- Tap ‘Next.’
- Stow the rule with a name like “QBPorts(year).”
- Click ‘Finish.’
Replicate these steps to initiate outbound rules. The same procedure will run but with ‘Outbound Rules’ in step 4.
Assemble Windows Firewall Exceptions for QuickBooks Programs:
- Unfurl the Windows Start menu.
- Scour for ‘Windows Firewall‘ and open it.
- Pick ‘Advanced Settings.’
- Right-hit ‘Inbound Rules.’
- Tap ‘New Rule.’
- Desire ‘Program.’
- Hit ‘Next.’
- Opt for ‘This Program Path.’
- Prefer to ‘Browse.’
- Uncover and pick an executable file from the table below.
- Then, hit ‘Next.’
Duplicate these steps for each executable file in the table. Ensure you’ve picked TCP in the ‘Specific local ports’ field. Don’t forget to input the mandated ports for your QuickBooks version, as mentioned in ‘Step 1: Configure Firewall Manually.’
Complete changes will apply if you reboot your gadget and reopen QB.
| Executable QB files | Location |
| DBManagerExe.exe | C:\Program Files\Intuit\QUICKBOOKS YEAR |
| Dbmlsync.exe | C:\Program Files\Intuit\QUICKBOOKS YEAR |
| AutoBackupExe.exe | C:\Program Files\Intuit\QUICKBOOKS YEAR |
| FileManagement.exe | C:\Program Files\Intuit\QUICKBOOKS YEAR |
| QBW32.exe | C:\Program Files\Intuit\QUICKBOOKS YEAR |
| QuickBooksMessaging.exe | C:\Program Files\Intuit\QUICKBOOKS YEAR |
| FileMovementExe.exe | C:\Program Files\Intuit\QUICKBOOKS YEAR |
| QBDBMgrN.exe | C:\Program Files\Intuit\QUICKBOOKS YEAR |
| QBLaunch.exe | C:\Program Files\Common Files\Intuit\QuickBooks |
| QBCFMonitorService.exe | C:\Program Files\Common Files\Intuit\QuickBooks |
| QBServerUtilityMgr.exe | C:\Program Files\Common Files\Intuit\QuickBooks |
| QBUpdate.exe | C:\Program Files\Common Files\Intuit\QuickBooks\QBUpdate |
| OnlineBackup.exe | C:\Program Files\QuickBooks Online Backup |
| IntuitSyncManager.exe | C:\Program Files\Common Files\Intuit\Sync |
Solution 6: Correct the SSL Settings
Correcting SSL (Secure Sockets Layer) settings is vital for ensuring secure and error-free communication between your QB software and remote servers. Here are the general steps to restore SSL settings on a Windows computer to fix QuickBooks error 9000:
Step 1: Unlock Internet Options
- Push the keyboard’s Windows key.
- Otherwise, hit the taskbar’s Windows icon to unfurl the Start menu.
- Input “Internet Options” into the search streak.
- Extract “Internet Options” from the search effects.
Step 2: Open Internet Options
- Enter the Internet Properties window.
- Head to the “Advanced” tab.
Step 3: Review SSL Settings
- Scroll down the settings checklist.
- Uncover the section labeled “Security.”
- The Security section houses various SSL and TLS settings.
- Review and modify SSL and TSL as you need.
- Here are some common SSL/TLS settings:
- Click Tools.
- Tap Internet Options.
- Access Connections.
- Hit LAN Settings.
- Unlock Automatically Detect Settings.
- Leave the Proxy Server box blank.
- Mark SSL 2.0 and SSL 3.0.
- Untick TLS 1.2.
Step 4: Apply Changes
- Acclimate the SSL and TLS settings by hitting the Apply button.
Step 5: OK and Restart
- Tap “OK” to exit the Internet Properties window.
- Let the effect of these revisions shine through a reboot.
Solution 7: Manage Publisher’s Certificate Revocation
Publisher’s Certificate Revocation is a security feature in web browsers investigating the revocation status of digital certificates used by websites and software publishers. If you encounter issues related to Publisher’s Certificate Revocation, you can turn this feature on or off in most web browsers. Here are the general steps for managing Publisher’s Certificate Revocation in different browsers:
For Internet Explorer:
- Open Internet Explorer.
- Get to IE’s upper-right corner.
- Tap the gear icon.
- Unfurl the Tools menu.
- Pick “Internet options.”
- Scan the Internet Options window.
- Walk to the “Advanced” tab.
- Pave the way to the “Security” section.
- Aim to investigate “Check for publisher’s certificate revocation.”
- Either check or uncheck it according to your preference of activating or deactivating it, respectively.
- Tap “Apply.”
- Pack “OK” to earmark the changes.
- Restart Internet Explorer.
- See how all these revisions apply to remove QuickBooks error 9000 from your device.
For Mozilla Firefox:
- Open Firefox.
- Witness (three horizontal lines) in the upper-right corner.
- Connect the menu icon.
- Select “Options.”
- See the left sidebar.
- Tap “Privacy & Security.”
- Scroll down to the “Certificates” province.
- Check underneath the “Validation” section.
- Treat this box as needed- “Query OCSP responder servers to confirm the current validity of certificates.”
- Similar to Publisher’s Certificate Revocation, checking or unchecking will activate or deactivate this button and its operations. So, pick per your necessities.
- Exit the Options tab to stow the changes.
Solution 8: Other Tool Hub Utilities
The firewall configuration steps suggest how to load and install QB Tool Hub. After running the file doctor tool, if you don’t find relief from the QuickBooks error 9000, we suggest you operate its other utilities. These mechanisms include Quick Fix My Program (Program Problems), QuickBooks Install Diagnostic Tool (Installation Issues), and QuickBooks Network Diagnostic Tool (Network Issues).
- QFMP resolves issues with your app’s performance, resolving the lags, slowdowns, and frequent crashes.
- The install diagnostic tool repairs MS Office components, critical to installing and running this app on your desktop and other installation issues.
- The network diagnostic tool rectifies issues with your network connections- multi-user and internet.
Hopefully, after attempting all these resolutions, the QuickBooks error 9000 will find no place on your gadget.
Furthermore, the last step is reinstalling your computer’s Windows operating system. Reinstalling Windows is an advanced troubleshooting procedure that requires expert supervision. If you are not a pro at advanced troubleshooting, call Our Accounting Helpline Payroll Support Phone Number 1.855.738.2784 and connect with one of our expert technicians who can help you rectify QuickBooks Payroll Connection Server Error 9000 by using advanced tools specially designed to fix such errors.
FAQs
Does QuickBooks Error 9000 affect payroll processing?
Yes, QuickBooks Error 9000 can dissemble payroll-related functions, such as direct deposit operations, driving delays, or errors in paying employees.
Is QuickBooks Error 9000 a common issue?
QuickBooks Error 9000 is a somewhat standard issue, and many QuickBooks users encounter it at some point, especially when using online features and services.
Can I resolve QuickBooks Error 9000 on my own, or do I need professional assistance?
You can often resolve QuickBooks Error 9000 on your own by pursuing troubleshooting steps. However, if you are skeptical or the issue persists, striving for professional aid from QuickBooks support or IT experts is advisable.
How can I prevent QuickBooks Error 9000 from occurring in the future?
The prevention tips for QuickBooks Error 9000 include:
1. Maintaining a steady internet connection.
2. Preserving your QuickBooks software updates.
3. Regularly reviewing and revising firewall and security settings.
4. Following the best approaches for using QuickBooks online features.
What should I do if QuickBooks Error 9000 persists despite troubleshooting?
If QuickBooks Error 9000 continues to occur even after troubleshooting, we recommend reaching out to our QB support team.

Edward Martin is a Technical Content Writer for our leading Accounting firm. He has over 10 years of experience in QuickBooks and Xero. He has also worked with Sage, FreshBooks, and many other software platforms. Edward’s passion for clarity, accuracy, and innovation is evident in his writing. He is well versed in how to simplify complex technical concepts and turn them into easy-to-understand content for our readers.

