Last Updated on March 10, 2025
Many users have reported encountering QuickBooks scheduled backup not working error. It has messed up with their storage system and is causing severe risk of data loss if not given attention soon. However, here’s a comprehensive guide to help you figure out the ins and outs of this error and how to eliminate it effectively and quickly.
QuickBooks automatic backup is a data backup feature that backs up your crucial QuickBooks files on a regular basis. Utilizing the functionality, you can schedule the backup in such a way that QuickBooks will automatically take the backup of your data even if you forget to do so. However, the scheduled backup feature also encounters errors that cause data-related issues. So, follow the article for detailed troubleshooting methods.
Are you struggling to eliminate the QuickBooks scheduled backup not working errors? Call the Accounting Helpline Support Number 1.855.738.2784 for Immediate Assistance from professionals.
Some Reasons that Trigger “QuickBooks Scheduled Backup not Working” Error
Look for the following triggers when your QuickBooks online data backup doesn’t work:
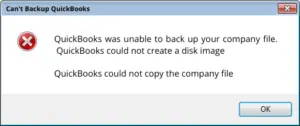
- QuickBooks is set up to run for a different version of Windows. For example – you are using Windows 10, and QuickBooks is configured for Windows XP or Windows Server 2003.
- Improper setup of scheduled backups in QuickBooks may cause QuickBooks online backup not working error.
- Compatibility issues between the Windows operations system and QuickBooks can cause problems in the backup.
- QuickBooks may not have the required access permissions to create backups in the designated drive or folder.
- Outdated IDP is another reason that can trigger such an issue in the program.
- Issues in the installation and selection of the .NET Framework can also trigger issues scheduling backups in QuickBooks.
These reasons are adequate to address the problem in QuickBooks remote backup. Therefore, effective troubleshooting solutions are given as follows to fix the issue.
Here’s How to Resolve QuickBooks Scheduled Backup not Working on Windows Problem
Resolve the QuickBooks Scheduled Backup not Working error by implementing the following solutions:
Troubleshooting Solution 1: Consider updating Intuit Data Protect (IDP) to the latest release.
We update IDP to ensure the backups go smoothly. Let’s learn how to install updates for IDP.
Step 1: Download the Latest Intuit Data Protect Update
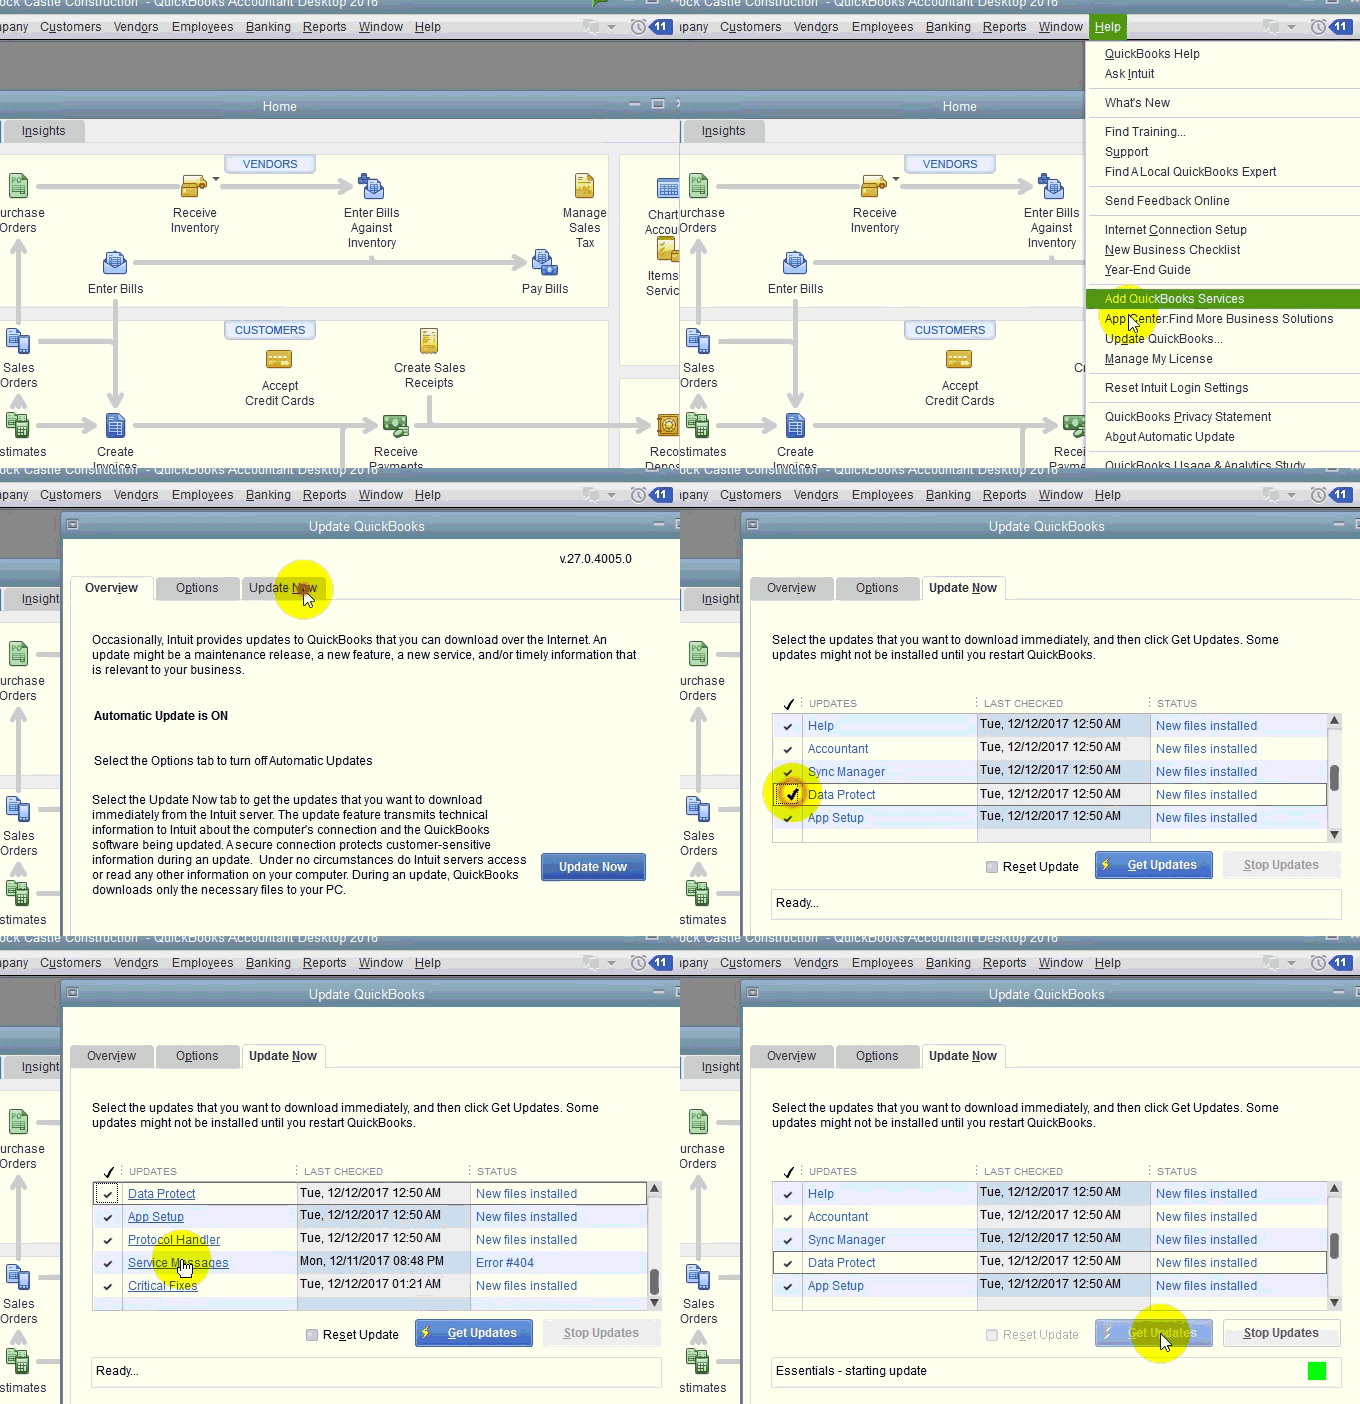
- Go to the Help menu, choose Update QuickBooks, and then select the Update Now tab.
- Ensure you select Data Protect from the list and then choose Get Updates.
Step 2: Install the update of IDP
- Choose the up arrow ^ on the desktop toolbar. It’s usually found in the lower-right corner near the clock.
- Then, right-click the IDP icon that looks like a green padlock and choose About Intuit Data Protect.
- Choose Update, and finally hit OK.
Troubleshooting Solution 2: Create a Windows User Account with Admin Rights
Step 1: Consider Adding a Windows User with Admin Rights
- Tap on the Windows Start menu.
- Choose All Programs, then open Windows Small Business Server, and then choose Windows SBS Console.
- Now, choose Users and Groups, then choose the Add a new user account tab.
- Fill in the user info, and then follow the Add a New User Account wizard.
- Finally, give the new user admin rights and then hit the Finish option.
Step 2: Consider Giving Admin access to the QuickBooks programs Exit the QuickBooks Desktop.
- Go to the Windows Start menu, open the Control Panel, and then choose User Accounts.
- Look for the QBDataServiceUserXX for your version of the QuickBooks Desktop.
- Choose Change the Account type, then choose Administrator, and then choose Change Account Type.
- Hit the Apply option to save the changes, and then follow these steps for each version of QuickBooks Database Server Manager you have.
Now, we will verify that the Windows user profile logged in has admin-level access.
In case you access both QuickBooks Desktop and Intuit Data Protect locally
It is important that the Windows user profile logged in has admin-level privileges to ensure full access to IDP and QB Desktop. Let’s learn how to do that:
1. Press Ctrl + R on the keyword to open the Run Command.
- Enter Control Panel and then choose OK to access the Control Panel.
- Go to User Accounts to see the Administrator placed below the User Name.
It simply means that the user logged in has full access to IDP.
In case you access both QuickBooks Desktop and Intuit Data Protect remotely
In this scenario, it is crucial to ensure that the remote session is running and does not automatically time out before and during the scheduled backup time. Let’s learn how to check the server settings:
- Open the Control Panel and go to System and Security.
- When you open the System and Security, you will see Power Options; tap on this option.
Note:- Adjust the computer settings to ensure the system doesn’t sleep. It will help the remote session keep running before and during the scheduled backup time.
Troubleshooting Solution 3: Run QuickBooks in Compatibility Mode
Set automatic backup QuickBooks by ensuring compatibility between Windows and QB.
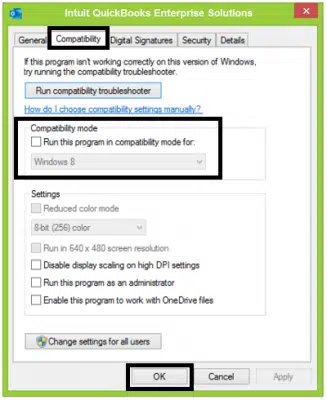
- Right-click the QuickBooks icon and select Run QuickBooks in compatibility mode.
- Choose Compatibility, and then check the box next to the Run this program in compatibility mode option.
- Select the Windows version from the drop-down menu.
- Finally, check the Run this program as an administrator option from the Privilege Level section.
- Select the Apply option and then hit Okay.
Troubleshooting Solution 4: Enable the .NET Framework 3.5 to Ensure Optimal Compatibility
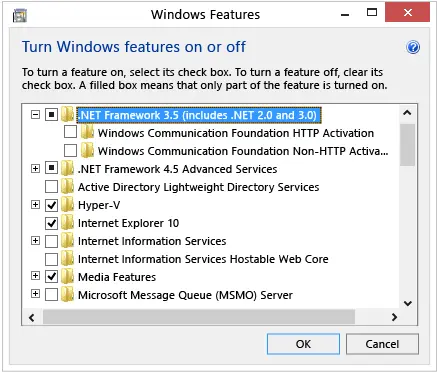
- Press the Windows + R button to open the Run window.
- Type in Control Panel, then select OK to open it.
- Choose Uninstall a Program, and then select Turn Windows features on or off.
- Make sure that .NET Framework 3.5 is enabled. Also, the .NET Framework 4.5 must be selected by default.
- In case it is unchecked, select it and then hit OK. On the contrary, if it is already selected, then hit the Cancel option.
Solution 5: Verify Scheduled Automatic Backup Settings in QuickBooks
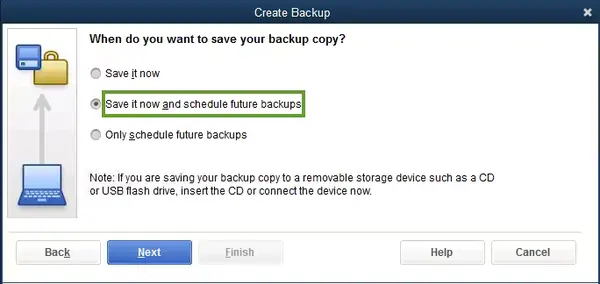
In our article Scheduling a Local Backup in QuickBooks Desktop – Explained, we have mentioned a step-by-step method to schedule a local backup in QuickBooks Desktop. Follow the instructions from the article to configure QuickBooks enterprise automatic backup properly.
Solution 6: Maintain Compatibility by Setting Windows OS to Windows 10
QuickBooks users encounter the QuickBooks backup not responding error when their settings are not arranged to be compatible with Windows 10. This most effective fix runs through the following measures:
- This solution requires you to access the Task Scheduler in Windows 10.
- After searching and opening the Task Scheduler box, hit the Task Scheduler library.
- You’ll need to keep scrolling until you locate the QuickBooks backup task.
- Then, right-tap this backup task and navigate to the Properties button.
- The Task Properties window will now launch.
- Get your mouse to the General section.
- Point to the Configure option.
- When you click it, and a drop-down emerges, opt for Windows 10 or your OS version.
After accessing and configuring these settings, some users have reported QuickBooks backup failures. There may be an error with the QBBackup.log file. The error message may say, “QuickBooks encountered a problem attempting to backup C:\DATABASES\QB_XXXXXXX\XXXXXXX.qbw – Drive specified could not be accessed. Error ID 202: Last System Error: The system cannot find the path specified.”
This problem can be fixed by hitting the “Run only when a user is logged in” option.
Conclusion
Some users might find the above-mentioned troubleshooting method complicated as it involves reconfiguring Windows features. If you are also one of the users who is unable to resolve the “QuickBooks Scheduled Backup Not Working” error, then reach us at Accounting Helpline Customer Service Number 1.855.738.2784 for help and quick assistance.
FAQs
What is meant by QuickBooks Online Backup?
Simply put, QuickBooks online backup is a setting configured in the QB Online version that enables the application to store all the data files and essential folders on a cloud server. Online backing up of data in the cloud enables the data to stay safe in the proper space and can be retrieved whenever necessary. It prevents troubles like data loss or corruption as accurate files are safely stored in a proper location.
QuickBooks users of any version can take QuickBooks enterprise backup. It will store their data in a secure location that you can choose yourself, either cloud or local storage.
What does QuickBooks Backup Not Responding Error Mean?
QuickBooks backup not responding error emerges when the backup feature doesn’t work as intended. It means that either the automatic backups are not happening or they are pausing and getting interrupted in between. This problem can cause accidental data loss, which may cause severe problems in the future. Various reasons can bring the QuickBooks desktop cloud backup to a halt. So, knowing them before time is critical to implement adequate troubleshooting methods.
Does QuickBooks save automatically?
Yes, the answer to Does QuickBooks save automatically is positive, considering you have configured the settings to do so.
Does QuickBooks Online backup my data?
Yes, the answer to Does QuickBooks online backup my data is positive. You can check in the QB online settings to enable backing up your essential files and schedule them at appropriate times.
What to do if QB backup doesn’t respond?
If your QuickBooks backup not responding, you need to undertake all the solutions mentioned above in the article. Further, you need to ensure that it does not exceed the company file size or name by compressing the files and changing the name. Ensure to have proper extensions and not set up persistent backups. Further, if the QuickBooks backup schedule is still not working perfectly, you need to connect with the Accounting Helpline experts at 1.855.738.2784.

Edward Martin is a Technical Content Writer for our leading Accounting firm. He has over 10 years of experience in QuickBooks and Xero. He has also worked with Sage, FreshBooks, and many other software platforms. Edward’s passion for clarity, accuracy, and innovation is evident in his writing. He is well versed in how to simplify complex technical concepts and turn them into easy-to-understand content for our readers.
