Last Updated on April 23, 2026
A QuickBooks Desktop license number or product code is usually used in QuickBooks to apply and authorize a specific version of the software. Many people use QuickBooks Desktop to change QuickBooks product number because it’s easy to find any given product online.
If you are having trouble locating or updating your QB license number, reach out to the Accounting Helpline’s experts at 1.855.738.2784 for a smooth, hassle-free process.
What is a Product or Installation Number Code?
An installation or product code is a quick way to find which version of QuickBooks Desktop your company uses. This code is located in the bottom left corner of your QuickBooks Desktop screen. It’s a QB product and license number that is transferred to your PC. The installation number will be determined as the license key if you are using a trial version of QuickBooks. This number can always be changed at any moment without affecting your computer’s software.
Why Should You Have an Updated License Number?
The main advantage of changing your QuickBooks Desktop license number or product code is gaining access to the latest features and capabilities. For example, the license number determines the number of users you can have. The file type you use for the software highly depends on the product code. Additionally, it helps prevent illegal transactions and protects your data.
If you use QuickBooks professionally, you likely use it daily. It is highly beneficial to keep your license number current for several reasons, such as avoiding future licensing problems. This can help avoid unplanned production stoppage or client rejection. It also helps guarantee that the data for your business is current and has no missing transactions. Furthermore, having an up-to-date license number enables your program to monitor when it is deactivated or expires.
Steps to Take When Changing Your QuickBooks Desktop License or Product Code
When you activate or register QuickBooks, you are required to enter the product and license number, but sometimes the product and license code don’t work when changing the QuickBooks Desktop license or product code. Here, we will discuss how to change QuickBooks product number.
Change QuickBooks Product Number for Windows
In case you are using QuickBooks Desktop on Windows, then you can change QuickBooks product number as follows.
Solution 1: Uninstallation and reinstallation of QuickBooks
To change QuickBooks product number in Windows, follow the easy steps below:
- You need to ensure that QuickBooks is currently disconnected from your PC. This is because changing the license or product code number will not take effect until the software is released from the computer.
- Install and save all the crucial files on your system that has latest product code or license number.
- Before opening QuickBooks Desktop, you also have to ensure you have a good Internet connection.
- After that, open QuickBooks Desktop as if it were new and add your recent product or license information.
- If you use a different program than the one provided, restart your computer and reload QB Desktop to highlight the changes.
- When you purchase the software, you can change QuickBooks Desktop license number or product codes.
- The QB Desktop license number and product code can be changed when you buy the software.
These are some of the steps that you can use to change QuickBooks product number. In case you are not able to change the license number without uninstalling/reinstalling QuickBooks, go to the next procedure.
Solution 2: Manually edit the qbregistration.dat (for QB Enterprise)
It is recommended to follow the reinstall process outlined above if you have QuickBooks Enterprise installed on five or fewer computers. Another way to change license number in QuickBooks Desktop is to edit the file “qbregistration.dat”. This file has the product codes for all installed QuickBooks software.
Step 1: Open the QBRegistration file through QuickBooks
- Start by opening QuickBooks.
- To open the Tech Help window, press F2 or Ctrl+1 and then F3 or Ctrl+2.
- After that, choose QBREGISTRATION.DAT on the Open File Tab and select Open File. Then, you will see the file open in Notepad.
- Make a backup of the qbregistration.dat file. It is crucial to know that QuickBooks won’t open if the file has any typos. So, follow the important steps mentioned below:
- Select the Save as option for the Notepad File menu.
- Choose Desktop in the Save As window, then click Save.
- Finally, close the file.
- Next, go to the Tech Help window to reopen the file.
- After re-opening the file, close QuickBooks but keep the QBregistration.dat file open in Notepad.
Step 2: Edit QBregistration.dat file
- In Notepad, click on the Edit option, then Replace or Ctrl + H in the qbregistration.dat file.
- Then, type the old product number in the Find what field and substitute it with the new one in the Replace with field. Make sure to use the format XXX-XXX when you enter the product number.
- After that, click on the Replace All option.
- Select File, then Save, and close the file
Step 3: Check your product code
- Open QuickBooks and then press F2 to view the Product Information window.
- Next, check the Product number field to confirm the product code has been updated.
This solution will help you change the license number in QuickBooks Desktop on Windows.
Update License Code in QuickBooks Desktop for Mac
Now, we will discuss the steps you can implement to change the license number in the Mac version of QuickBooks Desktop.
- First, choose the Manage License option from the particular QuickBooks menu.
- Next, select the Deauthorize this computer option.
- Then you will see a pop-up on your computer. Tap on the option “Deauthorize”, then press Exit.
- After that, launch the QuickBooks application and complete the registration process. Then, you will get an option to add your license number here.
You can change the QB license number in mac by following the steps mentioned above.
Check Out How to Troubleshoot Activation & License Errors in QuickBooks Desktop
It is recommended to follow the steps below to resolve QB license number or activation issues on your system.
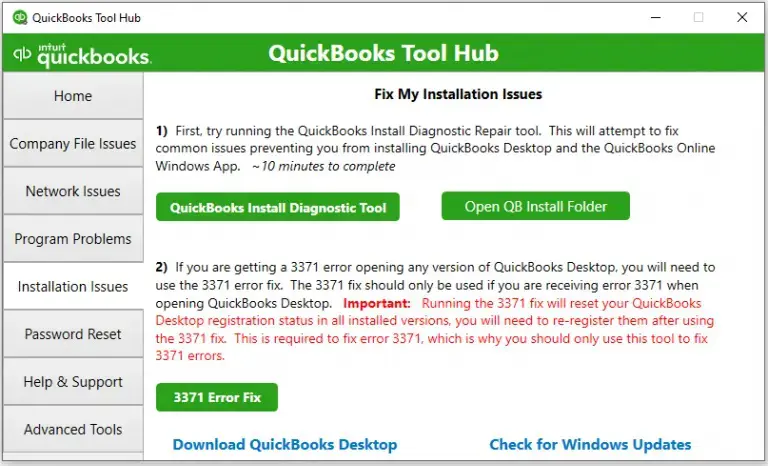
Solution 1: Use the 3371 Error Fix Tool from the QuickBooks Tool Hub
Activation or license issues can be fixed using the 3371 Error Fix. Follow the steps mentioned below to do so:
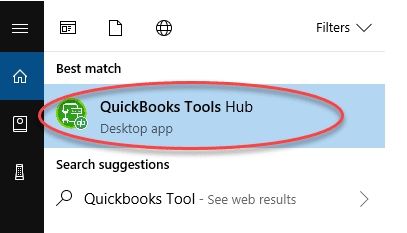
- Start by launching the QuickBooks Tool Hub.

- Then, go to the Installation Issues tab.
- Next, tap on 3371 Error Fix.

- Finally, press OK.
This solution would resolve any activation and license issues if you recently changed your QuickBooks license number.
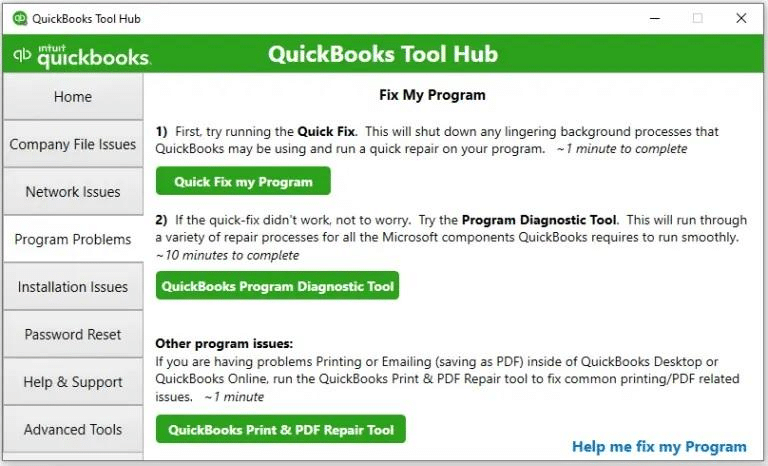
Solution 2: Use Quick Fix My Program from the QB Tool Hub
One of the main reasons why you are facing activation issues with QuickBooks is program problems. So, use Quick Fix My Program to eliminate the issue:
- Close the QuickBooks Desktop software.
- After that, download and install the QuickBooks Tool Hub.
- Then, use the QuickBooks Tool Hub app.
- Navigate to the Program Problems tab.
- Next, click on the Quick Fix My Program.
- Finally, wait for the tool to complete the process.
Once you have completed all steps, restart the app to see if the activation issue is resolved.
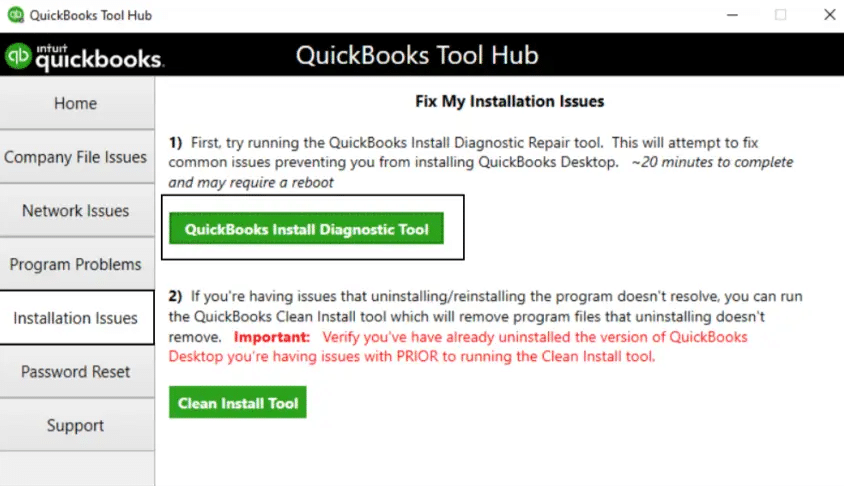
Solution 3: Run the QuickBooks Install Diagnostic Tool for the Tool Hub
If something goes wrong during QuickBooks installation, run the QuickBooks Install Diagnostic Tool to resolve common installation issues.
- Begin by opening the QuickBooks Tool Hub, then choose Installation Issues.
- After that, select QuickBooks Install Diagnostic Tool.

- Let the tool run; it can take up to 20 minutes.
- Restart your computer and open QuickBooks Desktop when the tool finishes.
- Then, open the data file and try to activate it.
If you are still experiencing the same issue, proceed to the next solution.
Solution 4: Make a New Windows Admin
- First, add a Windows user with admin rights.
- After making the new user, sign out of Windows and sign in as the new user.
If this solution fixes the error, keep the new admin user; if not, remove it and use your existing user.
How to Fix “The Validation Code is Incorrect” or Temporary Service Error
It is important to resolve the validation code is incorrect or a temporary service error, as it can result in activation failure. Check out the following solutions to quickly fix this issue.
Solution 1: Check and Correct Date & Time Settings
This is one of the simplest ways to fix the incorrect validation code error. Check out and follow the steps mentioned below:
- First, close the QuickBooks Desktop.
- Next, right-click the time display on the Windows taskbar and select Adjust Date/Time.
- Make sure that the date and time settings are correct. If they’re correct, proceed to the next solution. If not, follow the steps 4 to 8.
- Click on the Date & Time tab, then set the date for the current year.

- After that, click Apply, then OK.
- Open the QuickBooks Desktop and go to Help.
- Click on the Activate QuickBooks Desktop option, then Begin Activation.
- Enter the validation code, then select Next.
If you are still facing the same error, proceed to the next solution.
Solution 2: Verify and Manage Your QuickBooks License
This is another effective solution to fix the incorrect validation code. Follow the steps discussed below:
- Initially, find your license number.
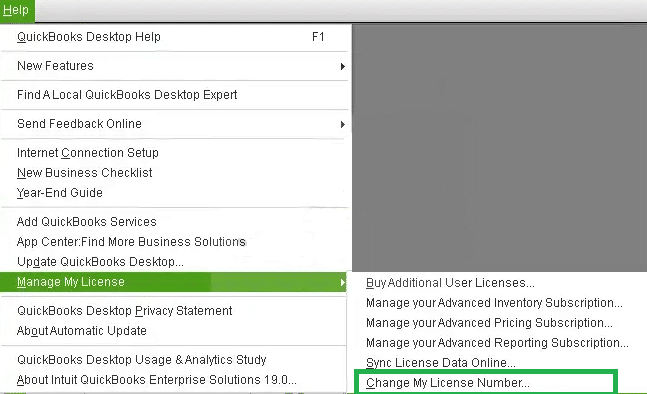
- Then, go to Help > Manage my license > Change my license number.

- Finally, type your License number, click on Next, and then Finish.
These steps will fix the error and simplify the process.
What to Do If the Validation Code Screen Doesn’t Appear
Follow the solutions mentioned below if you don’t get prompted to enter the validation code.
Solution 1: Activate QuickBooks Manually
Follow this quick, easy method to resolve the issue where the validation code screen isn’t appearing:
- Open QuickBooks and press Ctrl+P. This will open a manual activation window.
- Then, enter the validation code.
If you still cannot enter the validation code, move to the next solution.
Solution 2: Check and Update Your QuickBooks License Details
Now we will discuss another solution to fix the problem of the validation code screen not appearing:
- Go to Help > Manage my license > Change my license number.
- Then, enter the license number as all 0s.
- Make sure not to enter the validation code and then choose the option Finish.
- Next, enter the license number. When you enter the validation code, select the Finish option.
These two solutions will fix the issue of the validation code being incorrect or a temporary service error.
Locate Your QuickBooks Desktop License and Product Number
It is crucial to find the QuickBooks Desktop license and product number when installing the software, transferring the license to a new computer, or contacting customer support. Here are the primary solutions to find your QuickBooks Desktop license and product number.
Find QuickBooks License Info for ProAdvisors Program Members
If you are on a PAP (ProAdvisor Program) software bundle, you can find the product number, license number, and release by following the steps given below:
- First, sign in to camps.intuit.com.
- Choose one of the three license or subscription types that is suitable for the installation you are performing.
- Next, select Products and Services and show more products and details.
- Then click PAP Enterprise Software Bundle > Details.
- Choose the Show More option, then select the Intuit QuickBooks Desktop Accountant Plus subscription current version to view the latest version of the license and product information.
These steps will help you to find the license or product number easily.
Find License Information in QuickBooks Desktop (Pro, Premier, Enterprise)
Now we will discuss the method to locate license information in QuickBooks Desktop:
- Begin by opening the QuickBooks Desktop.
- Then, press the F2 key.
- In the Product Information window, look for the product number, product name, and license number.
- Next, find the release at the end of the product name.
- Finally, identify your version in the Version User on File section. The list is usually arranged by date, with the oldest version at the top and the latest at the bottom.
These steps will help you to find the license info in QB Desktop.
Check Product Information in QuickBooks Desktop for Mac
Follow these steps to find the information in QuickBooks Desktop for Mac.
- First, open QuickBooks Desktop for Mac.
- Next, go to the Help menu and select Product Information.
You can use the solution above to find product information in QB Desktop for Mac.
Conclusion
In this blog, we discussed how to change QuickBooks product number. We have also discussed the solutions to resolve any activation or validation issues you may encounter. It is advised to keep your license and product info up to date. This helps to make sure seamless software activation, access to the latest features, and uninterrupted business operations. If you need help with updating your QB license or fixing activation issues, don’t hesitate to connect with our Accounting Helpline’s experts at 1.855.738.2784.
Frequently Asked Questions (FAQs)
How can I change QuickBooks product number?
You can change QuickBooks product number by going to the Help menu and clicking on Manage My License. After that, click on Change My License Number and type your new license number. In the end, click Next, then Finish. This will change the QuickBooks license number on your computer.
Can I change QuickBooks product number online?
No, it will not make a difference to your QuickBooks data despite changing the license number. In any serious alterations, you should always make sure you have saved up your data.
Does changing the license number affect the QuickBooks data?
No, changing the license number won’t affect your QuickBooks data. You should always back up your data before making any major changes.
Do I have to buy QuickBooks again if I wish to modify QuickBooks product number?
No, you do not need to buy QuickBooks once again. You may change QuickBooks product number to simply suit a version or edition that you have bought.
Is it possible to change the license number without reinstalling QuickBooks?
It is possible to modify the license number of the QB under the desktop version of QuickBooks by uninstalling and reinstalling the software. Select Help > Manage My License > Change My License Number.
What to do if my QuickBooks license number is lost or not working?
If you lost your license number, you can retrieve it by logging in to your Intuit CAMPS account to see the registered QuickBooks product and license information. Another way to find the license and product number in QuickBooks is to press F2 to open the Product Information window.
Related Posts-
What is the QuickBooks Error 6143? A Complete Guide
What is the QuickBooks Error 121? Methods to Fix It
Methods to Fix QuickBooks Outlook is Not Responding
How to Fix Payroll Error 40003 QuickBooks Desktop in Windows 11
Effortless Fixes for QuickBooks Error PS077: Get Your Business Back on Track
QuickBooks Multi-User Mode Not Working: Fix Connection & Access Issues

Edward Martin is a Technical Content Writer for our leading Accounting firm. He has over 10 years of experience in QuickBooks and Xero. He has also worked with Sage, FreshBooks, and many other software platforms. Edward’s passion for clarity, accuracy, and innovation is evident in his writing. He is well versed in how to simplify complex technical concepts and turn them into easy-to-understand content for our readers.