
Last Updated on April 17, 2026
Payroll is a service offered by Intuit, integrated with QuickBooks, which can help you run the payroll for your organization. Through this service, you can send payments to employees, vendors, and pay taxes at the same time. This is why it is important to keep your payroll up to date. But, during the same payroll update process, you can encounter the QuickBooks error 12002. This error can cause delays to your update process, ultimately hampering your business workflow. In this blog, we’ll discuss how to patch the same error with an easy step-by-step guide. But first, let’s talk about what error 12002 in QuickBooks Desktop actually is.
Struggling with error 12002 or other 12XXX series errors in QuickBooks? Contact us to talk to our Accounting Helpline’s experts at 1.855.738.2784 today!
What is QuickBooks Error 12002? A Simple Explanation
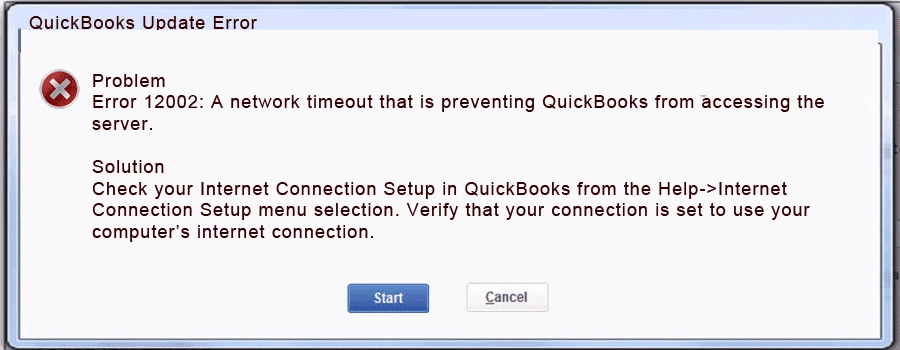
QuickBooks payroll update error 12002 is a part of the 12XXX series error, which you usually encounter while updating QB Desktop or Payroll. It’s usually caused when your QBDT workstation is unable to connect to the internet because of a faulty Firewall or browser security settings. It can also be caused by your antivirus blocking certain files of QuickBooks. This, in the end, can stop you from updating your QB Payroll and can prevent you from performing important processes for your organization. Now, let’s discuss the causes of this cumbersome error.
Potential Triggers for QuickBooks Desktop Error 12002
A lot of factors can potentially be behind you seeing QuickBooks error 12002. Given below is a list of them:
- The QB Desktop software you’re using is outdated.
- You’re not running the software update with admin rights.
- Your Firewall is blocking the QB workstation.
- Your QBDT program can be either damaged or corrupted.
- The date & time settings of your system might be incorrect.
- You can also face QuickBooks service messages error 12002 due to incorrect Secure Socket Layer (SSL) settings.
- A damaged QB company file might also be the culprit of this problem.
- An outdated Windows OS can also cause this issue.
- Having an unstable internet connection might also trigger this error.
Now, let us proceed to troubleshoot this error with our step-by-step guided methods.
Quick Ways to Fix QuickBooks Payroll Update Error 12002
Mentioned below are some of the solutions for you to implement in order to fix error 12002 in QuickBooks Desktop. Go through them one by one and carry them out as instructed.
Use the QuickBooks TLS 1.2 Tool from the Tool Hub
You can use the TLS 1.2 readiness tool from the QuickBooks Tool Hub to fix the QuickBooks error 12002 with the following steps:
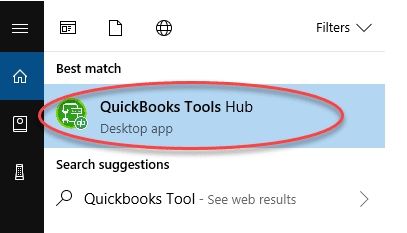
- Download and install the QB Tool Hub.

- Double-click on the QB Tool Hub icon.

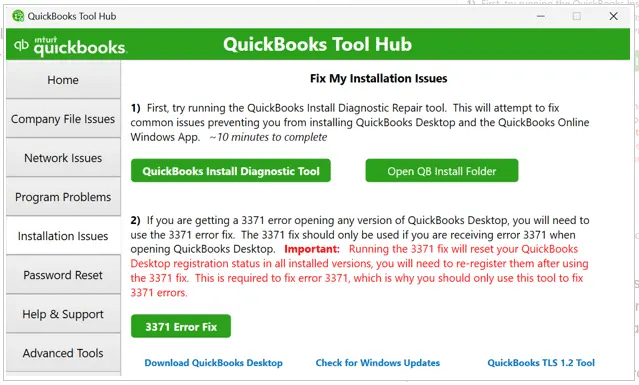
- Now, navigate to the Installation Issues tab.

- Look over the bottom right corner.
- Click on QuickBooks TLS 1.2 Tool.
- Hit OK.
- Select Yes for EULA Agreement.
- Press Run.
- Wait for the tool to finish working.
- Click on Exit.
This would make your PC TLS 1.2 compliant. However, it comes with certain system requirements. So we’ve listed them in a table below:
| Operating System | Windows 10 Windows Server 2008 R2 Windows Server 2012 R2 Windows Server 2017 |
| Microsoft Edge | Microsoft has discontinued Internet Explorer. Download the latest version of MS Edge to continue. |
| .Net framework | Version 4.5.2 or greater of the .NET Framework |
| Elevated privileges | Run QB with admin rights |
Still struggling with the error 12002 QuickBooks update? Move on to the next solution.
Download the Updates with Admin Rights
You might run into error 12002, QuickBooks update, because you’re not using QB with admin rights. Follow the steps below to mend it:
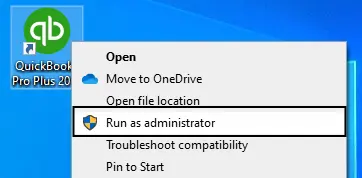
- Locate the QB icon on your desktop.
- Right-click on it.
- Now, click on Run as administrator.

- Download the payroll updates.
Still not able to download the updates? Verify your network strength with the next solution.
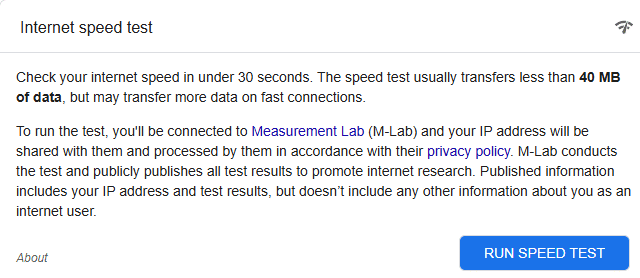
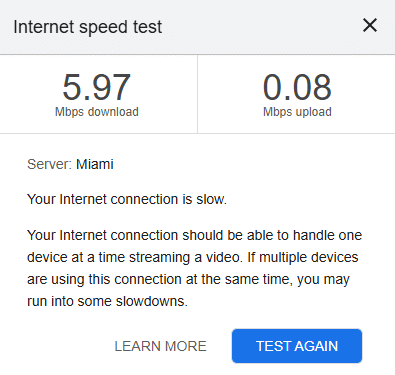
Check Your Internet Speed
A low-speed or unstable internet connection can result in you not being able to update QB Payroll. To verify your network strength, follow the steps given below:
- Open the Google website on your browser.
- Type Speed Test in the search bar.

- The Internet speed test window would be embedded as the first search result.
- Then, click on RUN SPEED TEST.
- The test results would show up on your screen.

- If Google states that your network connection is slow or the latency is any higher than 100ms, consider switching your ISP.
This was all about fixing your internet connectivity issues.
Configure Your Windows Firewall for QuickBooks
Your Windows Firewall might be blocking QuickBooks, resulting in you seeing the payroll update error 12002. Therefore, it is important to configure your Firewall settings, which would allow QB to access the internet. This would fix the problem; if it doesn’t, move on to the following solution.
Try to Update Your QB Desktop Manually
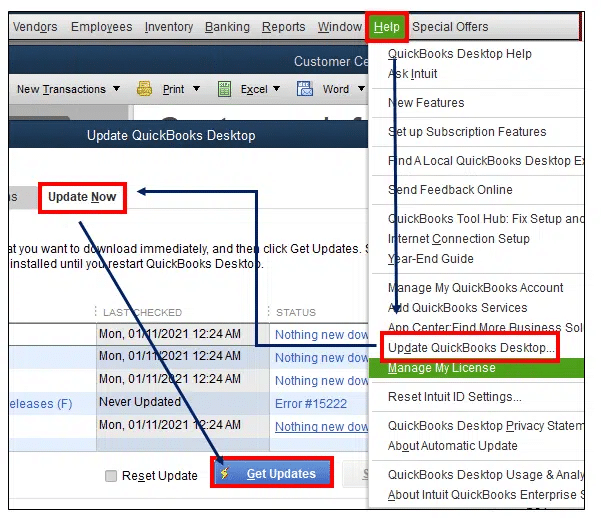
If you’re unable to download payroll and software updates on your QB workstation, you can update it manually with the following steps:
- Run your QB app as an administrator.
- Close your company file.
- In the No Company Open screen, go to the Help menu.
- Now, press Update QuickBooks Desktop.
- Go to the Options tab.
- Click on Mark All.
- Then, hit Save.
- Press the Update Now tab.
- Now, mark the Reset Update checkbox.
- Then, click on Get Updates.

- After downloading, restart the QB app.
- Click Yes when asked to install the updates.
- Restart your PC.
- Finally, try to download payroll updates.
Now, you won’t encounter any issues with updating the payroll in QuickBooks.
Repair Your QuickBooks Software
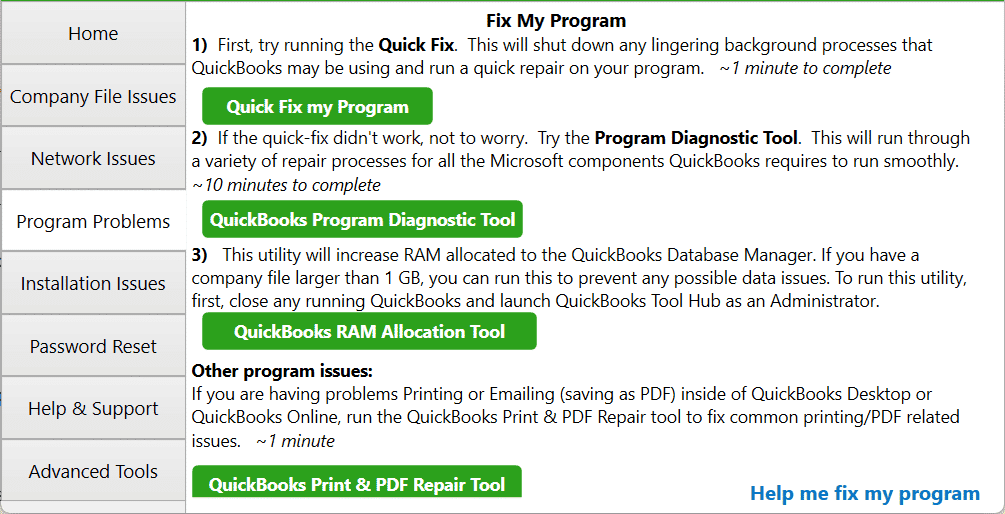
You can use the QB Tool Hub to repair your program and get rid of the QuickBooks error 12002. To do so, follow the steps given below:
- Open the QB Tool Hub.
- Navigate to the Program Problems tab.
- Click on Quick Fix my Program.

- Let the tool finish working.
- Try downloading payroll updates to see if the error is resolved.
- If not, open the Tool Hub again.
- Browse to the Installation Issues tab.
- Click on QuickBooks Install Diagnostic Tool.
- Wait for the tool to finish working.
Now, you would be able to download and install the latest payroll updates without any trouble.
Verify the Date & Time Settings of Your PC
To verify and, if necessary, change the date and time settings of your PC to patch the QuickBooks error 12002, follow the steps below:
- Open the Start menu.
- Type date and time settings.

- Click on Date & time settings.
- Then go to the Date & time tab.
- Click on Sync now.
This will ensure that the date and time of your system is accurate according to your time zone.
Use the Verify and Rebuild Tool
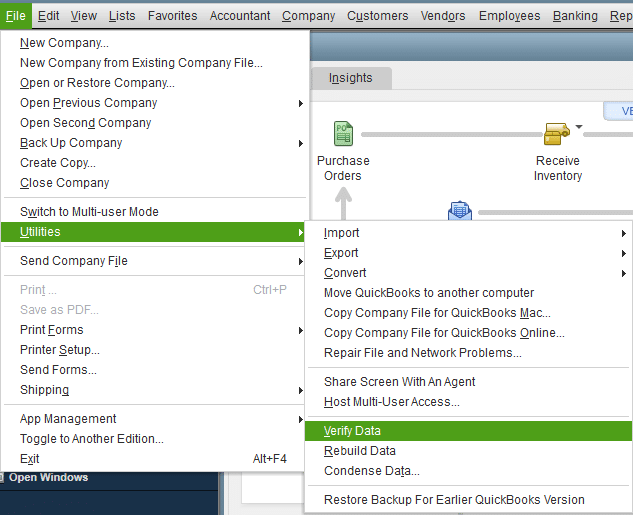
You can use the verify and rebuild data tool to fix QuickBooks error 12002 during state forms download. This will help fix issues such as company file data being damaged, corrupted, or compromised. After using this tool, you would be able to download and install your payroll updates smoothly.
Clean Install the QuickBooks Application
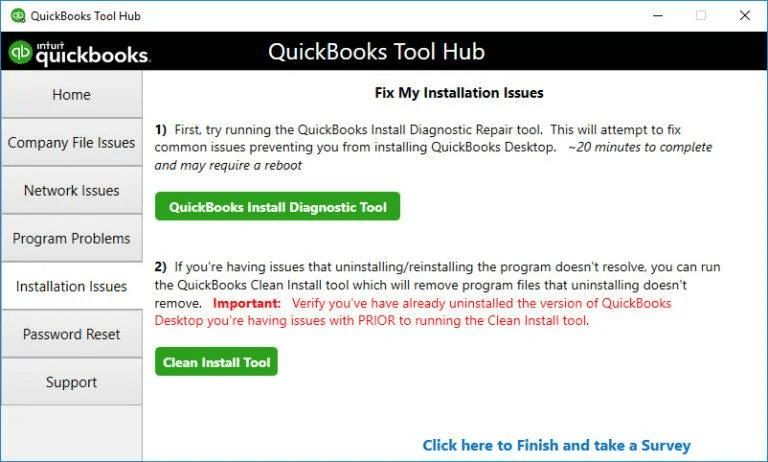
You can clean install the QuickBooks software to fix the QuickBooks service message error 12002, but this should consistently be implemented as a last resort. This would help you fix any program and company file-related issues that are stopping you from downloading the latest payroll updates.
Resolving QuickBooks Error 12002 – An Overview
Presented below is a concise summary of this blog on resolving the error 12002 in QuickBooks in a tabulated format:
| Error description | QuickBooks error 12002 is an update error that users encounter while downloading the latest payroll updates. It’s part of the 12XXX series errors, which are update-related in general. |
| Causes | Outdated QB software, not updating with admin rights, Firewall blocking QB, the QBDT program being corrupted, incorrect date & time settings, damaged company file, and an unstable network connection. |
| Ways to fix | Use the TLS 1.2 tool from the Tool Hub, download the updates with admin rights, verify your network speed, configure Windows Firewall, update the QB software manually, repair the QB software, verify the date & time of your system, use the verify and rebuild tool, and clean install the QB app. |
Summing Up
In this blog, we discussed the QuickBooks error 12002 in great detail and provided you with the potential factors that can be behind this issue. Moreover, we provided you with a step-by-step guide so you can mend this error yourself. If somehow you’re unable to do so and are facing challenges with this or any other error, contact our Accounting Helpline’s experts today at 1.855.738.2784.
FAQs
How to fix error code 12002?
To fix error code 12002 in QuickBooks, you can download the updates with admin rights, configure your Firewall, use the TLS 1.2 tool from the QuickBooks Tool Hub, verify your internet connection, repair your QB software, and many more. To learn more, read the blog given above.
What is error code 12000 in QuickBooks?
What can I do about security software that interferes with QB and causes a 12002 error?
If security systems or antivirus software interfere with QB, you can uninstall the antivirus or security programs or disable them for a while. This will fix the error 12002 in QuickBooks. Alternatively, you can create antivirus exclusions for the QB programs.
What does QB error 12002 do?
QuickBooks error 12002 can prevent you from updating the application or payroll tax table. This can be due to issues with the internet connection, firewall blockage, or incorrect time and date settings. It may also cause the application to perform slowly and sluggishly.
Related Posts-
A Comprehensive Guide to Troubleshoot QuickBooks Error 12009
Looking To Import IIF Files In QuickBooks Desktop? Here’s How
Quick Fixes to Resolve the QuickBooks Payment Link Not Working Issue
Complete Guide on QuickBooks Payroll Update: Errors & Solutions
A Comprehensive Guide to the QuickBooks Migration Tool for Data Transferring
Fix QuickBooks Error 3371 status code 11118/11104/1 With Hustle Free

Edward Martin is a Technical Content Writer for our leading Accounting firm. He has over 10 years of experience in QuickBooks and Xero. He has also worked with Sage, FreshBooks, and many other software platforms. Edward’s passion for clarity, accuracy, and innovation is evident in his writing. He is well versed in how to simplify complex technical concepts and turn them into easy-to-understand content for our readers.