
Last Updated on April 21, 2026
Accessing the company file is a simple task until it is QuickBooks is untouched from 6000 series errors like QuickBooks error 6012 1061. This less common but complex to-fix error requires multiple troubleshooting solutions. You get error 6012 while opening the company file on a local or network setup. One common cause of this error is incorrect network setup, and there are several other less common reasons that you will find in this article. Let’s see what you can do to resolve this error and continue accessing your company file in this detailed guide.
You can also avail of on-call guidance from the support team for fixing QuickBooks Error 6012 1061. Place a call on the toll-free number 1.855.738.2784.
Methods that have Shown Promising Results to Fix QuickBooks Error 6012 1061
Here is the section of this article that will aid in removing QuickBooks Error 6012 1061 from your application.
Method 1: Manually Update QuickBooks
The first method we suggest when fixing the QuickBooks error code 6012 1061 is the traditional one. Updating an application usually resolves common issues; we will attempt to fix the unrecoverable error through this solution.
- If you were working on QuickBooks, close the application and the company file.
- Click on the Start icon of your Windows.
- Use the search bar to look for QuickBooks Desktop.
- After locating the QuickBooks Desktop icon, right-click on it.
- Select Run as administrator.
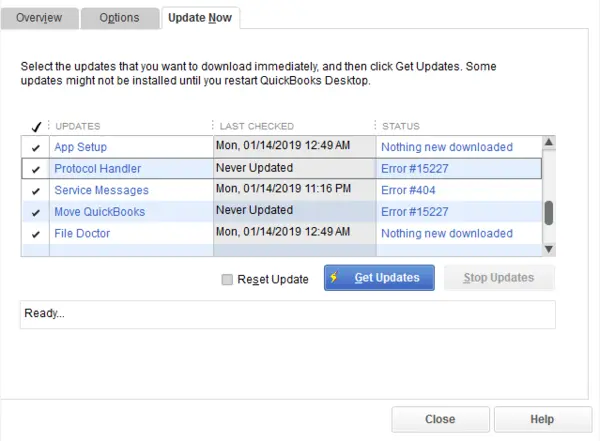
- Use the Help
- Click on the Update QuickBooks Desktop option.
- Tap the Get Updates
- Click the Update Now
- Restart QuickBooks and click Install Now.
Method 2: Use QB File Doctor
Running the QuickBooks File Doctor scan effectively addresses the QuickBooks error 6012 1061. Follow the steps below:
Step 1: Initiate QuickBooks Tool Hub Download
- Close your QuickBooks program.
- Download the latest QuickBooks Tool Hub package from Intuit and save it to your desktop or Downloads folder for easy reach.
- Launch the downloaded exe file.
- Install the program by managing the InstallShield instructions and accepting the License Agreement.
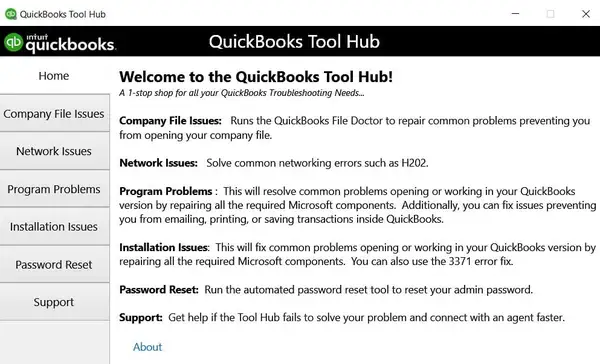
- Finish the installation, double-click the tool hub icon, and open it.
Step 2: Run the QuickBooks File Doctor Tool
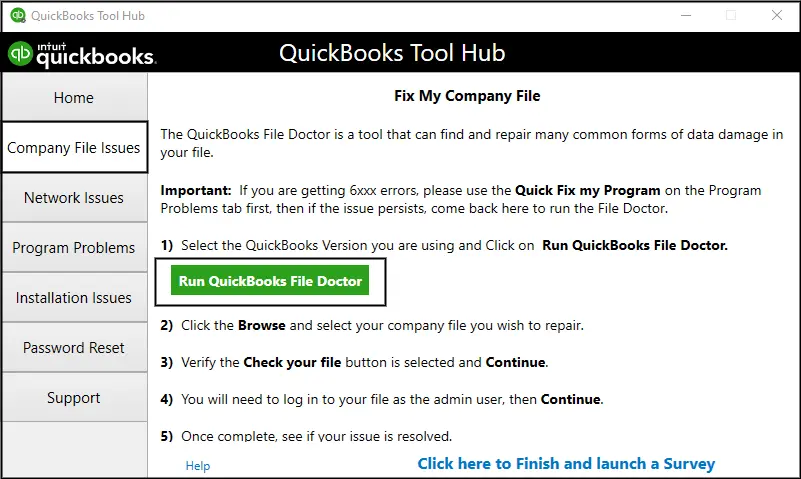
- Access Company File Issues in the QuickBooks Tool Hub.
- Select the Run QuickBooks File Doctor option and wait for it to open.
- Choose your company file from the dropdown list in QB File Doctor. If your file is not visible, click Browse and search to locate it.
- Hit the “check your file” option, then Continue.
- Put your QB admin password in the field, then click Next.
- Follow additional steps if QuickBooks File Doctor does not provide a resolution.
Troubleshooting for Local File Access
When you open the file locally, you access it on the same computer where QuickBooks is installed. Here is a solution for addressing potential issues:
Method 1: Rename QuickBooks Network Data and Transaction Log Files
The .ND and .TLG files are crucial components of your QuickBooks data, serving as configuration files that facilitate QuickBooks connectivity to a company file in a network or multi-user environment.
If these files encounter damage, errors may occur when opening QuickBooks files. Renaming these files does not lead to data loss, as QuickBooks automatically regenerates them during a scan using the QuickBooks Database Server Manager and when accessing the company file.
Follow these steps:
- Navigate to the folder where the company file is stored.
- If not found there, check the hard drive where all files are stored.
- Locate the network data file with a ‘.nd’ extension and the Transaction Log file with a ‘.tlg’
- Right-click on the files and choose Rename to add a different extension, such as ‘.old.’
- Initiate QuickBooks again and attempt to sign in to your company file. If the issue persists, proceed with additional solutions.
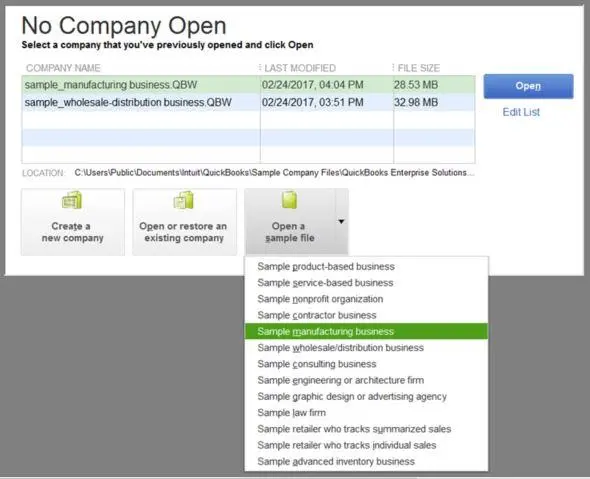
Method 2: Open a Sample Company File
When opening a sample company file, the goal is to determine whether the issue is rooted in your company file or within QuickBooks. If you encounter an error while trying to open a sample company file instead of achieving successful access, it indicates potential damage to your QuickBooks installation. In such situations, it is recommended to proceed with repairing your QuickBooks installation using the Install Diagnostic tool (steps given below):
To conduct this test:
- Open the No Company Open window, hit “Open a Sample File,” and choose any sample company file from the provided list.
- If the sample file opens without issues, proceed to solution 3. However, encountering the same error message with the sample file signals the need to repair your QuickBooks installation files:
- Double-click the QuickBooks Tool Hub icon and choose the Installation Issues option.
- Click on QuickBooks Install Diagnostic Tool.
- The tool will start running, and it may take around 20 minutes to complete the process.
- After running the Install Diagnostic Tool, you must restart your system.
- Relaunch QuickBooks Desktop and your data file, and see if QuickBooks Error 6012 1061 still appears on your screen.
Method 3: Move a Copy of the Company File to another Folder
If you cannot open the company file and have lost access to the data within it, consider extracting it by creating a backup of the company file and saving all stored information.
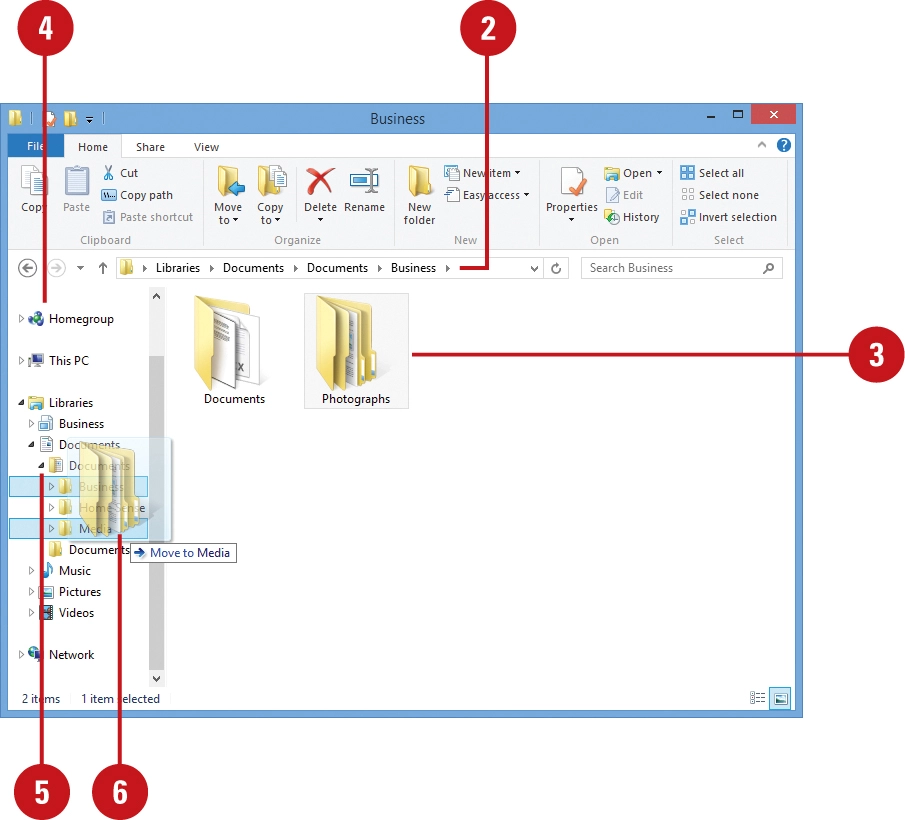
By copying the file to the desktop and attempting to open it, you’re essentially testing for potential issues related to the location of the company file.
- If the file successfully opens from the desktop, it suggests damage or complications with the original file location, possibly due to saving the file within too many folders, potentially exceeding the file system path limitations.
- If the file still fails to open even after relocating it to a different location, there is a likelihood of file damage or corruption, requiring further investigation and potential file recovery measures.
To troubleshoot QuickBooks error 6012 1061, start by creating a new folder:
- Go to the previous folder where the company file is stored and right-click on it.
- Select “Copy” and return to the newly created folder on the desktop.
- Paste the company file into the new folder.
- Hold the Ctrl key and launch QuickBooks.
- Click on “Open or restore an existing company.”
- Access your company file on the desktop and attempt to open it. If the same error persists, explore other solutions.
Method 4: Recover from a Backup Copy
To confirm whether there is an issue with the current company file (.QBW), consider restoring a backup copy. If an error occurs during the restoration process, follow the steps outlined below:
- First, confirm your PC is not acting as a host.
- Open your company file.
- Tap the File menu and choose Utilities.
- If “Stop Hosting Multi-User Access” is visible:
- Select “Stop Hosting Multi-User Access.“
- Confirm by choosing “Yes” in the prompt for stopping multi-user access.
- Again, select “Yes” in the “Company file must be closed” window.
- Ensure that the path to your company file does not exceed 210 characters.
- Locate your company file.
- Copy the path from the address bar.
- Paste this path into Notepad, then find the character count and spaces.
- Attempt to restore your company file once more. If the error persists, proceed to solution 5.
Method 5: Retrieve Lost Data with ADR
Auto Data Recovery (ADR) can assist in recovering lost data in the event of damage to your company file.
Troubleshooting File Access Over a Network
When attempting to open a file stored on a server or another PC, consider the following steps:
Solution 1: Confirm Hosting is Enabled on All Workstations
Only have one PC or server host the company files:
- Press F2 to access Product Information.
- Check Local Server Information to verify if hosting is disabled.
Solution 2: Rename TLG and ND Files and Utilize the Database Server Manager
After implementing the steps above in Solution 1 (Troubleshooting when opening the file locally) regarding renaming ND and TLG files, run the QuickBooks Database Server Manager, which facilitates hosting of company files:
- Open QuickBooks Tool Hub.
- Navigate to Network Issues.
- Select QuickBooks Database Server Manager.
- Within this utility, choose Start Scan. Click Browse if your company file isn’t visible and select Start Scan.
- Finally, open QB and your company file to resolve the QuickBooks error 6012 1061.
Solution 3: Access a Sample Company File from the Workstation
Implement this solution by following the steps outlined in Solution 2 (opening the file locally).
Solution 4: Replicate QB Files to a Desktop
Refer to the steps mentioned earlier (open the file locally) in Solution 3 and resolve the error 6012 1061.
Solution 5: Close all QB Processes
Resolve error 6012 1061 by closing all QB processes:
- Enter as the Administrator on the server computer.
- Press Ctrl + Shift + Esc to open the task manager.
- Show processes for all users and hit Users.
- End Task for each QuickBooks process (EXE, qbupdate.exe, and QBDBMgr.exe).
- Open the company file in multi-user mode.
- If the error persists, proceed to solution 6.
Solution 6: Adjust Folder Permissions Manually
Make sure the folder containing your company file has the correct permissions so you don’t receive QuickBooks error 6012 1061:
- Access the Windows Start menu and tap open File Explorer.
- Right-click on the folder containing the company file and hit Properties.
- Open the Security tab and click on Advanced.
- Tap QBDataServiceUserXX and click on Edit.
- Toggle the following permissions to Allowed:
- Traverse Folder/Execute File
- List Folder/Read Data
- Read Attributes
- Read Extended Attributes
- Create Files/Write Data
- Create Folders/Append Data
- Write Attributes
- Write Extended Attributes
- Read Permissions
- If your permissions are not configured correctly:
- Right-click on the folder containing the company file and select Properties.
- Hit Security, then Edit.
- Tap QBDataServiceUserXX and select Full Control, then Allow.
- Hit Apply, followed by OK.
- Try opening your file and check if the error persists.
Solution 7: Configure Firewall and Antivirus Settings
Your firewall and antivirus ports must have exceptions for QuickBooks so they don’t interfere with the program’s operations:
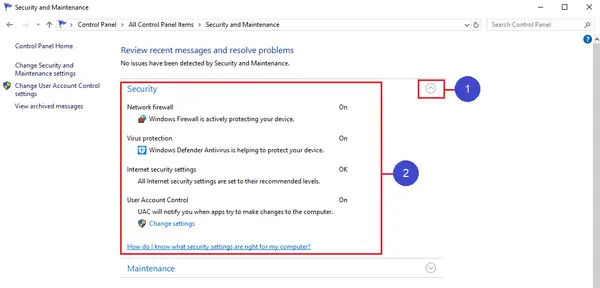
- Open the Start menu in Windows.
- Access “Windows Firewall” by searching in the Start menu.
- Choose Advanced Settings.
- Right-click Inbound Rules and hit New Rule.
- Tap Port and Next.
- Choose TCP.
- Put the specific ports required for your QuickBooks version in the Specific local ports area.
- After inputting the port number hit Next.
- Choose Allow the connection, then Next.
- Mark all profiles if asked, then choose Next.
- Create and name the rule.
- Click Finish.
- Repeat the process for Outbound Rules.
Ensure Windows Firewall exceptions for QuickBooks programs:
- Click the Start menu in Windows.
- Input Windows Firewall in the search to open it.
- Click Advanced Settings.
- Right-click Inbound Rules and choose New Rule.
- Hit Program, then Next.
- Tap This Program Path and
- Choose any executable file, then select Next.
- Select Allow the Connection, then Next.
- If asked, mark all profiles, then click Next.
- Create and name the rule.
- Repeat the process for Outbound Rules.
We hope QuickBooks Error 6012 1061 is eliminated by now, but if you still encounter the error after following this detailed article, waste no time calling the Accounting Helpline support team at 1- 855 738 2784.
FAQ’s
How do I resolve the QuickBooks error 6012 1061 by recovering the backup copy?
Here’s how to restore your backup copy and resolve the error 6012 1061:
1. Access the File menu in QB and select Open or Restore Company.
2. Choose Restore a backup copy and proceed to the Next option.
3 .Select Local Backup and hit Next.
4. Browse your computer to locate your backup company file, usually named [Your company name].qbb.
5. Specify a folder to save the restored company file and click Open. Note: Opening the backup in the same folder as your existing company file may risk overwriting your data.
6. To prevent overwriting, rename your existing company file or the backup to ensure unique names. Alternatively, you can save the backup in a completely separate folder.
7. Once ready, click Save. If any messages appear regarding potential data overwriting, choose the option suiting your preferences. Ensure you don’t overwrite anything unless intentional.
8. Your new company file is now prepared for use.
How to fix QuickBooks error 6012 1061?
Here’s how to fix QuickBooks error 6012 1061:
1. Rename TLG and ND files
2. Open a sample company file
3. Copy the company file to another location
4. Restore a backup copy
5. Run the QB File Doctor
6. Configure firewall and antivirus
7. Adjust folder permissions manually
8. Manually update QB
9. Recover a backup copy or use Auto Data Recovery
10. Exit all QB processes
11. Ensure hosting is disabled on all workstations

Edward Martin is a Technical Content Writer for our leading Accounting firm. He has over 10 years of experience in QuickBooks and Xero. He has also worked with Sage, FreshBooks, and many other software platforms. Edward’s passion for clarity, accuracy, and innovation is evident in his writing. He is well versed in how to simplify complex technical concepts and turn them into easy-to-understand content for our readers.