Last Updated on March 10, 2025
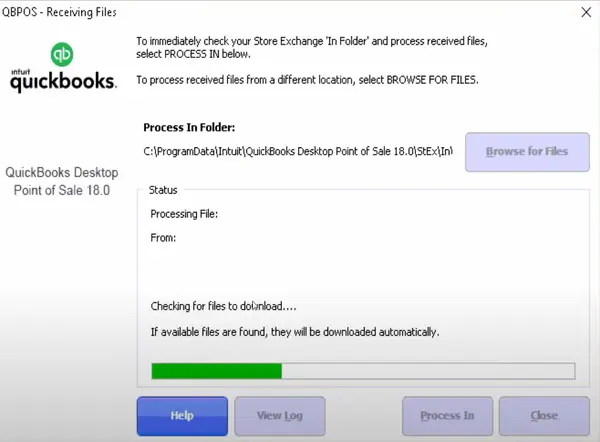
QuickBooks Store exchange allows users to transfer data between their Headquarters and Remote Stores. When running the store exchange, you may come across QuickBooks Error 175305, stating “errors were encountered.” The error does not allow you to update the transactions, which can negatively affect your business. Hence, it is essential to use expert-suggested solutions and eliminate QuickBooks Error 175305. We have brought you this blog, which lists professional ways to resolve this Point of Sale error.
The steps are easy to follow, and we hope they serve the purpose of fixing the issue. Contact the Accounting Helpline Point-of-Sale Expert team at 1.855.738.2784 for a more effortless way.
Top Reasons for the Occurrence of Error 175305 in QuickBooks
There are not several causes for the occurrence of error code 175305 in QuickBooks Desktop POS. The issues that mainly trigger this error are the misconfigured settings of the POS application. Here is a list of all those internal and external reasons why your QuickBooks Desktop can throw error code 175305.
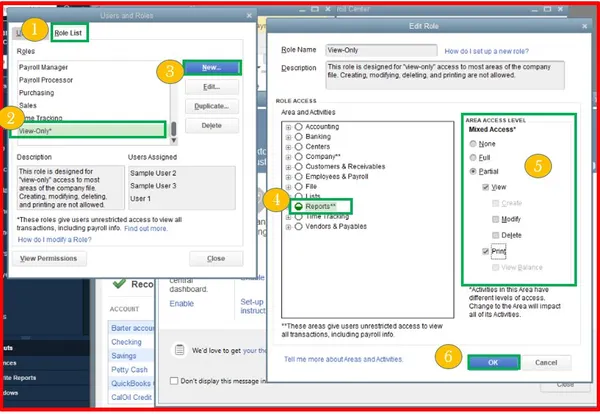
- Lack of admin access to perform certain operations in QuickBooks can result in this error.
- Firewall restrictions imposed on the QB POS are also why you get this error.
- Junk files stored in the application created by the data from the stores.
- Incorrect passwords for the stores can also be a reason.
- Incorrect Store Exchange Communication method.
Next, in this article, we will look at some of the most effective solutions you can implement to eliminate error code 175305 in QuickBooks Desktop POS.
Top Solutions for the Store Exchange Error 175305
Store exchange error 175305 in QuickBooks Point of Sale can be resolved by our point-of-sale expert team as follows:
Solution 1: Give Admin access to QuickBooks
Usually, when using QuickBooks in the multi-user mode, we forget to give admin rights to the network. Using the steps in this solution, you will give the user the network admin rights to resolve QuickBooks Error 175305.

Add a Windows User with Admin Privileges
- Create a local user account:
- Click on Start, then visit Settings, and choose Accounts. Select Family & other users (or in some Windows versions, you may see Other users).
- Next to “Add other user,” hit Add account.
- Hit “I don’t have this person’s sign-in information.” Select “Add a user without a Microsoft account” on the following page.”
- Provide a username, password, or password hint—or tap security questions—and then click Next.
- Now, modify the local user account to admin as follows:
- Tap Start, then go to Settings, and select Accounts.
- Under Family & other users, click on the account owner’s name (you should observe “Local account” below the name), then choose Change account type.
- Note: Ensure you tap an account displaying “Local account” and not an email address or without the mention of “Local account.” This ensures you grant administrator permissions to a local account, not a Microsoft account.
- Under Account type, choose Administrator, then OK.
- Sign in using the new administrator account.
Offer Admin Access to QB Programs
- Close the QuickBooks Desktop application.
- Next, navigate to the Windows Start
- Launch the Control Panel and then choose the User Accounts
- Locate QBDataServiceUserXX for your QuickBooks version. For your reference, you must know that QuickBooks Desktop 2020 will have QBDataServiceUser30.The 2019 version of QuickBooks will have QBDataServiceUser29. In short, the number decreases as you go to the previous version.
- Now click on Change the account type and then select Administrator.
- Choose Change Account Type.
- Hit the Apply button that you see on your screen to save your changes.
- Remember to continue this process for each QuickBooks Database Server Manager version.
By following the steps above, your QuickBooks Database Server Manager now has the authorization to operate on your network.
Solution 2: Modify the Store Exchange Communication Method
We will change the store exchange preference in this second solution to fix QuickBooks Error 175305. You can resolve the store exchange error in QuickBooks Point of Sale by modifying the current store exchange communication method. Here are the steps to achieve that.
- Go to the File
- Click on Preferences and then Company.
- Now, use the Multi-Store dropdown menu to choose Store Exchange.
- You must see what your current preference is.
- Click on Not Used for each store before selecting Save.
- Now re-launch the Company Preferences
- Next, you must fill in the original company preference you noted above.
- Click on Save.
- At last, Run another cycle of store exchange.
Solution 3: Run the Clear Store Exchange Stex tool
You must use the Clear Store Exchange stex tool in your headquarters and remote stores. Given below is the procedure to do the same.

- First, you must use your web browser to download the system’s Clear Store Exchange stex tool.
- The tool file is saved in a zip format.
- Now, you must unzip the file by clicking on it.
- Next, to use the tool, double-click on the icon.
- Run another store exchange.
Solution 4: Reset the Password for all Stores
Having inconsistencies in the passwords of the stores can cause QuickBooks Error 175305. Therefore, with this solution, we will help you create identical passwords for all your stores.
- First, click on the File
- Choose Preferences and then the Company
- Now, from the Multi-Store, click on Store Exchange.
- Navigate to the Options
- Choose Change Password.
- You must now create the same passwords similar to all the stores.
- Run another store exchange and see if QuickBooks Error 175305 still appears.
Solution 5: Add QuickBooks POS Ports to the Firewall
If the above solutions did not prove helpful in solving the QuickBooks Point of Sale error 175305, try adding the Point of Sale ports to the firewall. We suggest being careful with this process, which can alter the program.

- Use your keyboard to press the Windows + R key simultaneously.
- This will open the run command window.
- Enter Control Panel, where you see the cursor, and click OK.
- You will see the Control Panel appear in front of you.
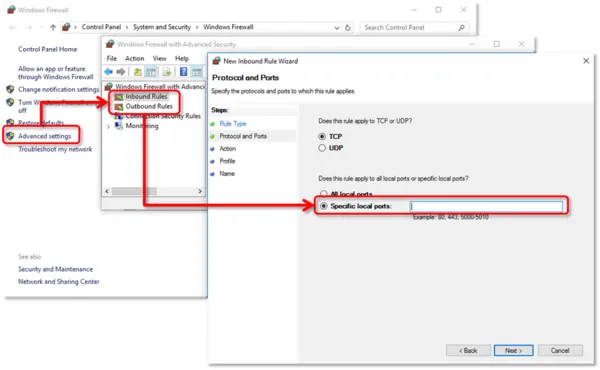
- Click on Windows Firewall.
- Choose the Advanced Settings option and select Inbound.
- Press the New Rule
- Choose Port and then Next.
- Use the following reference to fill in the port numbers and click on the Next
- TCP (Incoming): 8040, 8443, 8036, 8035, 8025, 8024, 46228, 46225, 46216-46220, 46203, 2638, 443
- UDP (Outgoing): 8036, 8035, 8024, 2638
- Now tap the Allow Connection option and click on Next.
- Give a name to the firewall port (such as POS).
- Soon after, click on Finish
- After the inbound rules, repeat the above steps for the Outbound Rule option.
Executable files and their necessary ports
| Default Port | Program File | Tasks Requiring The Program File |
| 443 | ● EFTSvr.exe | ● Throughout operation● Merchant Service transactions |
| 8443 | ● EFTSvr.exe | ● Throughout operation● Merchant Service transactions |
| 2638 | ● DataImporter.exe● EFTSvr.exe● QBDBMgr.exe ● QBDBMgrN.exe ● QBPOSDBServiceEx.exe | ● Conversion from the previous version● Changing the currently running database.● Startup ● Detecting change to QBDatabases.ini ● Help > Manage my license ● Throughout operation |
| 46203, 46204 | ● EFTSvr.exe● QBDBMgrN.exe● QBPOS.exe | ● Throughout operation● Changing the currently running database |
| 8024, 8025 | ● QBPOS.exe● Setup.exe | ● Web installation● License verification● Throughout operation |
File Locations
| File | Location |
| ● Eftsvr.exe (v9 &lower)● DataImporter.exe● QBPOS.exe ● QBPOSShell.exe (v10 & higher) | 64-bit:● C:\Program Files (x86)\Intuit\QuickBooks POS XX\32-bit: ● C:\Program Files\Intuit\QuickBooks POS XX\ |
| ● QBDBMgr.exe● QBDBMgrN.exe● QBPOSDBService.exe | 64-bit:● C:\Program Files (x86)\Intuit\QuickBooks POS XX\DatabaseServer\32-bit: ● C:\Program Files\Intuit\QuickBooks POS XX\DatabaseServer\ |
Solution 6: Conduct Three Complete Store Exchange Cycles
Execute a store exchange for every remote store thrice to ensure no information is overlooked.
We hope this article on QuickBooks Error 175305 will be worthy and helpful in fixing the issue. If you need additional help or the problem seems to appear repeatedly, contact Point of Sale Professionals. Our team of experts is available around the clock at the toll-free number 1.855.738.2784.
FAQs
Before configuring a firewall/ antivirus for QB Point of Sale, what are some crucial considerations?
Some important points regarding firewall configuration for QuickBooks Point of Sale are as follows:
1. To follow the firewall configuration steps, you must have Windows Administrator rights.
2. If you utilize a third-party security program, include the Firewall Ports and Executable files required by QuickBooks Desktop Point of Sale.
3. Reach out to the developer of your third-party security program for guidance on adding exemptions for ports and files.
How do I resolve QuickBooks error 175305?
Resolving QuickBooks error 175305 involves doing the following:
1. Firewall configurations to be favorable for QB Point of Sale
2. Have a Windows Admin user
3. Choose the store exchange communication method
4. Use the Clear Store Exchange stex tool
5. Modify the password for all stores
6. Conduct three full store exchange cycles

Edward Martin is a Technical Content Writer for our leading Accounting firm. He has over 10 years of experience in QuickBooks and Xero. He has also worked with Sage, FreshBooks, and many other software platforms. Edward’s passion for clarity, accuracy, and innovation is evident in his writing. He is well versed in how to simplify complex technical concepts and turn them into easy-to-understand content for our readers.

