
Last Updated on April 16, 2026
Has QuickBooks Error 12 0 knocked over your application and interrupted your functioning? In such cases, having a handy comprehensive guide with every bit of detail about the error is crucial. That is why we are providing you with this in-depth blog with the causes and solutions for the error to benefit you in a short time.
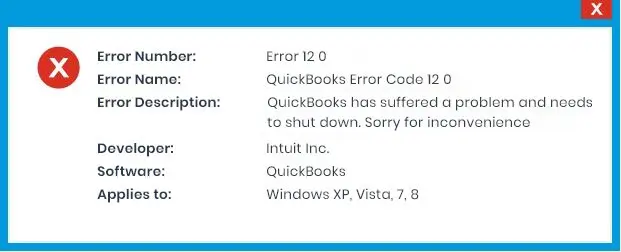
Every application running on Windows requires proper permission and administrative rights to perform any action. If the application does not have the right to access system resources, then it encounters errors. QuickBooks is a broad application requiring permission to access most Windows components. QuickBooks Error Code 12 0 occurs when QuickBooks does not have administrator permission on Windows. The user receives an error message: “We’re sorry, QuickBooks encountered a problem Error codes (-12 0)”. Read out the complete article for complete troubleshooting info.
Is QuickBooks Error Code (-12 0) flustering you and your work? Dial the Accounting Helpline Customer Support Number 1.855.738.2784 to connect with support experts for Professional Insights and Resolution of errors
Causes of QuickBooks Error Code 12 0
QuickBooks Error Code 12 0 emerges on a user’s screen due to any of the causes mentioned below:
- The QuickBooks installation files might not be installed completely.
- Some essential files might go missing or get deleted accidentally.
- Making incorrect entries of the non-existing programs can lead to 12, 0 error codes in QuickBooks.
- QBCFMonitorService is not running.
- Not having adequate admin rights to perform certain tasks in QuickBooks can also trigger the same error in the application.
Steps to Resolve Error Code -12, 0 in QuickBooks Desktop
Undertake the following resolution methods to fix the error 12, 0 in QuickBooks Desktop:
Troubleshooting Solution 1: Consider Using the QuickBooks Database Server Manager
You can scan the company file using the QuickBooks Database Server Manager. So, Let’s begin by scanning the company file:
Step 1: Scan the Folders
Before you can share the company file, scanning the folder holding them is important.
- On the server computer, go to the Windows Start menu and then enter “Database” into the search bar.
- Then, open the QuickBooks Database Server Manager and go to the Scan Folders tab.
- Further, choose Browse and then select the folder that holds the company file.
- Hit the OK option once you are done.
- Finally, choose Start Scan when you are ready.
After the scan, the folder will appear in the QuickBooks company files found section. Now, you can access the company files in this folder from other computers on your server.
Step 2: Monitor the drives
After scanning the folders, the drives holding them appear in the Monitored Drives tab. Consider selecting the drives to monitor the folder. Let’s learn how to do that:
- Move to the Monitored Drives tab and select the checkboxes for the hard drives holding the company files.
Note: Add those drives that hold the company files
Step 3: Consider Managing the Database Server Manager
Other tabs in Database Server Manager keep everything running smoothly.
- The System tab will tell you where Database Server Manager is installed on the system.
- The Database Server tab will give you the real-time status of the tool, along with who’s connected to it.
Troubleshooting Solution 2. Manually Start Service QBCFMonitorService
let’s try restarting QBCFMonitorService.exe. Here are the steps to begin with:
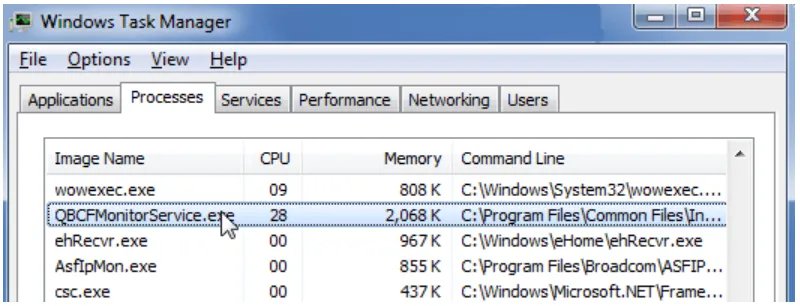
- Press the Ctrl + Alt + Del keys on the keyword to open the task manager and then move to the Processes menu.
- Consider right-clicking the QBCFMonitorService process and then selecting the End Task option.
- Choose Yes to confirm, and then open QuickBooks again.
Troubleshooting Solution 3: Replace the User Account with a Local System Account
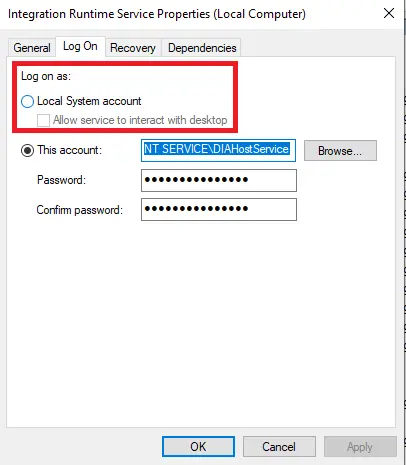
- Press the Windows + R keys on the keyboard. It will open a run command in the extreme left corner.
- Enter services.msc in the search bar and select the OK option.
- Search for your version of QuickBooks desktop from the list of options appearing on the screen. After spotting the QuickBooks version, double-click to open it.
- Go to the Log on tab, and choose the Local System Account option.
Troubleshooting Solution 4: Delay the Startup of the DNS Service
Let’s learn how to delay the startup of the DNS service from “Automatic” to “Automatic (Delayed Start)” by following the steps below:
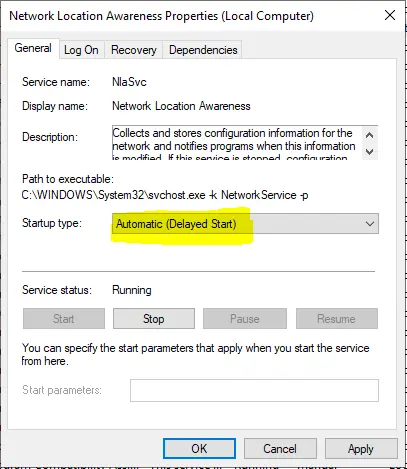
- Press the Windows + R keys on the keyword to open the run command.
- In the run command, type in services.msc and then hit OK.
- A list of options will appear on the screen; look for the DNS client and open it.
- Now, in the startup type, choose “Automatic (Delayed Start)” instead of Automatic.
Follow this Before Implementing the Next Troubleshooting Procedure
- Open the QuickBooks Desktop application and press the F2 key on your keyboard.
- Alternately, press the Ctrl + 1 key on your keyboard to open the Product Information window.
Note down the QuickBooks version that is displayed at the top left side of the window, as we need the product version for the next troubleshooting step.
Troubleshooting Solution 5: Restart QuickBooks Service
- Press the Windows + R key on your keyboard.
- Type Services.msc in the Run window’s search box.
- Press OK or hit Enter.
- Locate QBDataServiceUserXX in the list of services where XX stands for the QuickBooks version you are using.
QBDBServiceUser - Click the QuickBooksDBXX, and from the left side panel, select Restart.
Troubleshooting Solution 6: Set Folder Access Permission
- Right-click QuickBooks and select Properties.
- Under the Security tab, click Everyone for Group or User Names.
Set Permission for QuickBooks Service on Windows - Select Full Control under the Permissions for Everyone section.
- Click Apply and then OK.
In conclusion, we have mentioned some effective troubleshooting solutions to fix QuickBooks Error 12 0. Hopefully, it would have helped to resolve the error successfully. However, if you still see the same error message, we suggest you get in touch with one of Accounting Helpline experts at 1.855.738.2784 for quick assistance and help.
FAQs
What is QuickBooks Error 12 0?
Error code 12 0 emerges on the screen when the user doesn’t possess adequate admin permissions to work on some QuickBooks functions. Usually, incorrectly configured system settings and variations in the Windows registry might lead to the error. This runtime error can cause QuickBooks to hang or crash while running. The error message that might appear will state, “This Action Requires Windows Administrator Permissions Error -12 0.”
What are some essential considerations before troubleshooting error 12, 0 in QuickBooks?
You should consider the following points before stepping into the troubleshooting of the error 12, 0:
1. Ensure you have admin permissions and privileges to make changes in QuickBooks.
2. Terminate the QuickBooks services from the Task Manager (Ctrl + Alt + Esc) > Processes tab > QBDBMgrN, QBUpdate.exe, QBDBXX > Right-click them > Hit End Processes.
Can the runtime QuickBooks Error Code -12 0 appear due to low disk drive space?
Yes, in specific instances, you might face the error 12, 0 due to low disk space. Run disk clean-up in this case as follows:
1. Backup files and see the available hard drive space.
2. Clear cache files and reboot the system
3. Run Disk Clean-up, open Explorer Window, and right-click the main directory (C:)
4. Hit the Properties option, and then, Disk Clean-up.

Edward Martin is a Technical Content Writer for our leading Accounting firm. He has over 10 years of experience in QuickBooks and Xero. He has also worked with Sage, FreshBooks, and many other software platforms. Edward’s passion for clarity, accuracy, and innovation is evident in his writing. He is well versed in how to simplify complex technical concepts and turn them into easy-to-understand content for our readers.