Last Updated on March 10, 2025
To verify that your account statement matches your bank, always make sure that the starting balance of your QuickBooks Online account matches your bank account’s starting balance; only then can you go for the reconciliation of an account in QuickBooks. There are times when you get errors like QuickBooks reconciling the beginning balance wrong and need a quick solution to get it fixed. For detailed instructions on matching or reconciling the opening balance match with the statement balance, follow the complete article until the end.
Is your opening balance not matching the statement balance in QuickBooks? You can fix the reconciliation issues by following this blog. However, if you want a faster resolution avenue, call Accounting Helpline team at 1.855.738.2784 for help.
Main Reasons Why You Are Facing QuickBooks Reconciling the Beginning Balance Wrong
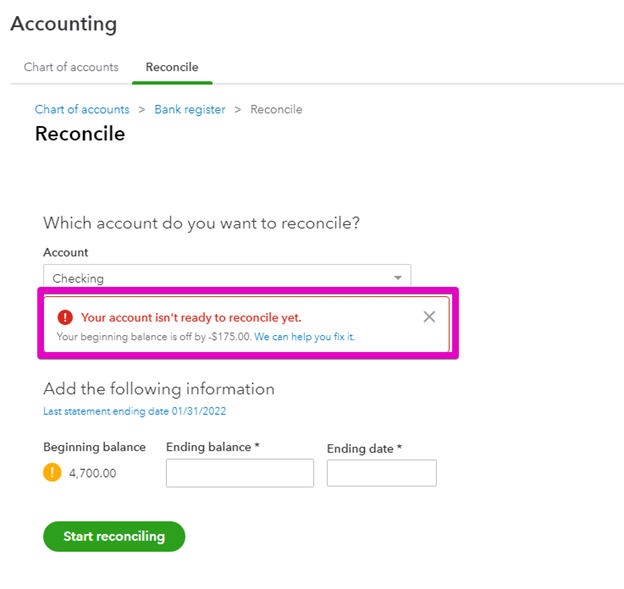
When you Begin Reconciliation and pick an account to reconcile, the Beginning Balance might be zero or incorrect due to one of the following reasons:
- The account wasn’t set up with a balance, or the account balance was incorrect.
- Previously cleared and reconciled transactions in QuickBooks were voided, deleted, or changed.
- If you have converted the file from another version of QuickBooks, it can also cause QuickBooks reconciling the beginning balance wrong Issue.
- Possible data damage or corruption in your file can lead to QuickBooks Reconciling the Beginning Balance Wrong.
Conditions When You Get Wrong Reconcile Opening Balance of an Account in QuickBooks Online
You can get inaccurate starting balance in various conditions like if an account has never been reconciled before or you are getting an alert on the reconciling account page and few others, we will be discussing every single reason before getting an incorrect beginning balance of an account below in this article.
NOTE: To learn more about how to fix reconciliation in QuickBooks accounts, you can go through the article “Steps to Reconcile Bank Account with QuickBooks.”
If You are, Using an Account that has Never been Reconciled Before or it is Completely a New Account
While reconciling an account that is new or hasn’t been reconciled before, you must follow the steps given below –
- Look for the Gear Icon at the top and select “Chart of Accounts.”
- Locate your account and click View Register or Account History.
- Examine and edit the account balance if it is inaccurate, and if you see no account balance, then you must enter it.
- If the account you are using is a bank feed account, then you need to locate and delete such downloaded transactions that have cleared the bank before the statement’s beginning date.
QuickBooks automatically records the starting balance when you connect your bank to it depending on how far back you have downloaded the transactions, and typically, it is 90 days back. If an account has transactions done before three months, then the automatically recorded balance by QuickBooks might not show you the correct starting balance, and you might get QuickBooks reconciling the beginning balance wrong.
If You see an Alert on Account Reconciliation Page
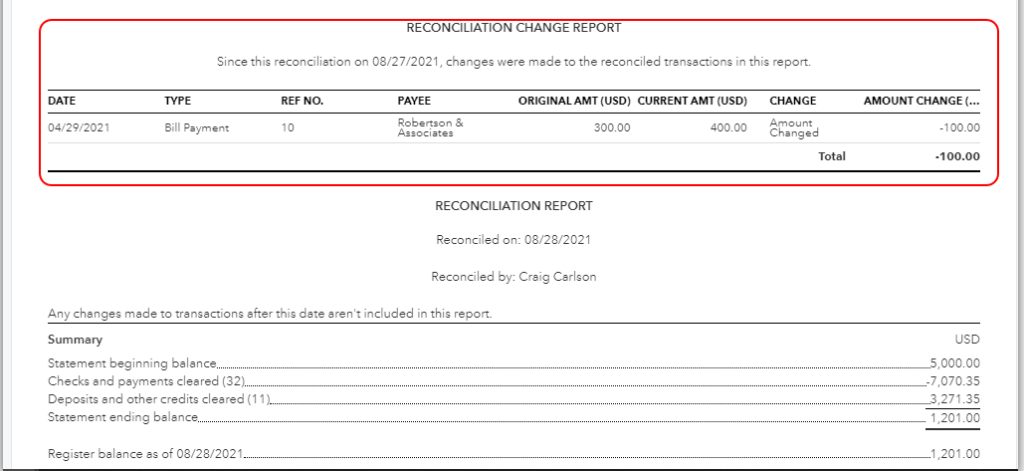
Click the link that you see in the alert of beginning balance discrepancy. For every change type that has been listed in the discrepancy report, here are the steps that you need to take:

Correct an unreconciled transaction.
- Select the transaction.
- Change the account reconciliation status back to (R) Reconciled.
- Save the changes made.
Correct the account and amount of a changed transaction.
- Select and the transactions you want.
- Save each transaction as you edit them.
- Save the changes made.
Correct the transactions those were mistakenly reconciled in account history.
- Choose the transaction.
- Modify reconciliation status back to no status or (C) Cleared.
- Save these changes.
- You will notice these transactions disappearing from the discrepancy report and the difference will get closer to $0.00 at the top right corner.
- Your starting balance in QuickBooks Online will match your statement when the difference will become $0.00.
- After this, you can select “Resume Reconciling”.
Correct a deleted transaction:
- Look for the difference in total discrepancy at the top right corner.
- Exit the discrepancy report.
- Under the register, recreate deleted transactions.
- Look for these recreated transactions and check them to verify their reconciliation status to be (R) reconciled.
- Click the Gear Icon located at the top side and then click “Reconcile”.
- Go back to the discrepancy report if you still see a discrepancy alert. However, you can still see these deleted transactions in the report, but you will notice the difference in the amount at the top, created by these recreated, reconciled transactions.
- If you notice, a total discrepancy difference is getting closer to $0.00 it means you are doing it right. Keep changing the additional transactions until you get $0.00 as the total discrepancy difference at the top.
If no Alert is Shown in QuickBooks Online on Account Reconciliation Page
The most common mistake user makes is to reconcile the wrong account when they have multiple accounts with the same bank, so make sure you are reconciling the right account.
- Click “Reconcile” from the Gear Icon at the top.
- Select the account that needs to be reconciled.
- Find the Ending Date field of the Last Statement Ending Date.
- Check the starting balance if it is correct.
Still, if you get the incorrect starting balance even after selecting the correct month and account, it might be possible that the account has never been reconciled using the reconciliation tool. Best way to get this fixed is to dial 1.855.738.2784.
“Reconcile an account” Page shows $0 as Starting Balance after Importing to or Exporting from QuickBooks Online
- Use the ending balance to perform a single reconcile of the last reconciled bank statement. Do not add any fees or interest and then save reconcile.
- Click “Reconcile” from under the Gear Icon and make sure that the beginning balance is $0.
- From the last reconciled bank statement check for the ending balance and enter it without adding any fees or interest.
- Now click “OK” and find the difference between the list of transactions and balances to be reconciled and check if the number is (0) zero.
- You can “Reconcile” and complete the process if you found the number to be (0) zero.
- If you found that the number is not (0) zero then check “Unmark All” and check “Hide Transaction” option after the statement end date. Check the “Mark All” option and run reconciliation report from the QuickBooks Online menu to uncheck those uncleared transactions from the last reconcile.
- Now to finish the process click “Reconcile Now”.
How Can You Fix An Incorrect Beginning Balance in QuickBooks Desktop?
If you QuickBooks reconciling the beginning balance wrong, chances are the beginning balance will be wrong or edited. To fix this, you must run the following reports and find the wrong transaction –
Reconcile Discrepancy Report

- Go to the Reports menu, select Banking, and click Reconciliation Discrepancy.
- Select the Account, click OK, and a list of transactions that have changed since your last reconciliation will emerge. Use this report to identify the transaction(s) causing the reconciliation issue.
- If you find a discrepancy, note the transaction date and the Entered/Last Modified to understand when the change happened.
Audit Trail Report
- Go to Reports, select Banking, click Previous Reconciliation, and select the account you want to reconcile.
- Select the most recent statement date and choose Transactions cleared at the time of reconciliation.
- Click Display, note the statement and the reconciliation creation date, then go to Reports.
- Select Accountant & Taxes, click Audit Trail, then set the Account filter to the account you want to reconcile.
- Select Display, set the Date filter with the From field blank and the To date set to the statement date.
- Click OK, set the Entered/Modified filter with the From date set to the previous reconciliation creation date from the PDF and the To field as today’s date.
Once done, see if any of the transactions in the report can be taken as the discrepancy.
Previous Reconciliation Report
- From the Reports menu, select Banking and click Previous Reconciliation.
- Select the Account and Statement Ending Date, and click Display.
You can compare this report to past statements from your financial institution to find the discrepancy. Once found, you can undo the previous reconciliation and reconcile it. Alternatively, you can ignore the discrepancy and let QuickBooks Desktop enter an offsetting amount as an adjustment.
Conclusion
This is a time consuming and complicated process to match opening balance in QuickBooks Online with your bank statement, so if you found this tiresome and want our team to get QuickBooks reconciling the beginning balance wrong error fixed for you then just dial Accounting Helpline support number 1.855.738.2784 and get instant help.
FAQs
What are the steps to create an opening balance in QB Desktop?
To create an opening balance, you can begin reconciliation by creating a journal entry as follows:
– Go to Company, select Make General Journal Entries, and change the date to the correct statement date of your beginning balance.
– Select the account you want from the Account dropdown, then enter the correct opening balance in the Debit column.
-Finally, select Opening Balance Equity and click Save to save the amount.
How can I reconcile the opening balance in QB Desktop?
To reconcile the opening balance in QuickBooks Desktop, follow the steps below:
– Go to Banking, select Reconcile, and pick the account you want from the Account dropdown.
– Enter the statement date and ending balance that matches your Journal Entry, and click Continue.
– Open the Deposits and Other Credits section, select the Journal Entry, and ensure the Difference is zero.
– Finally, select Reconcile Now, and the bank balance will be matched with the QBDT balance.
How can I undo a previous bank reconciliation in QuickBooks Desktop?
You can undo a previous reconciliation in QuickBooks by using the following steps:
– Firstly, backup your QuickBooks company file, then go to Banking and click Reconcile.
– Select Undo Last Reconciliation, and when prompted, select Continue and hit OK.
– Finally, close out of the reconcile window and open it again.

Edward Martin is a Technical Content Writer for our leading Accounting firm. He has over 10 years of experience in QuickBooks and Xero. He has also worked with Sage, FreshBooks, and many other software platforms. Edward’s passion for clarity, accuracy, and innovation is evident in his writing. He is well versed in how to simplify complex technical concepts and turn them into easy-to-understand content for our readers.

